Assembly Instructions 2/6
IMPORTANT
Use a soft cloth between these parts and the floor.
Do not use power tools above 8 volts to assemble.
Do not tighten all the bolts until each part is properly assembled.
The unit must be level to work properly. Use the included adjustable levelers to level.
Keep Hex Wrench as the bolts may need to be tightened in the future.
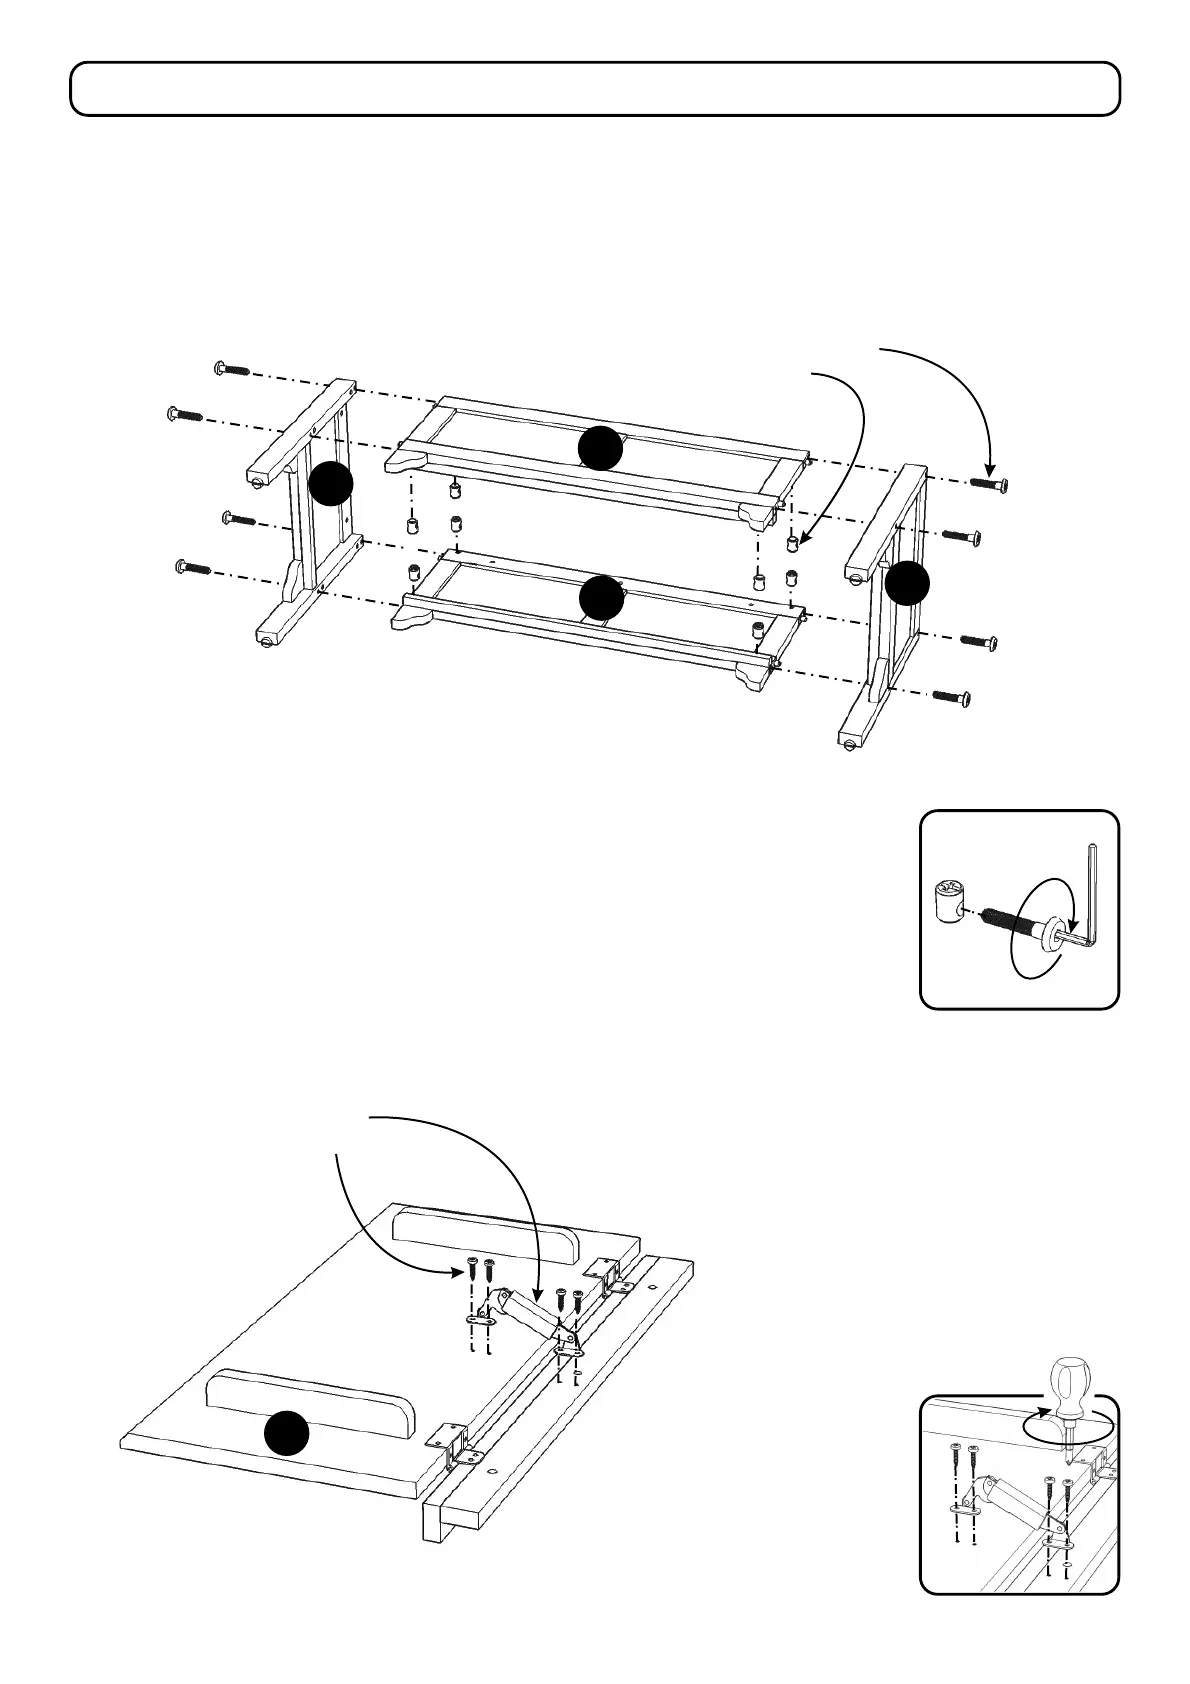
STEP 2
Attach Spring Support to Seat (A)
with Wood Screws into
pre-drilled holes.
(See Figure 2)
Figure 2
A
Spring Support
Wood Screw
STEP 1
Attach Side Panels (B) and (C) to Front Panel (D) and Back Panel (E)
with Cross Dowels and Head Cap Bolts (long).
(See Figure 1)
Head Cap Bolt (long)
Cross Dowel
B
C
D
E
Figure 1












 To Next Page