EasyManua.ls Logo

Home Styles Hutch - User Manual

Home Styles Hutch
6 pages
Print Icon
To Next Page IconTo Next Page
Loading...
Part List
Home Styles Consumer Assistance: www.homestyles-furniture.com,
servicedesk@homestyles-furniture.com, 888-680-7460, 877-831-0319
Tools required for assembly : Phillips screwdriver Tools recommended for assembly : Level
IMPORTANT NOTE
Carefully remove all the parts from the carton and put
them individually on a soft cloth to prevent scratches
or other damages occuring to the wood parts.
We have taken great care in the design of this
product and request that you carefully and strictly
follow our assembly instructions to ensure a
completed product as it was designed.
Hardware List
Cam Lock Screw
29 pcs. (+1 extra)
Cam Lock
29 pcs. (+1 extra)
M3x13
Wood Screw
for Magnet
8 pcs. (+1 extra)
M5x40
Panel Screw
9 pcs. (+1 extra)
Magnet
4 pcs.
Washer
9 pcs. (+1 extra)
Machine Screw
2 pcs.
Knob
2 pcs.
E.
Back Rail
1 pc.
F.
Front Rail
1 pc.
C.
Side Panel
1 pc.
D.
Middle Panel
1 pc.
G.
Back Rail
1 pc.
H.
Back Rail
1 pc.
K.
Front Post
1 pc.
I.
Door
1 pc.
J.
Door
1 pc.
N.
Shelf
1 pc.
P.
Back Panel
2 pcs.
88 5002 307
Hutch
Steel Plate
Connector
2 pcs.
.
D
oor
.
oor
o
nt Rail
pc.
c
k Rai
l
c
.
R
ai
l
c.
a
ck Rai
l
p
c.
B.
Side Panel
1 pc.
L.
Front Post
1 pc. O.
Shelf
4 pcs.
M.
Shelf
1 pc.
A.
Top
1 pc.
Adjustable Pin
16 pcs. (+1 extra)
M3.5x16
Wood Screw
24 pcs. (+2 extra)
Question and Answer IconNeed help?

Do you have a question about the Home Styles Hutch and is the answer not in the manual?

Summary

Product Information and Parts List

Important Safety and Handling Notes

Provides essential instructions for careful handling and assembly to prevent damage to wood parts.

Part Identification

Lists all the individual components included in the kit, with their corresponding labels and quantities.

Hardware Identification

Details all the necessary hardware pieces for assembly, including screws, locks, and connectors with quantities.

Assembly Instruction Step 1 and 2

Step 1: Prepare Panels and Posts

Insert Cam Lock Screws into side panels, front posts, and front rail as per diagram.

Step 2: Attach Magnets to Middle Panel

Insert Cam Lock Screws into the middle panel and attach magnets using wood screws.

Assembly Instruction Step 3 and 4

Step 3: Attach Back Rails and Panel

Connect back rails to side panel using cam locks and slide back panel into grooves.

Step 4: Install Shelf and Middle Panel

Attach shelf using cam locks and middle panel with cam locks, washer, and panel screw.

Assembly Instruction Step 5 and 6

Step 5: Attach Shelves and Side Panel

Connect shelf and side panel B to the unit using cam locks.

Step 6: Connect Front Posts to Front Rail

Attach front posts K and L to the front rail F using cam locks.

Assembly Instruction Step 7 and 8

Step 7: Connect Main Sections

Join the unit assembled in Step 5 to the rest of the structure using cam locks.

Step 8: Attach Top, Shelves, and Doors

Secure top panel, insert adjustable pins for shelves, place shelves, and attach doors with hinges and knobs.

Assembly Instruction Step 9 and 10

Step 9: Secure Unit Back

Insert wood screws from the back of the unit, ensuring it is level before tightening.

Step 10: Connect Hutch to Base

Place the hutch unit onto the buffet unit and secure using steel plate connectors and wood screws.

Overview

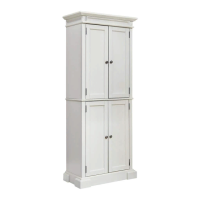
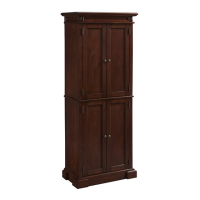
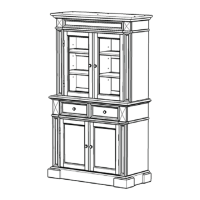
This document provides assembly instructions for the "88 5002 307 Hutch" from Home Styles. The hutch appears to be a two-piece furniture unit, likely consisting of a base (buffet) and an upper display cabinet (hutch), designed to be stacked.

Function Description:

The hutch serves as a storage and display unit, likely for a dining room or living area. It features multiple shelves for organizing items, doors for concealed storage, and an open display area. The design suggests a traditional or classic aesthetic, as indicated by the "Home Styles" branding and the overall appearance of the assembled unit.

Important Technical Specifications (Derived from Part List and Hardware List):

Part List Breakdown:

  • Top (A): 1 pc. Forms the top surface of the upper hutch unit.
  • Side Panel (B, C): 2 pcs (1 pc each). These form the vertical sides of the hutch unit.
  • Middle Panel (D): 1 pc. Likely a central divider or support within the hutch.
  • Back Rail (E, G, H): 3 pcs (1 pc each). These provide structural support and define the back perimeter of the hutch.
  • Front Rail (F): 1 pc. Provides structural support at the front of the hutch.
  • Front Post (K, L): 2 pcs (1 pc each). These are vertical decorative or structural elements at the front of the hutch.
  • Shelf (M, N, O): 6 pcs (M: 1 pc, N: 1 pc, O: 4 pcs). These are the horizontal surfaces for storage and display.
  • Door (I, J): 2 pcs (1 pc each). These are hinged panels for concealed storage.
  • Back Panel (P): 2 pcs. These are thin panels that slide into grooves to form the back of the hutch.

Hardware List Breakdown:

  • Cam Lock Screw: 29 pcs (+1 extra). Used for connecting panels and rails with cam locks.
  • M5x40 Panel Screw: 9 pcs (+1 extra). Used for attaching panels, likely with washers.
  • Washer: 9 pcs (+1 extra). Used with panel screws for secure fastening.
  • M3x13 Wood Screw for Magnet: 8 pcs (+1 extra). Used to attach magnets, likely for door closure.
  • M3.5x16 Wood Screw: 24 pcs (+2 extra). General purpose wood screws, used for various connections, including attaching the back panels and connecting the hutch to the buffet.
  • Cam Lock: 29 pcs (+1 extra). Used in conjunction with cam lock screws for strong, concealed connections.
  • Magnet: 4 pcs. Used to secure doors in a closed position.
  • Adjustable Pin: 16 pcs (+1 extra). Used to support shelves, allowing for adjustable shelf height.
  • Machine Screw: 2 pcs. Used to attach knobs to doors.
  • Knob: 2 pcs. Handles for the doors.
  • Steel Plate Connector: 2 pcs. Used to securely connect the upper hutch unit to the lower buffet unit.

Usage Features:

  • Adjustable Shelving: The inclusion of "Adjustable Pins" (16 pcs) and "Shelf (O)" (4 pcs) indicates that at least some of the shelves within the hutch are adjustable, allowing users to customize the internal storage space to accommodate items of varying heights.
  • Concealed Storage: Two "Door (I, J)" panels provide enclosed storage, keeping certain items out of sight.
  • Display Area: The presence of shelves and the overall hutch design suggest an emphasis on displaying decorative items, books, or collectibles.
  • Two-Piece Construction: The final step (Step 10) explicitly states "Place the Hutch unit onto the Buffet unit" and "Attach Steel Plate Connectors," confirming that this is a modular system designed to be stacked. This allows for easier transport and potentially more versatile placement options (e.g., using the buffet separately if desired, though the instructions focus on the combined unit).
  • Secure Connections: The extensive use of cam locks and various screws ensures a sturdy and stable assembled unit.
  • Door Magnets: "Magnets" (4 pcs) are used to keep the doors securely closed.
  • Careful Handling: The "IMPORTANT NOTE" emphasizes carefully removing parts from the carton and placing them on a soft cloth to prevent scratches, indicating a finish that requires gentle handling during assembly.
  • Leveling: The instructions state, "After assembly, item must be level to work properly. Use the included adjustable levelers to level." This is crucial for stability and proper functioning of doors and shelves, and the inclusion of adjustable levelers (though not explicitly listed as a separate hardware item, they are mentioned as "included") is a key maintenance/setup feature.
  • Progressive Tightening: The "IMPORTANT" section on page 2 advises, "Do not tighten up all the screws until each part is properly assembled." This prevents misalignment and stress on parts during assembly, contributing to the structural integrity and longevity of the furniture.
  • Tool Recommendations: The manual specifies "Phillips screwdriver" as required and "Level" as recommended, guiding users to use appropriate tools for proper assembly and setup.
  • Customer Support: Contact information for "Home Styles Consumer Assistance" (website, email, phone numbers) is provided, ensuring users can get help with assembly or parts, which is a crucial aspect of long-term product support.
  • Back Panel Design: The "Back Panel (P)" slides into grooves, which is a common and robust method for securing the back of furniture, contributing to its stability and preventing racking.
  • Steel Plate Connectors: The use of "Steel Plate Connectors" to join the hutch and buffet units ensures a strong and durable connection between the two components, preventing separation or instability.

Home Styles Hutch Specifications

General IconGeneral
BrandHome Styles
ModelHutch
CategoryIndoor Furnishing
LanguageEnglish

Related product manuals