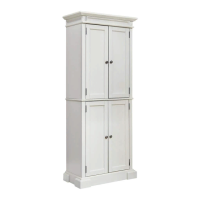
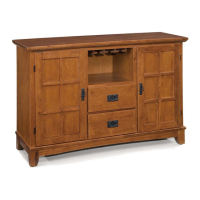
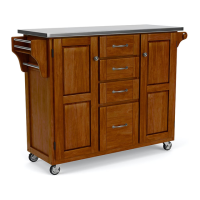
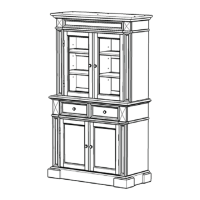
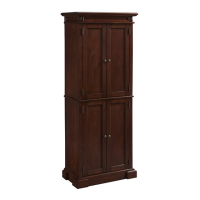
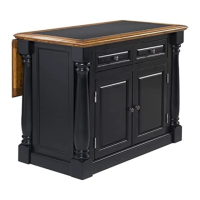
This document provides assembly instructions for the "Monarch Buffet" from Home Styles, identified by part numbers 88 5020 611 and 88 5020 612. The buffet is a piece of furniture designed for storage and display, featuring a top surface, multiple shelves, two drawers, and two doors.
Function Description:
The Monarch Buffet serves as a functional and aesthetic storage unit, likely for dining rooms or living areas. It offers enclosed storage behind two doors, open storage on multiple shelves, and two drawers for smaller items. The top surface provides additional space for display or serving. The design incorporates a classic buffet style with decorative elements, as suggested by the visual representation.
Important Technical Specifications:
The buffet is designed with a "Knock-Down Construction" for the drawers, meaning they are assembled from individual parts rather than being pre-built.
The assembly requires specific hardware components, including:
- Cam Lock Screws: 18 pcs (+1 extra)
- Cam Locks: 18 pcs (+1 extra)
- Head Cap Bolts (short): 8 pcs (+1 extra)
- Head Cap Bolts (long): 18 pcs (+1 extra)
- Adjustable Pins: 16 pcs (+1 extra)
- Flat Washers: 4 pcs (+1 extra)
- Wood Screws: 4 pcs (+1 extra)
- Wood Screws (short) for Back Panel: 12 pcs (+1 extra)
- Wood Screws (short) for Drawer Base Part: 8 pcs (+1 extra)
- Wood Screws (long) for Drawer Side Part: 16 pcs (+1 extra)
- Machine Screws: 4 pcs
- Knobs: 4 pcs
- Steel Connectors: 4 pcs
- Hex Wrench: 1 pc
- Small Hex Wrench: 1 pc
The main components of the buffet include:
- A. Top: 1 pc (from carton 88 5020 611)
- B. Front Post: 1 pc
- C. Front Post: 1 pc
- D. Side Panel: 1 pc
- E. Side Panel: 1 pc
- F. Middle Panel: 1 pc
- G. Support Runner: 1 pc
- H. Support Runner: 1 pc
- I. Shelf: 4 pcs
- J. Front Rail: 1 pc
- K. Front Rail: 1 pc
- L. Front Rail: 1 pc
- M. Back Rail: 2 pcs
- N. Bottom: 1 pc
- O. Door: 1 pc
- P. Door: 1 pc
- Q. Back Post: 2 pcs
- R. Back Panel: 3 pcs
- S. Drawer: 2 pcs (each drawer consists of S1 Front Part, S2 Back Part, S3 Side Part, S4 Side Part, S5 Base Part, S6 Divider)
Usage Features:
The buffet is designed for self-assembly, with detailed instructions provided across five steps for the main unit and an additional section for drawer assembly.
- Adjustable Shelving: The inclusion of "Adjustable Pins" and "Shelves (I)" suggests that the shelves can be positioned at different heights to accommodate various items.
- Leveling Mechanism: The unit features "adjustable levelers" on the bottom, allowing users to ensure the buffet is stable and level on uneven floors. This is crucial for proper functionality and appearance.
- Drawer Functionality: Two drawers (S) are integrated for organized storage of smaller items. The drawer assembly involves sliding the base part into grooves and securing it, along with dividers.
- Door Access: Two doors (O and P) provide access to the interior storage compartments. These doors are attached using lift hinges.
- Pull Handles: Knobs are provided for the doors and drawers, facilitating easy opening and closing.
Maintenance Features:
- Tightening Screws: The instructions emphasize not tightening all screws until parts are properly assembled, and also recommend keeping the Hex Wrench in a safe place for future tightening of Head Cap Bolts. This suggests that periodic tightening of fasteners may be necessary to maintain the unit's stability.
- Leveling: The adjustable levelers are a key maintenance feature, allowing users to re-level the unit if it shifts or if the floor settles, preventing stress on the structure and ensuring proper door and drawer alignment.
- Cleaning: The "IMPORTANT NOTE" advises using a soft cloth to prevent scratches and other damages to wood parts during unpacking and assembly, implying that a soft cloth should also be used for routine cleaning to protect the finish.
- Customer Support: Home Styles provides comprehensive customer assistance via their website (www.homestyles-furniture.com), email (servicedesk@homestyles-furniture.com), and phone numbers (888-680-7460, 877-831-0319). This ensures users have access to support for any assembly issues, missing parts, or future maintenance inquiries.
Assembly Process Overview:
- Step 1: Insert Cam Lock Screws into posts, side panels, and front rails. Attach Steel Connectors to side panels with Head Cap Bolts (short).
- Step 2: Attach front posts to side panels with Cam Locks and Head Cap Bolts (long). Attach support runners to side panels with Head Cap Bolts (long).
- Step 3: Attach the bottom panel to a side panel unit with Head Cap Bolts (long). Attach back rails using Cam Locks. Attach back posts to back rails and slide back panels into place. Attach the remaining back rail using a Cam Lock.
- Step 4: Attach the middle panel with Wood Screws and Flat Washers. Attach front rails using Cam Locks. Attach the remaining side panel unit with Cam Locks and Head Cap Bolts (long).
- Step 5: Turn the unit upright. Place the top onto the unit and attach with Head Cap Bolts (long). Insert adjustable pins and place shelves. Slide drawers into position. Attach doors by sliding lift hinges. Assemble pull handles to doors with Machine Screws.
- Step 6: Adjust adjustable levelers to level the unit. Insert Wood Screws (short) from the back for the back panel.
Drawer Assembly (S):
- Step 1: Attach the front part (S1) to side parts (S3 and S4) using long wood screws, tightening halfway. Attach the back part (S2) to side parts (S3 and S4) using long wood screws, tightening halfway. Ensure the roller is on the back.
- Step 2: Slide the base part (S5) into the grooves of the side parts (S3 and S4), pushing it forward until it meets the front part (S1).
- Step 3: Insert short wood screws into the pre-drilled holes in the base part (S5) and tighten.
- Step 4: Assemble the pull handle with machine screws.
- Step 5: Insert dividers (S6) into the grooves of the front part (S1) and back part (S2).
Finally, tighten all screws used in the drawer assembly.
The overall design suggests a sturdy and practical piece of furniture, with attention to detail in its assembly process and long-term stability through features like adjustable levelers and the recommendation for future screw tightening.