EasyManua.ls Logo

Home Styles Pantry 5004-69 - User Manual

Home Styles Pantry 5004-69
8 pages
Print Icon
To Next Page IconTo Next Page
Loading...
Tool(s) required for assembly: Phillips screwdriver, Level, Drill (8 volts or less), 3/8” Drill Bit
5004-69
Pantry
IMPORTANT
Cam Lock Screw
24 pcs. (+1 extra)
Cam Lock
24 pcs. (+4 extra)
M3.5x16
Wood Screw
16 pcs. (+1 extra)
Adjustable Pin
16 pcs. (+1 extra)
Knob
4 pcs.
M4x25
Machine Screw
4 pcs.
A.
Top
1 pc.
B.
Side Panel
2 pcs.
C.
Side Panel
2 pcs.
D.
Back Stretcher
4 pcs.
E.
Back Upright
2 pcs.
F.
Back Panel
4 pcs.
G.
Middle Panel
1 pc.
H.
Base
1 pc.
I.
Shelf
4 pcs.
J.
Door
2 pcs.
K.
Door
2 pcs.
styles Customer Service: www.homestylesfurniture.com,home
servicedesk@homestylesfurniture.com,
888-680-7460
Hardware List
Carefully remove all the parts from the carton and
place them individually on a soft cloth to prevent
scratches or other damage.
Carefully and strictly follow these assembly instructions
to ensure a completed product as designed.
Do not use power tools above 8 volts to assemble.
Part List
Question and Answer IconNeed help?

Do you have a question about the Home Styles Pantry 5004-69 and is the answer not in the manual?

Summary

Assembly Instructions

STEP 1: Insert Cam Lock Screws

Insert Cam Lock Screws into pre-drilled holes in panels and tighten.

STEP 2: Attach Back Stretcher

Attach Back Stretcher to Side Panel with Cam Lock. Slide Back Panel into position.

STEP 3: Attach Back Stretcher and Side Panel

Attach Back Stretcher to unit with Cam Lock. Attach Side Panel to unit with Cam Locks.

STEP 4: Attach Base and Doors

Attach unit to Base with Cam Locks. Attach Doors by sliding hinges into side panel hinges.

STEP 5: Attach Back Panels and Upright

Attach Back Stretcher to Side Panel. Attach Back Upright to Stretcher. Slide Back Panel into position.

STEP 6: Attach Side Panel and Back Stretcher

Attach Back Stretcher to unit with Cam Lock. Attach Side Panel to unit with Cam Locks.

STEP 7: Connect Unit Sections

Attach unit from Step 6 to unit from Step 4 with Cam Locks.

STEP 8: Install Shelves and Doors

Insert Adjustable Pins for shelves. Place Shelves. Attach Doors and Knobs with Machine Screws.

STEP 9: Attach Top Panel

Attach Top (A) to the assembled unit using Cam Locks.

STEP 10: Level and Secure Unit

Level the unit by adjusting levelers. Insert Wood Screws into pre-drilled holes.

STEP 11: Install Tipover Restraint

Secure the unit to the wall using the Tipover Restraint for safety.

Care Instructions

General Care Guidelines

Avoid liquids, direct sunlight, writing on surface, hot objects, rubber placemats, and commercial polishes.

Cleaning Instructions

Clean with a soft cloth moistened in lukewarm soap and water, then buff with a dry cloth.

Overview

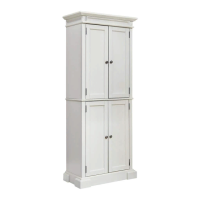
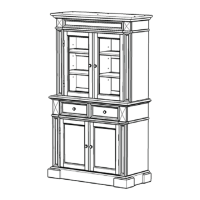
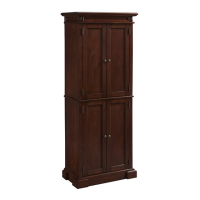
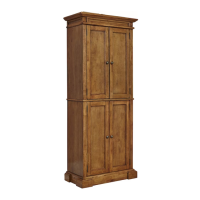
This document provides assembly instructions and care guidelines for the Homestyles 5004-69 Pantry, a piece of furniture designed for storage. The pantry is assembled from various wooden panels and hardware components, resulting in a multi-tiered cabinet structure with doors.

Function Description:

The Homestyles 5004-69 Pantry serves as a storage unit, likely intended for kitchens, dining areas, or other rooms where additional storage for food, dishes, or household items is needed. Its design suggests multiple shelves and compartments, enclosed by doors, to keep contents organized and out of sight. The inclusion of adjustable shelves allows for flexible storage configurations to accommodate items of varying heights. The overall structure, once assembled, is a freestanding cabinet designed to provide practical and accessible storage space.

Usage Features:

The pantry's design incorporates several features aimed at ease of use and stability.

  • Adjustable Shelves: The presence of adjustable pins and shelves (Part I) indicates that users can customize the internal layout of the pantry. This flexibility allows for efficient storage of different-sized items, from tall bottles to stacks of plates, by repositioning the shelves at desired levels within the side panels.
  • Doors: The pantry includes multiple doors (Parts J and K) which are attached using hinges. These doors serve to enclose the storage compartments, protecting contents from dust and providing a neat, uncluttered appearance. Knobs are attached to the doors for easy opening and closing.
  • Stability and Leveling: The assembly instructions emphasize the importance of leveling the unit. Adjustable levelers are included on the bottom of the unit (Figure 5), allowing users to compensate for uneven floors. This feature is crucial for ensuring the stability of the pantry, preventing wobbling, and ensuring the doors operate correctly.
  • Tipover Restraint: A significant safety feature is the included tipover restraint system. This system involves attaching a bracket to the wall and another to the top of the unit, then connecting them with a strap. This is designed to prevent the pantry from accidentally tipping over, especially important in households with children or pets. The instructions detail how to drill a hole in the wall, insert an anchor, and secure the brackets and restraint strap, highlighting a commitment to user safety.
  • Modular Assembly: The pantry is designed for modular assembly, meaning it is built up in sections. This approach can make the assembly process more manageable, as users construct smaller units (like the base, middle, and top sections) before combining them. This modularity is evident in steps where units from previous steps are attached to form the complete structure.

Maintenance Features:

The care instructions provided with the Homestyles 5004-69 Pantry focus on preserving the furniture's finish and structural integrity.

  • Cleaning: The primary cleaning recommendation is to use a soft cloth moistened with lukewarm soap and water, followed by buffing with a dry clean cloth. This gentle approach is designed to clean the surface without damaging the finish.
  • Avoid Harsh Chemicals: The instructions explicitly warn against using glass cleaners containing ammonia, as ammonia can chemically attack the finish. Similarly, commercial waxes and polishes are discouraged, as they can lead to yellowing. These warnings highlight the sensitivity of the furniture's finish to certain chemicals.
  • Moisture Protection: A crucial maintenance point is to "NEVER allow liquids to remain on furniture." This is because absorption can cause parts to warp, split, and finishes to delaminate, indicating that the material, likely particle board or MDF with a laminate/veneer, is susceptible to moisture damage. Prompt cleanup of spills is essential.
  • Heat Protection: Users are advised not to place hot objects directly on the surface to prevent finish damage. This suggests the surface material may not be highly heat-resistant.
  • Sunlight Protection: The instructions recommend against placing the pantry in direct sunlight to prevent fading of the finish. Prolonged exposure to UV light can degrade colors and materials over time.
  • Rubber-Based Placemats: A specific warning is given against using rubber-based placemats, as they can cause discoloration. This indicates a potential chemical reaction or staining issue between the rubber and the furniture's finish.
  • Surface Protection: Users are cautioned not to write directly on the surface to prevent marking, reinforcing the need to protect the finish from physical damage.
  • Assembly Tool Usage: While not a maintenance feature for the assembled product, the instruction "Do not use power tools above 8 volts to assemble" is a critical guideline during setup. This prevents overtightening screws, which could strip threads or crack panels, thereby preserving the structural integrity of the furniture from the outset.
  • Replacement Parts: Homestyles offers replacement parts free of charge for missing or damaged components within 30 days of purchase, provided the product was purchased from an authorized retailer. This policy supports the long-term usability of the pantry by ensuring that initial defects or missing pieces can be resolved, contributing to the overall longevity of the product.

Home Styles Pantry 5004-69 Specifications

General IconGeneral
Product TypePantry
Model Number5004-69
MaterialWood
Assembly RequiredYes
StyleTraditional
ColorWhite
Number of Shelves4
CategoryIndoor Furnishing
Dimensions30 x 16 x 72 inches

Related product manuals