Assembly Instructions 4/5
Figure 8
O
Figure 7
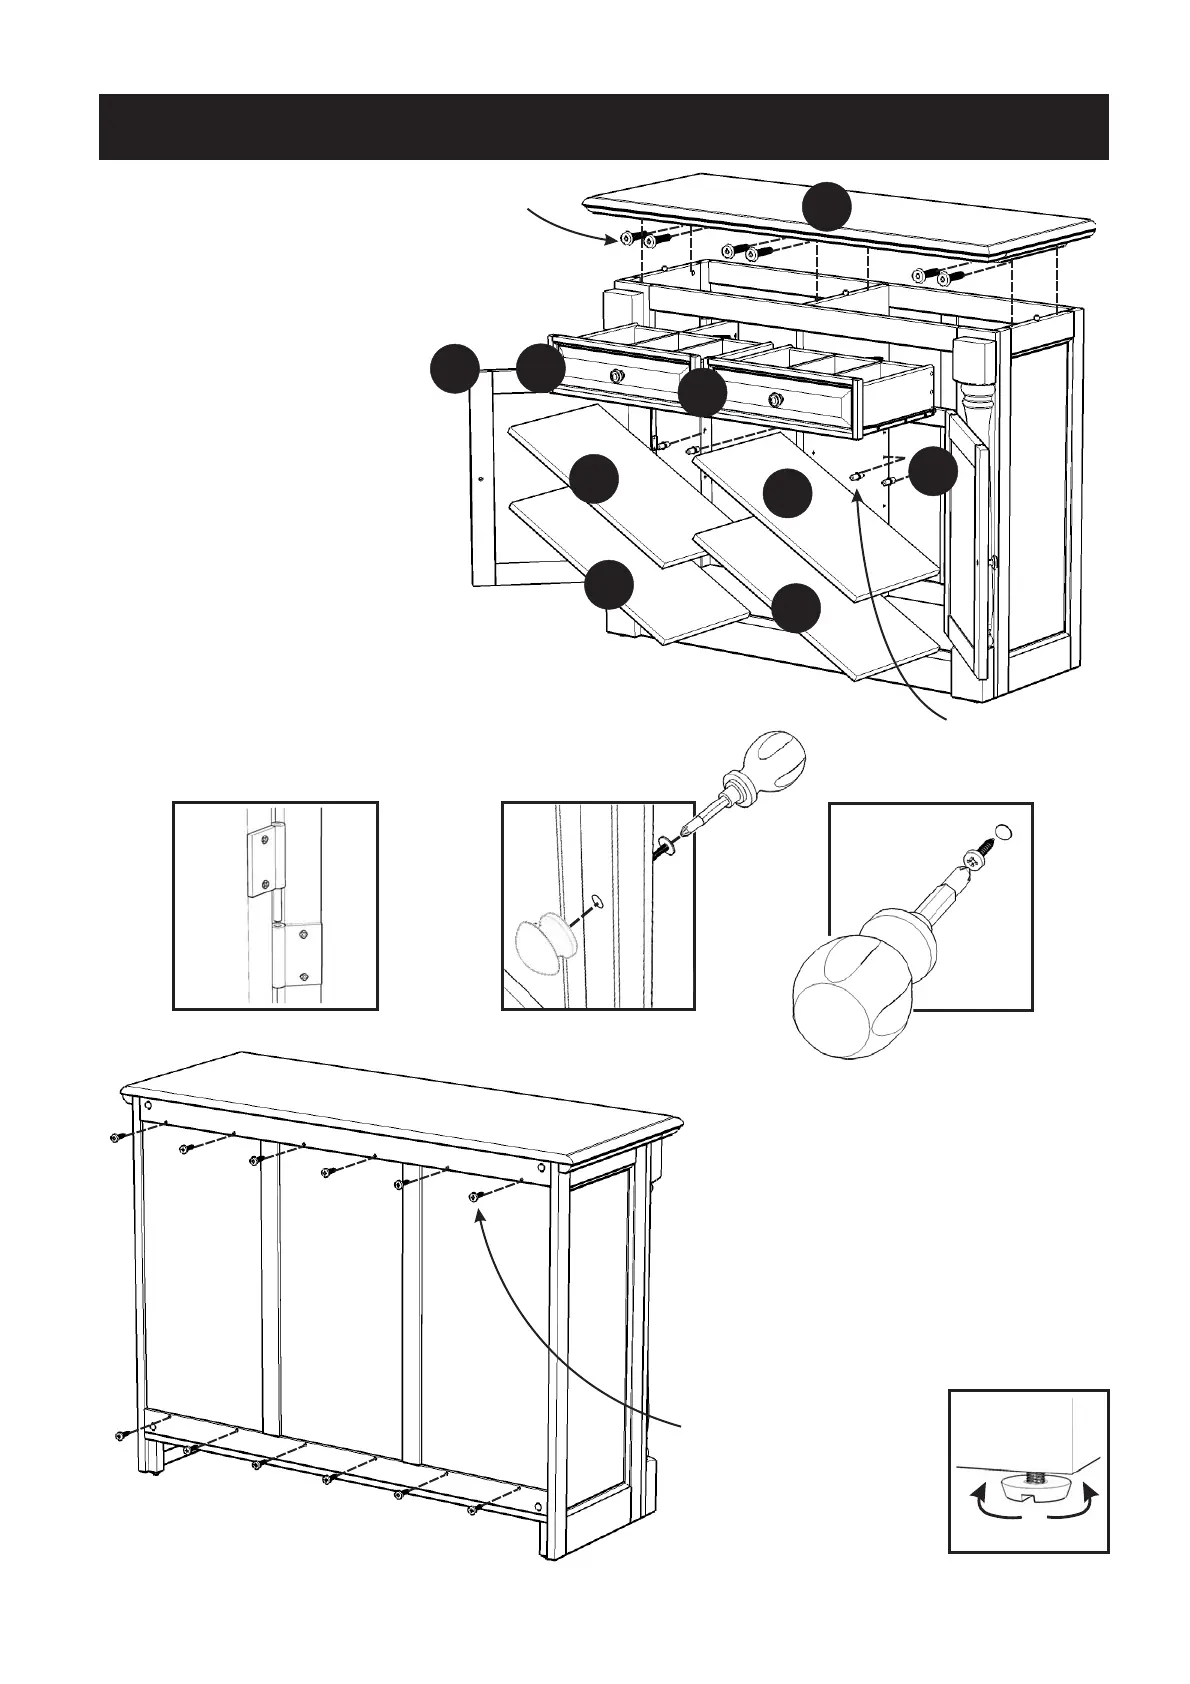
Turn the unit to its’ upright position.
Place Top (A) onto unit and
attach with Head Cap Bolts
(long).
Insert Adjustable Pins into
side panels and middle
panel. Place Shelves (I) into
position.
Slide Drawers (S) into position.
Attach Doors (O) and (P) to the
side panels by sliding the door
lift hinges into the side panel lift hinges.
(see Figure 5)
Assemble Pull Handles to Door (O) and (P) with
Machine Screws. (see Figure 6)
STEP 5
STEP 6
Insert 12X Wood Screws from
the back of the unit. (see Figure 7)
Note: Please make sure unit is
level before tightening these
screws.
To level the unit, adjust the adjustable
levelers on the bottom of unit.
(see Figure 8)
Figure 6
Figure 5
S
A
P
I
S
Wood Screw
(short) for
Back Panel
Head Cap Bolt
(long)
Adjustable Pin
I
I
I




 To Next Page