OPERATION
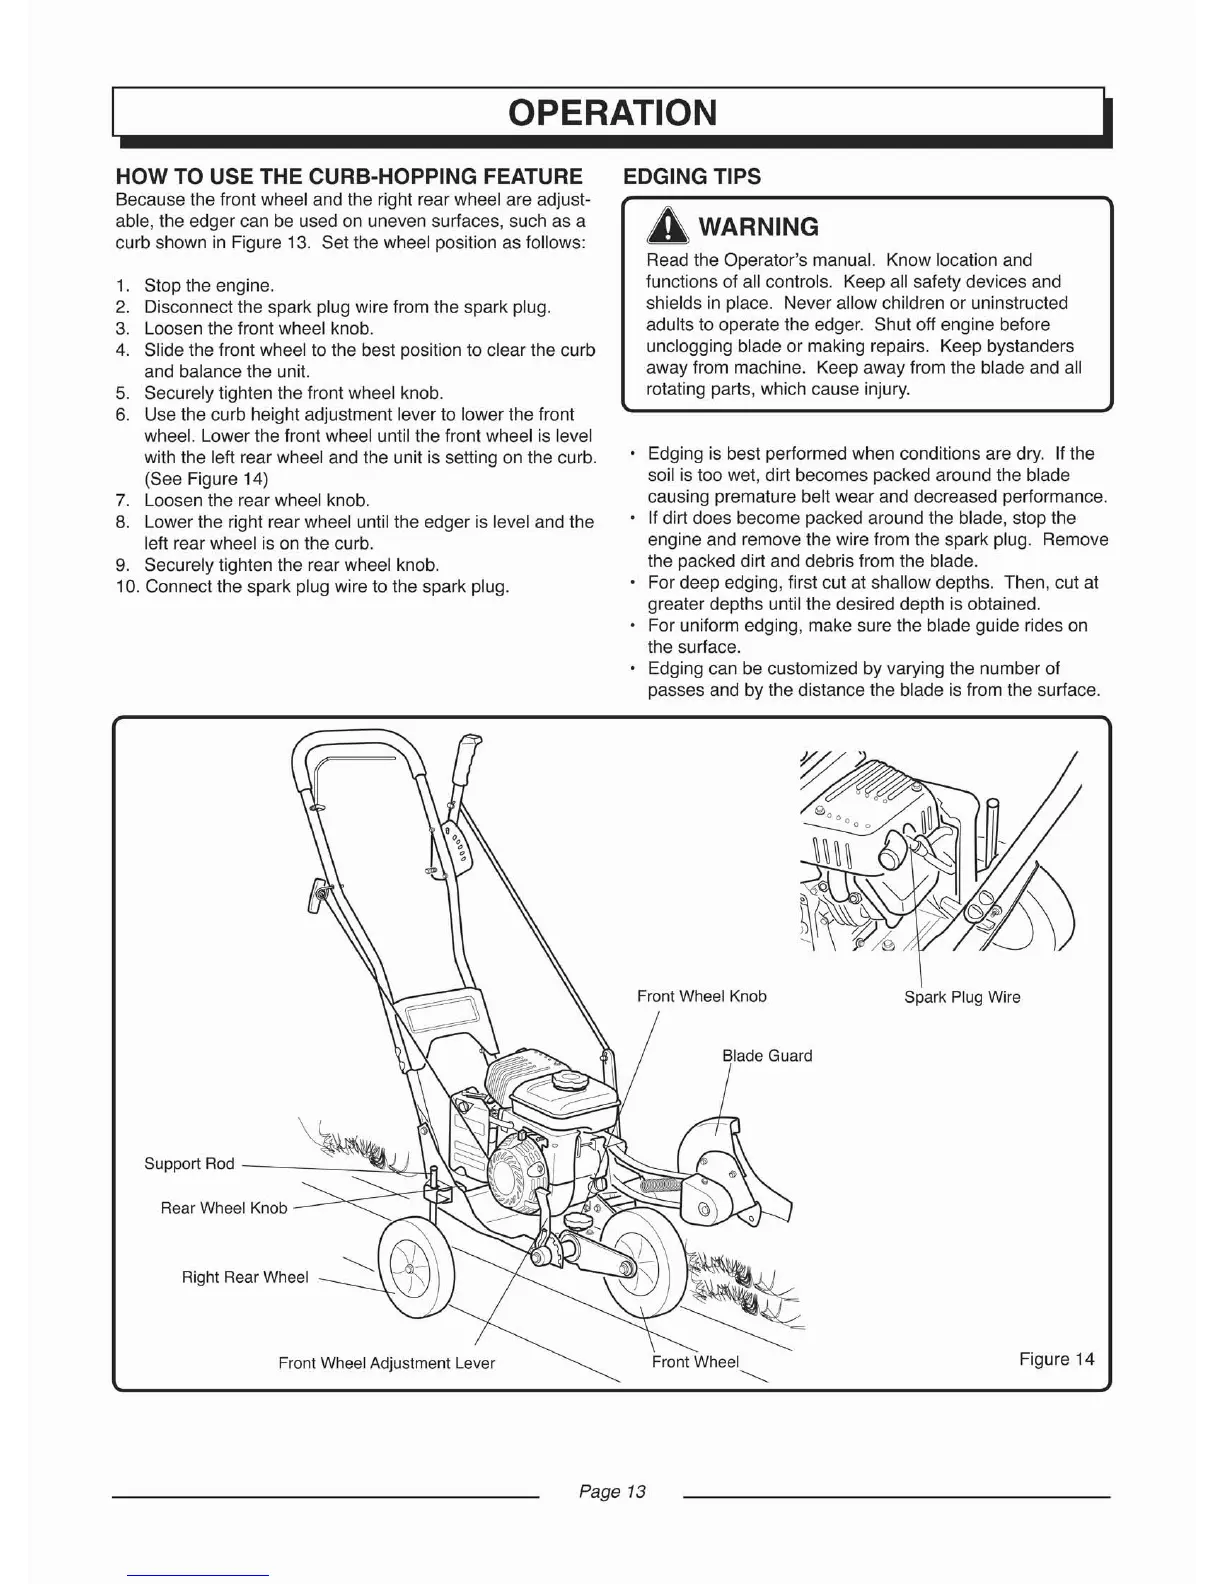
HOW TO USE THE CURB·HOPPING FEATURE
Because the front wheel and the right rear wheel are adjust-
able, the edger can be used on uneven surfaces, such as a
curb shown in Figure 13. Set the wheel position as follows:
1. Stop the engine.
2. Disconnect the spark plug wire from the spark plug.
3. Loosen the front wheel knob.
4. Slide the front wheel to the best position to clear the curb
and balance the unit.
5. Securely tighten the front wheel knob.
6. Use the curb height adjustment lever to lower the tront
wheel. Lower the front wheel until the front wheel is level
with the left rear wheel and the unit is setting on the curb.
(See Figure 14)
7. Loosen the rear wheel knob.
8. Lower the right rear wheel until the edger is level and the
left rear wheel is on the curb.
g. Securely tighten the rear wheel knob.
10. Connect the spark plug wire to the spark plug.
EDGING TIPS
A WARNING
Read the Operator's manual. Know location and
functions of all controls. Keep all safely devices and
shields in place. Never allow children or uninstructed
adults to operate the edger. Shut off engine before
unclogging blade or making repairs. Keep bystanders
away from machine. Keep away from the blade and all
rotating parts, which cause injury.
Edging is best performed when conditions are dry. If the
soil is too wet, dirt becomes packed around the blade
causing premature belt wear and decreased performance.
If dirt does become packed around the blade, stop the
engine and remove the wire from the spark plug. Remove
the packed dirt and debris from the blade.
For deep edging, first cut at shallow depths. Then, cut at
greater depths until the desired depth is obtained.
For uniform edging, make sure the blade guide rides on
the surface.
Edging can be customized by varying the number of
passes and by the distance the blade is from the surface.
Support Rod
- _ _
Rear Wheel Knob
::.::::::o
,,-<:~>-'
,...-t
~
f"\
~
Right
RearWheel
Fron
t Wheel Ad
justme
nt Lever
Front
Wheel
-........
Spark PlugWire
Figure 14
Page 13
 Loading...