11
INSTALLATION
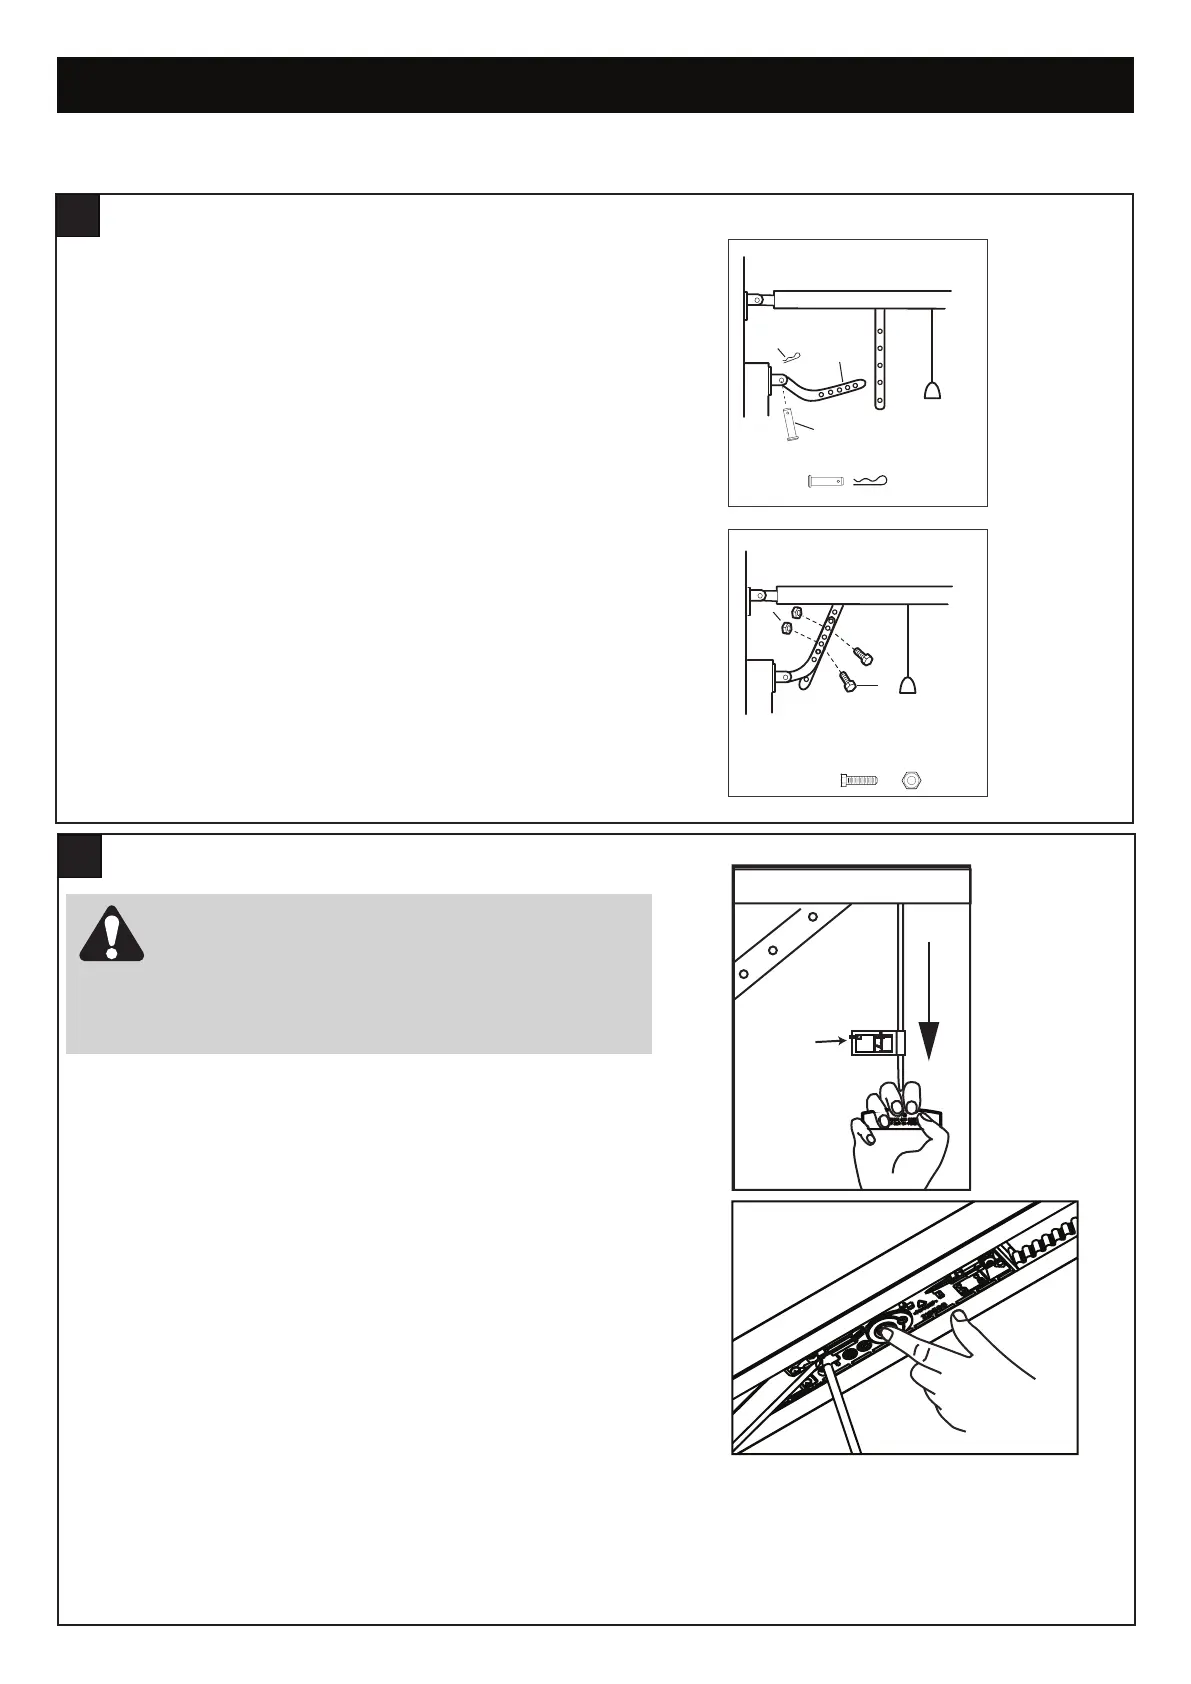
ATTACH DOOR ARM TO TROLLEY
17
Make sure the garage door is fully closed. Pull the manual
release cord to disengage the trolley. Slide the trolley to around
300 mm from the lintel bracket.
1. The straight door arm is already preassembled to the
trolley.
2. Install the curved arm (1) onto the door bracket using the
23 mm Clevis pin (2) and R-Clip (3) supplied.
3. Move the straight and curved arms together and secure
using two bolts and nuts provided (4). Ensure the angle of
the straight arm is around 20 degrees from vertical, when
the door is fully closed.
1
2
3
Fig. 1
4
5
Fig. 2
OPERATING THE MANUAL RELEASE
18
The manual release mechanism enables the door to be manually
operated during power outages or in an emergency.
The RED Manual Release cord is preassembled to the trolley. When the
opener is installed the handle should be no higher then 1.8 metres from
the floor. The cord may need to be extended.
Attach the manual release Instruction Label to the cord as indicated in
fig 1.
DO NOT USE THE RED HANDLE TO OPEN AND CLOSE THE DOOR.
To operate the Manual Release:
The door should be fully closed if possible.
1. The door should be fully closed if possible.
2. Pull and hold the manual release rope down, (fig A) at the same
time lift the door slightly (fig B). This will disengage the door from
the trolley.
3. Release the rope and the door can now be opened by hand.
To Re-engage the Door:
1. If power is available, operate the opener with the remote control.
When the trolley passes the door position it will automatically
re-engage the opener and move the door.
2. If no power is available, manually operate the door to the original
“position of disengagement”, and the door will automatically lock in
that position.
DO NOT DISENGAGE THE OPENER TO MANUAL
OPERATION WITH CHILDREN , PERSONS OR OTHER
OBJECTS INCLUDING MOTOR VEHICLES WITHIN THE
DOORWAY : (The door is under significant tension
and if the door has developed a fault or incorrect
tension, it may be unsafe and may fall rapidly).
1
2
Instruction
label