3-9
GX120K1•GX160K1•GX200 MAINTENANCE
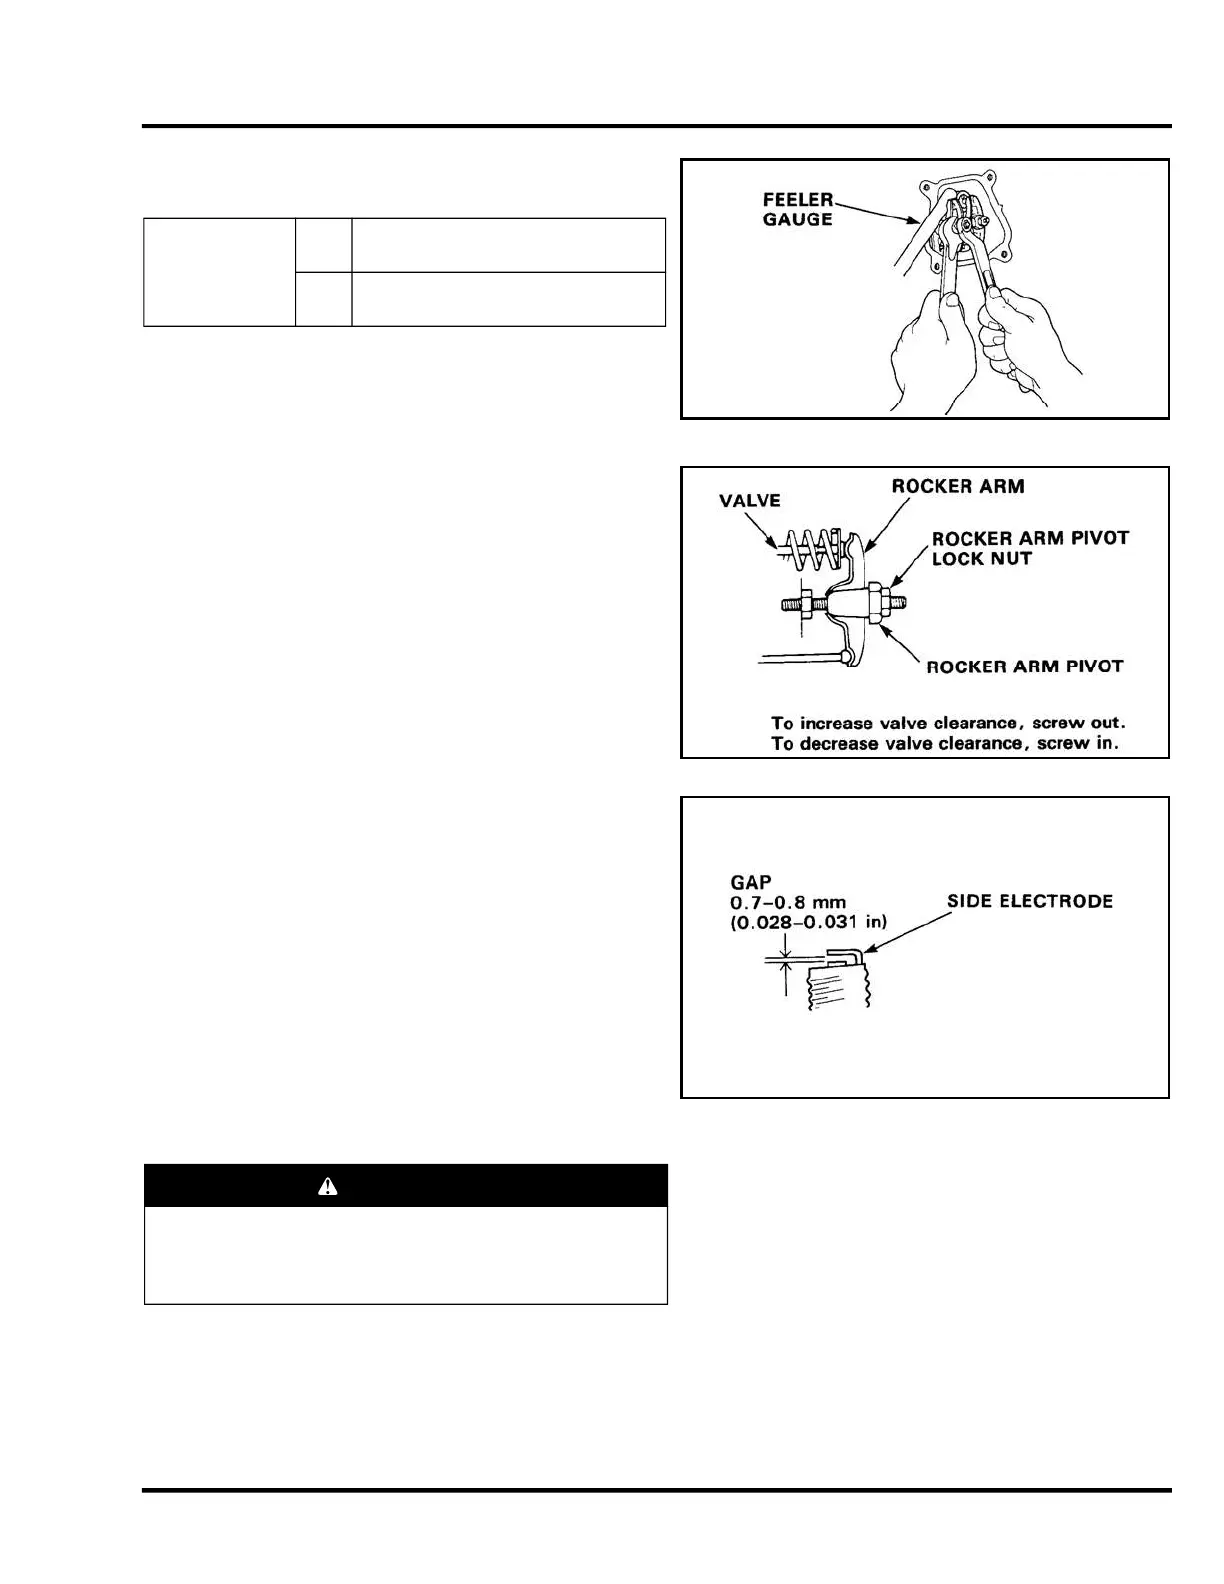
3. Insert a feeler gauge between the rocker arm and valve to
measure valve clearance.
4. If adjustment is necessary, proceed as follows:
a. Hold the rocker arm pivot and loosen the rocker arm pivot
lock nut.
b. Turn the rocker arm pivot to obtain the specified clearance.
c. Retighten the rocker arm pivot lock nut while holding the
rocker arm pivot.
d. Recheck
valve clearance after tightening the rocker arm
pivot lock nut.
7. SPARK PLUG
1. Visually inspect the spark plug. Discard the plug if the insulator
is cracked or chipped.
2. Measure the plug gap with a wire-type feeler gauge.
If necessary, adjust the gap by bending the side electrode.
3. Make sure the sealing washer is in good condition; replace the
plug if necessary.
4. Install the plug finger-tight to seat the washer, then tighten with
a plug wrench (an additional 1 /2 turn if a new plug) to
compress the sealing washer. If you are reusing a plug, tighten
1/8-1/4 turn after the plug seats.
Standard valve
clearance
IN
0.15±0.02 mm
(0.006±0.001 in)
EX
0.20±0.02 mm
(0.008±0.001 in)
CAUTION
• The spark plug must be securely tightened. An improperly
tightened plug can become very hot and possibly damage
the engine.
• Never use a spark plug with an improper heat range.
 Loading...