FUEL SYSTEM (Programmed Fuel Injection)
6-39
FUEL TANK
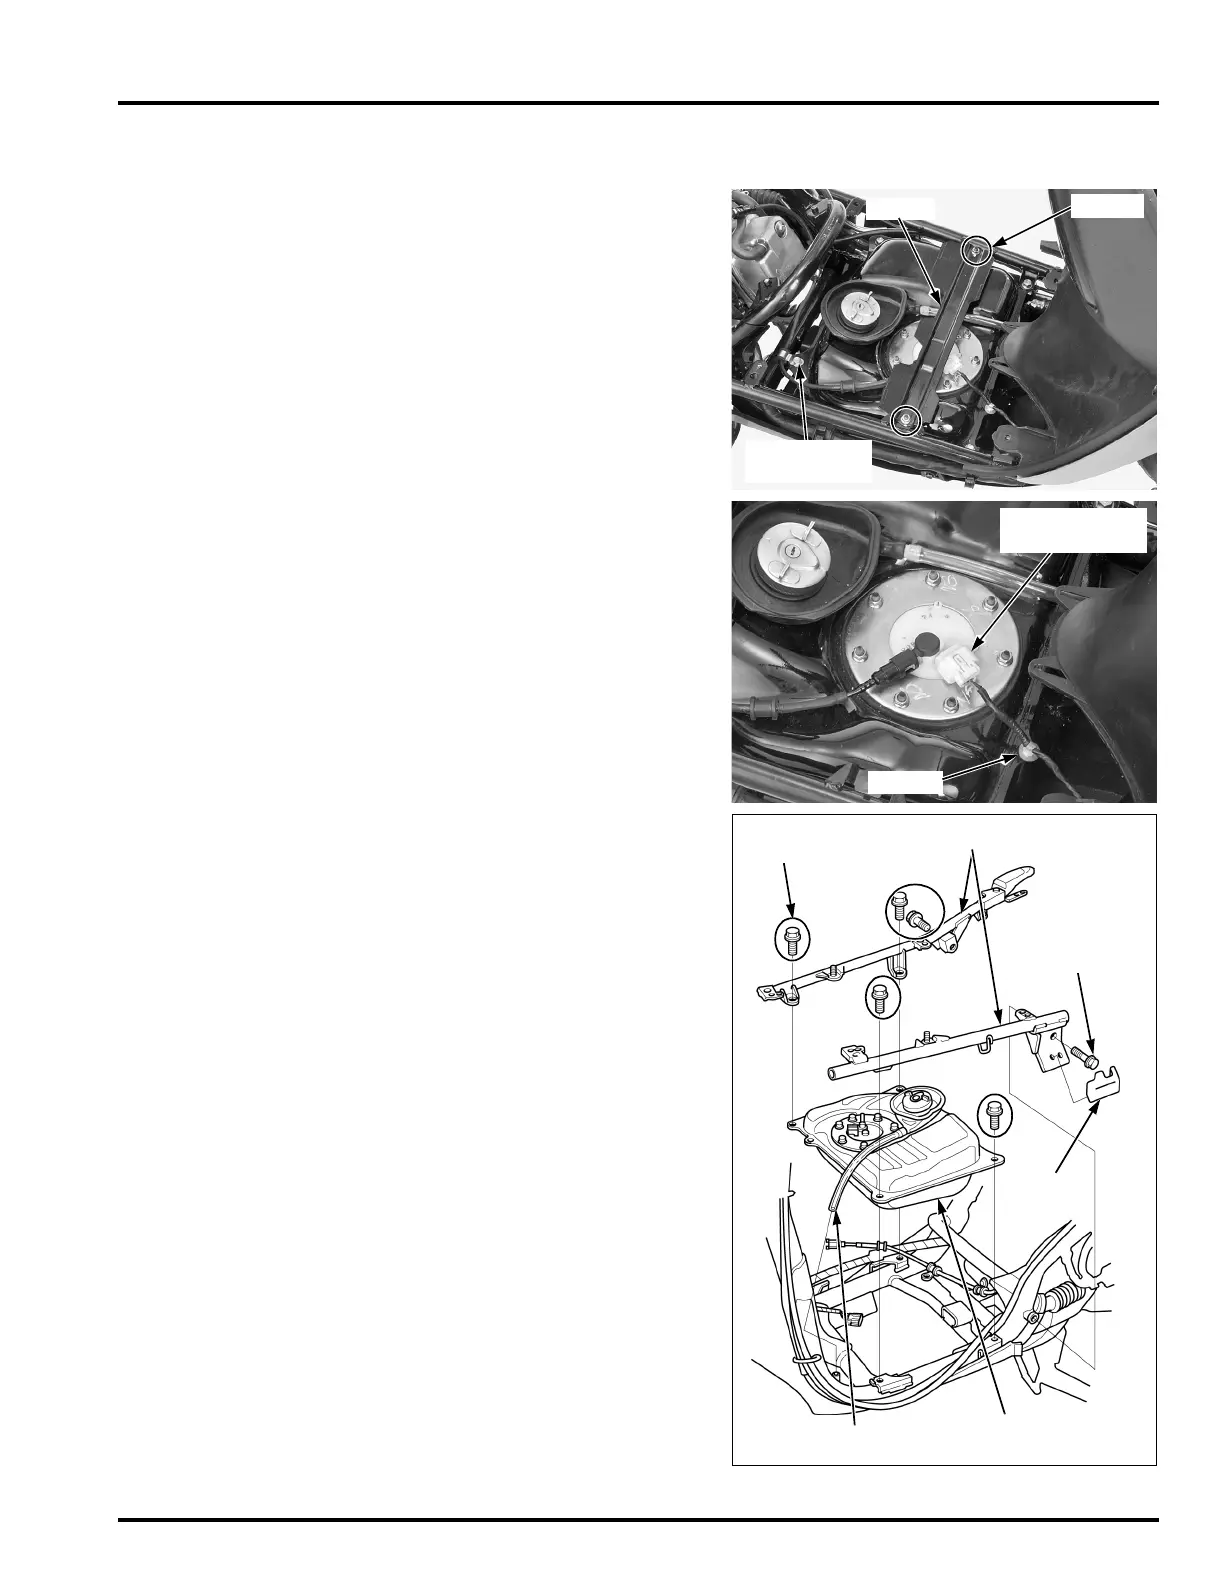
REMOVAL/INSTALLATION
Remove the floor panel (page 3-11).
Remove the bolts and floor panel side frame plate.
Remove the fuel hose clamp bolt from the fuel tank.
Relieve the fuel pressure and disconnect the quick
connect fitting (page 6-32).
Disconnect the fuel pump 5P connector.
Remove the clamp from the fuel tank.
Disconnect the fuel tray drain hose.
Remove the following:
– Rubber
– Five bolts
– Left floor panel side frame mounting bolt
– Floor panel side frames
– Fuel tank
Installation is in the reverse order of removal.
• Route the fuel tank drain hose properly, not to be
kinked or bound.
• Connect the quick connect fitting (page 6-33).
BOLTS
FUEL HOSE
CLAMP BOLT
PLATE
FUEL PUMP 5P
CONNECTOR
CLAMP
TORQUE: Left floor panel side frame mounting bolt
49 N·m (5.0 kgf·m, 36 lbf·ft)
SIDE FRAMES
BOLTS
DRAIN HOSE
FUEL TANK
RUBBER
LEFT
MOUNTING
BOLT

 Loading...