BATTERY/CHARGING SYSTEM
18-8
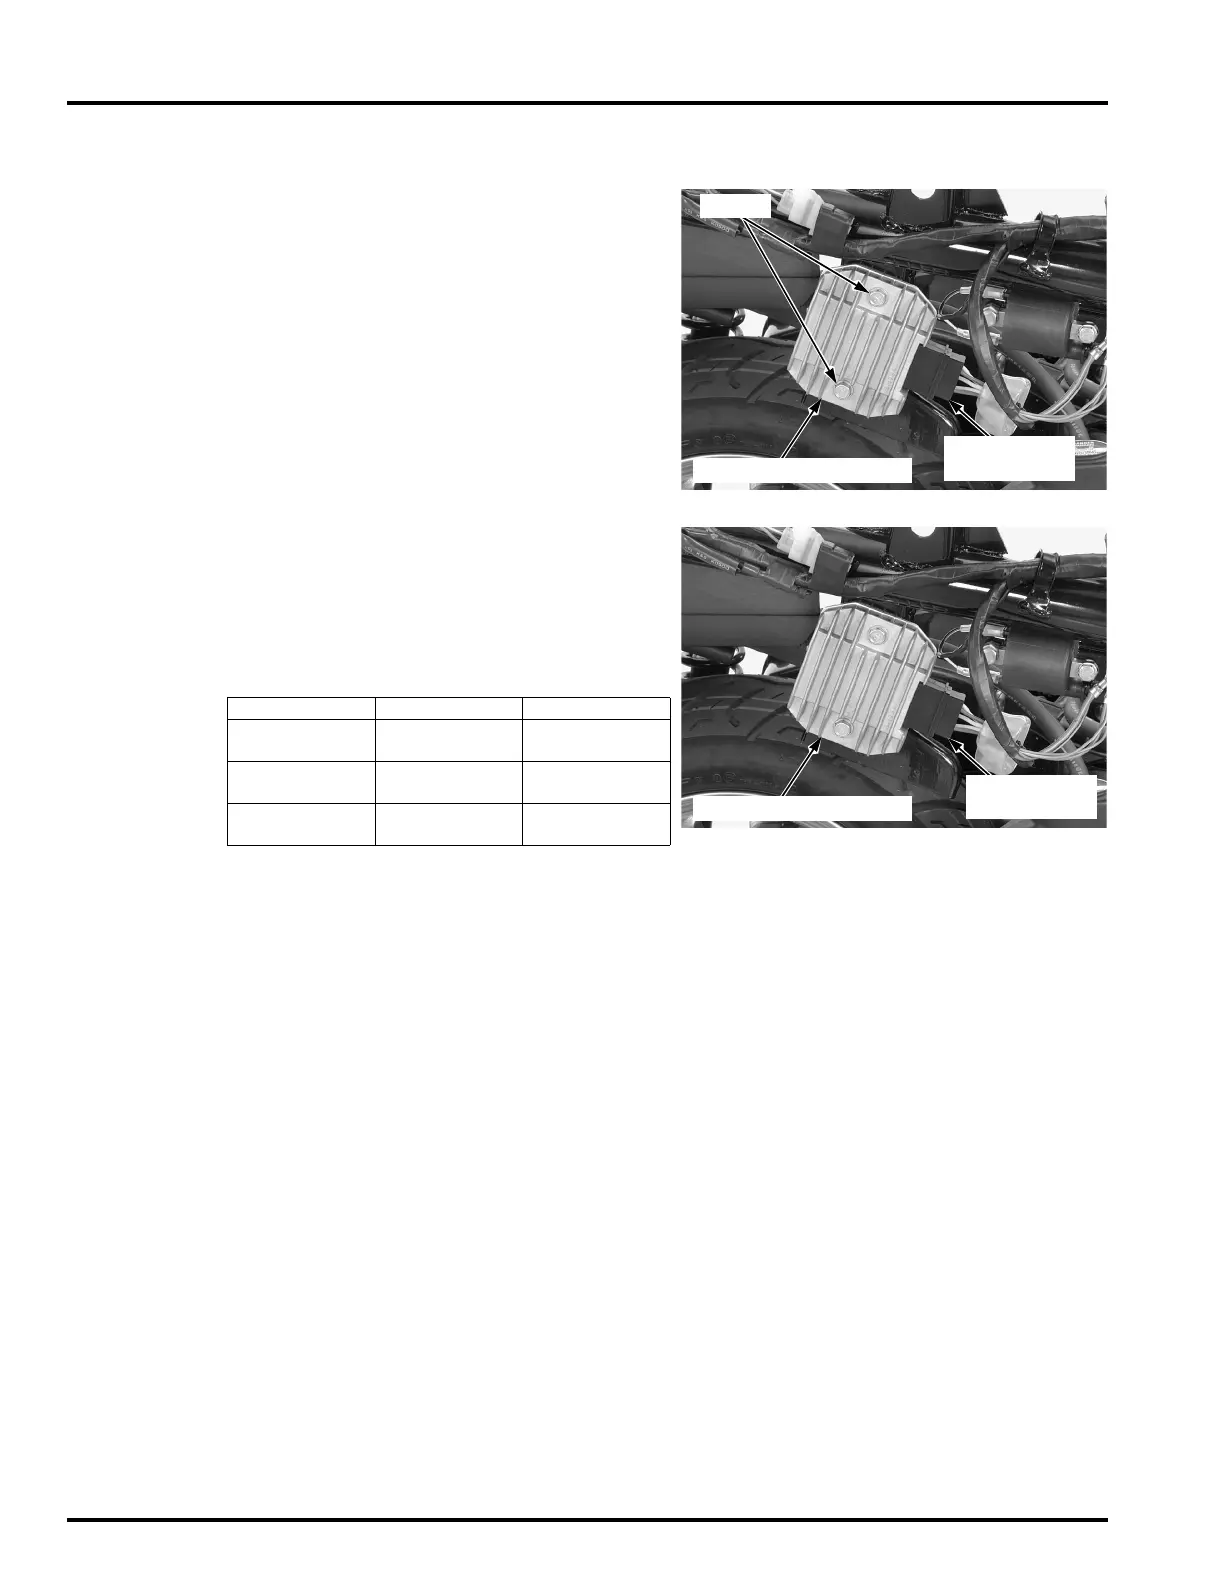
REGULATOR/RECTIFIER
REMOVAL/INSTALLATION
Remove the body cover (page 3-9).
Disconnect the regulator/rectifier 5P (Black) connec-
tor.
Remove the mount bolts and regulator/rectifier.
Installation is in the reverse order of removal.
SYSTEM INSPECTION
Remove the luggage box (page 3-8).
Disconnect the regulator/rectifier 5P (Black) connec-
tor, and check it for loose contact or corroded termi-
nals.
If the charging voltage reading (page 18-7) is out of
the specification, check the regulator/rectifier con-
nector terminals (wire harness side) as follows:
If all components of the charging system are normal
and there are no loose connections at the regulator/
rectifier 5P (Black) connectors, replace the regulator/
rectifier unit.
5P (Black)
CONNECTOR
BOLTS
REGULATOR/RECTIFIER
Item Terminal Specification
Battery charging
line
Red (+) and
ground (–)
Battery voltage
should register
Charging coil
line
Yellow and Yel-
low
0.1 – 1.0 Ω
at 20° C/68° F
Ground line Green and
ground
Continuity
should exist
REGULATOR/RECTIFIER
5P (Black)
CONNECTOR
 Loading...