EasyManua.ls Logo

Honeywell Home PROSiXFLOOD User Manual

Honeywell Home PROSiXFLOOD
4 pages
To Next Page IconTo Next Page
Page #1 background imageLoading...
Page #1 background image
PROSiXFLOOD
Wireless Flood Sensor
Installation and Setup Guide
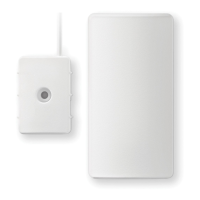
The PROSiXFLOOD is a wireless flood sensor with
external probe (FP280) intended for use with Honeywell
Home controls that support PROSiX™ series devices.
When the probe contacts water, the sensor sends an
alarm or trouble signal to the controller depending on
zone type selected (ex. trouble = Monitor Zone; alarm =
24hr Aux) within 15 seconds*. The probe is supervised
for an open circuit (cut wire) and sends a trouble signal
up to 15 seconds after the condition is sensed. The
sensor also has a front cover tamper and wall tamper
switch.
* See Controller’s instructions for setting alarm delay
options, if available.
MOUNT THE PROSIXFLOOD
1. Open the case - firmly slide the front and back
housings in opposite directions and pull them apart.
2. Mount the PROSiXFLOOD to a wall as shown, using
the double sided tape and screws provided.
3. Connect the flood probe’s wires to the
PROSiXFLOOD terminals.
4. Mount the flood probe in the area where flood
notification is desired. Secure probe with #6 x ¾” pan
head screw provided.
5. Reattach front cover and secure with the #2 x 1/4”
screw provided.
After enrolling and before mounting, verify adequate
signal strength by conducting a sensor test (see
controller’s instructions) with the device in its intended
mounting location. Adjust the device location and
orientation as necessary.
A = Terminal Block for sensor
B = Tamper Switch
C = LED
Probe: FP280

Other manuals for Honeywell Home PROSiXFLOOD

Question and Answer IconNeed help?

Do you have a question about the Honeywell Home PROSiXFLOOD and is the answer not in the manual?

Honeywell Home PROSiXFLOOD Specifications

General IconGeneral
Sensor TypeFlood Sensor
ConnectivityWireless
Power SourceBattery
Battery LifeUp to 5 years
Operating Temperature32°F to 122°F (0°C to 50°C)
CertificationsFCC, IC
Operating Humidity5% to 95% RH (non-condensing)
RangeUp to 200 feet
Battery TypeCR123A Lithium

Summary

Mount the PROSIXFLOOD

Open the case

Instruction to separate the front and back housings of the device.

Mount the PROSIXFLOOD to a wall

Guidance on attaching the sensor to a wall using provided tape and screws.

Connect the flood probe's wires

Procedure for connecting the flood probe wires to the sensor terminals.

Mount the flood probe

Instructions for positioning the flood probe in the desired location.

Reattach front cover

Steps for reattaching and securing the front cover of the sensor.

Enroll and Setup

Activate the PROSIXFLOOD

Activating the sensor by pulling the battery tab or using the tamper switch.

Enrollment process

Description of LED behavior and MAC ID transmission during enrollment.

Confirm enrollment

Indication of successful enrollment via LED and control beep.

24-Hour Enrollment Deletion and Default

Open cover and remove battery

Step one of the deletion process: accessing the battery.

Hold tamper switch while reinserting battery

Performing the factory default reset by holding the tamper switch.

Reattach the cover

Final step in the deletion process: reattaching the device cover.

Battery Replacement

Remove sensor from mounting bracket

Procedure for detaching the sensor's back housing from its mounting bracket.

Separate front and back housings

Instructions for opening the sensor by sliding the housings apart.

Replace the battery

Guidance on removing the old battery and inserting a new one after a 10-second wait.

Reassemble the housings

Steps for closing the sensor by sliding the front and back housings back together.

Federal Communications Commission & ISED Statements

Class B Digital Device Statement

FCC statement regarding Class B digital device compliance and potential interference.

ISED Class B Statement

Canadian ISED statement for Class B digital apparatus compliance.

FCC/ISED Statement

Combined FCC and ISED compliance statement regarding operation conditions.

RF Exposure

Support & Warranty Information

Related product manuals