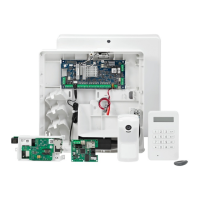
Do you have a question about the Honeywell Galaxy 500 and is the answer not in the manual?
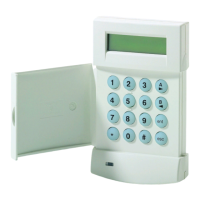
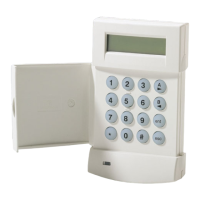
Describes the Galaxy alarm system controlled by LCD keypads and their connectivity.
Used for entering codes, selecting options, and modifying settings.
Activate system options and navigate lists of information by stepping forward or backward.
Accepts and processes entered data, performing valid actions and moving to the next option.
Aborts the current option or routine, returning the user to the previous menu level.
Displays additional choices for options or functions as the user duress key.
Provides additional features for certain options, such as printing the event log.
Indicates the system's power status: lit for normal, flashing for failure or low battery.
The display shown on the keypad when the system is unset, typically showing time and date.
Unique four, five, or six-digit PINs used for system identification and operation.
Ensures all doors and windows are secured and protected areas are clear of obstructions.
Process for entering a PIN for user levels 1 and 2 to start the setting routine.
Process for entering a PIN for user levels 3 to 6 to start the setting routine.
Select which groups to include in the setting routine and view their status.
Indicates the remaining time in seconds to vacate the premises after setting.
Describes the sounder's continuous tone or pulsing during the setting period.
Handling of open zones during setting and the 'Fail to Set' condition.
Manually completing the setting procedure by closing the final door or using the terminator button.
Confirmation of the system being set after a delay or manual termination.
Setting only specific zones that have the PART attribute enabled.
Aborting the setting routine by pressing the ESC key before the system sets.
Displays the programmed name of the group when setting.
Using MicroMAX cards or fobs to set the system with specific options.
Operation requiring both a PIN and a MAX card for access.
Keypads with built-in card readers for setting and unsetting operations.
Unsetting starts when the FINAL door is opened or an ENTRY zone is activated.
Consequence of entering a protected area and activating a zone before unsetting.
Entering a valid PIN before the entry time expires to avoid a full alarm.
Process to cancel an alarm by entering a valid PIN at the keypad.
Resets the system after an alarm using a manager level PIN.
System reset requiring an engineer's intervention after specific alarm activations.
Unsetting the system groups by swiping a MicroMAX module with a card.
Accessed by Manager code on specific Galaxy control panels.
Default menu access for most users and managers on specific Galaxy models.
Details menu options available to users based on their access level.
Procedure to enter the Full Menu or Quick Menu via a valid code.
Has a hierarchy of four structures accessible by increased user code level.
Offers up to 10 options (0-9) for users level three and above.
Allows users to omit zones before setting the system; zones must be eligible.
Steps to select the 'Omit Zones' option from the Quick Menu.
Navigating through zones that are eligible for omission.
Process of marking a zone for omission using the # key.
Starting the setting routine after selecting zones to omit.
Specific limitation for omitting zones on the Galaxy 512 model.
How omitting a vibration zone affects other vibration zones in the system.
Automatically omits eligible open zones when the system setting routine is started.
Steps to access and use the Forced Set option from the Quick Menu.
Handling of open zones that cannot be omitted from the system.
Switches the Chime mode on or off for zones programmed by the engineer.
Steps to toggle the Chime mode between ON and OFF status.
Describes how the Chime mode behaves when it is active.
Accesses the zone description and current status mode.
Steps to access the Display Zones mode from the Quick Menu.
The unique four-digit address used for zone identification and selection.
Displays the zone function, identifying its operation (e.g., INTRUDER, FIRE).
Shows the current status of a zone, such as circuit information (Open or Closed).
Alpha-numeric text describing the zone's purpose in detail.
Navigating through zones and viewing their details.
Aborts the current Display Zones option and returns to the menu.
Provides a means of viewing the system history and logged events.
Steps to access the Display Log option from the Quick Menu.
Details of logged events, including setting, unsetting, and alarms, with timestamps.
Navigating through log entries by date to find specific events.
Progressively viewing all events for a selected date.
Using the # key to reveal extra details on some event types.
Printing system history from the event display using a serial printer.
Allows users to obtain a hard copy print-out of system details.
Steps to access the Print option and its sub-options (Codes, Zones, Log, All).
Prints details of all user codes, including number, name, level, and length.
Prints details of each zone in the system, including address, function, and descriptor.
Prints the entire system event log, detailing time, date, setting, and alarms.
Prints all options: Codes, Zones, and Log.
Message displayed if the printer is off-line when printing is attempted.
Tests zones to ensure they are operating correctly.
Steps to access the Walk Test option from the Quick Menu.
Tests all valid zones included in the system.
Allows testing of specific zones chosen by the user.
Aborting the walk test option or allowing it to time out.
Allows users to modify the system's time and date.
Steps to access the Time/Date modification option.
Procedure for updating the system time (HH:MM).
Procedure for updating the system date (DD/MM/YY).
Adjusts the system clock speed to compensate for variations.
Enables managers to allocate PINs and related information to users.
Sub-menus for user PINs, levels, names, and MAX details.
Determines the notification period before a programmed PIN expiry date.
Assigns MAX cards to users who do not have PINs allocated.
Details authorised actions for the manager code, including PIN and MAX features.
Manager code defaults to accessing the quick menu on these models.
Steps to select the 'Codes' option from the Quick Menu.
Accessing and modifying user PIN, level, name, and time zones.
Assigns or modifies a user's PIN, ensuring uniqueness.
Erases an existing PIN entry using the * key.
Programs a user code as a Dual Code, requiring a second code for access.
Explains how dual codes function for system access.
Assigns a code that activates duress or PA outputs when entered.
Details user access levels and their corresponding menu option availability.
Allocates time zones to user PINs to restrict their access during specific periods.
Programs user codes for PIN changes with a notification period.
Specific group allocation method for Galaxy 500, 504, and 512 models.
Assigns a user to a single group for access, set, and unset operations.
Allocates multiple groups to a user for collective access and operation.
Allows users to choose which of their allocated groups to view, set, or unset.
Recommendations for assigning MAX numbers to users without PINs.
Indicates MAX card assignment and features like dual focus or dual access.
Limits MAX card operation to a single specific keypad.
Activates the MAX function when the card is held near the reader for three seconds.
Clears or restricts antipassback restrictions for card usage.
Recommends assigning MAX numbers to users not requiring a PIN.
Specific group allocation method for Galaxy 500, 504, and 512 models.
Sets the system's clock for British Summer Time changes.
Time changes always relate to GMT, with an example for Italy.
Nine points to help users avoid false alarms and ensure proper system operation.
Message advising the user that the system is already in use by another user.
Message indicating the system is currently in an alarm condition.
Message requiring a high-level code to reset after a PA (Personal Attack) zone activation.
Message requiring a manager level code reset after an alarm activation.
Message indicating that an engineer must reset the system.
Message for an empty log or when no omittable zones are available.
Message for an illegal or out-of-range option selection.
Message for an unregistered or invalid code entered.
Message when attempting to select a feature not provided by the engineer.
Instructions for resetting the system via the Alarm Monitoring Station.
Message when exiting Engineer Mode without detecting module changes.
| Brand | Honeywell |
|---|---|
| Model | Galaxy 500 |
| Category | Security System |
| Language | English |


