Do you have a question about the Honeywell Galaxy 512 and is the answer not in the manual?
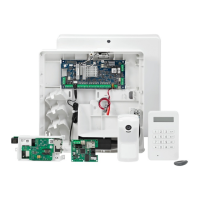
Details on Galaxy alarm system controlled by LCD keypads, with maximum keypad connectivity for different control panels.
Function of number keys for code entry, option selection, and PIN input. Also used for group programming.
Keys used to activate system options and navigate through lists of information, speeding up access.
Accepts and processes entered data, performs valid actions, and moves to the next option.
Aborts current option, returns to the previous level, or the start display. Can abort setting routine.
Displays additional choices for options and acts as a user duress key when pressed twice after a code.
Provides additional features for certain options, such as printing the event log or deleting entries.
Indicates system power status; green for mains power, flashing for power failure or low battery.
The display shown on the keypad when the system is unset, typically showing time and date.
Unique four, five, or six-digit PINs that identify users and permit system operation.
Pre-operation checks: ensure all doors and windows are secured, and protected areas are clear of obstructions.
Procedure for entering a PIN for user levels 1-2, with keypad feedback and initiation of the setting routine.
Procedure for entering a PIN for user levels 3-6, with keypad feedback and initiation of the setting routine.
Selection of groups for setting, displaying their status (Ready, Faulted, Set, Lockout).
Indicates the remaining time in seconds for users to vacate the premises after the setting routine starts.
Audible feedback during setting period: continuous tone for closed zones, pulsing for open zones.
Behavior when zones are open during setting; exit time resets, displays open zones, or triggers alarm if setting fails.
Manual completion of the setting procedure by closing the final door or pressing the TERMINATOR button.
Confirmation of system setting after time expiry or manual termination, indicated by sounders and display message.
System setting mode where only zones with the PART attribute are set, initiated by pressing '< B' after PIN.
The setting routine can be aborted by pressing the 'esc' key before the system completes the setting process.
Displays group names programmed by the installation engineer when '*' and '#' keys are pressed simultaneously.
Using MicroMAX cards or fobs to set the system by holding them against a MAX module for three seconds.
Operation requiring both a user PIN and a MAX card to be entered for setting and unsetting.
Keypads with built-in card readers used for dual focus setting and unsetting operations.
Unsetting process initiated by opening the FINAL door or activating an ENTRY zone; requires valid PIN entry.
Security procedure: enter building directly to keypad; straying into protected areas triggers an alarm.
Entering a valid PIN before the entry time expires to prevent a full alarm; sounder pulses faster near expiry.
Process to cancel an alarm by entering a valid PIN; may require a specific reset code if prompted.
Resets the system after an alarm activation using a manager-level PIN followed by the 'ent' key.
Required for specific alarm types; the system cannot be reset until an engineer performs the reset.
Unsetting groups by swiping a MicroMAX card, with group choice and dual focus operating as per setting instructions.
Accessed by Manager code on specific Galaxy models; contains a hierarchy of structures accessible by increased user level.
Default menu access for users level three and above, offering a selection of up to ten numbered options.
Procedure to access menus by entering a valid code and pressing 'ent', depending on user level.
Hierarchy of four structures accessible by increased user code level, offering comprehensive system access.
Offers users level 3+ up to 10 options (0-9), selected via number entry or A>/<B keys.
Allows users to omit eligible zones before setting the system; omitted zones remain for one set period only.
Accessing the QUICK MENU, selecting '0=OMIT ZONES', and pressing the 'ent' key.
Displays the first eligible zone for omission; use A>/<B keys to view other zones or hold keys for rapid scrolling.
Pressing the '#' key to omit a zone; A>/<B keys can be used to select and omit other zones.
Starting the setting routine after omitting zones by pressing 'ent'; 'esc' returns to menu options.
Specific limitation for Galaxy 512: only a single eligible zone can be omitted at a time.
Omitting a vibration zone results in all zones of that type being block omitted until manually reinstated.
Allows omission of ATM zones using specific ATM codes (188-197) and selecting the ATM zone type.
Automatically omits eligible open zones when setting starts; omitted zones remain for one set period only.
Accessing QUICK MENU, pressing key 1 then 'ent' to display omitted zones and remaining time.
Some open zones cannot be omitted; display shows open zones and resets exit time if they are not closed.
Switches Chime mode ON/OFF. Chime zones activate momentarily when opened.
Accessing QUICK MENU, pressing key 2 then 'ent'; use A> key to toggle ON/OFF status.
Chime mode remains active until switched OFF; suspended during system set or alarm.
Allows users to access Display Zones mode to check zone descriptions and current status.
Enter QUICK MENU, press key 3 then 'ent' to display details of the first zone (1001).
Unique four-digit address number used for zone identification and selection across different Galaxy models.
Displays the zone's function, identifying its operation such as INTRUDER or FIRE.
Current status of the zone displayed as circuit information, alternating between Open or Closed.
Zone descriptor composed of alpha-numeric text, providing a detailed description of the zone.
Displays first zone address; use A>/<B keys or enter address to view other zones sequentially.
Aborts the current option and returns the user to the main option menu.
Provides means to view system history; events are recorded and stored in non-volatile memory.
Enter QUICK MENU, press key 4 then 'ent' to display the most recent logged event.
Available events include setting, unsetting, and alarms; each event is timed and date-stamped.
Hold view keys to step through dates; A> moves forward, <B moves backward to select a date.
Step through events for a selected date using A>/<B keys; user group choice may affect display.
The '#' key reveals extra event details like zone descriptors, user levels, and the keypad used.
Press '*' key to print system history from the current display event to the most recent.
Provides a hard copy print-out of system details, requiring a serial printer to be connected.
Enter QUICK MENU, press key 5 then 'ent' to display print options; 'esc' aborts the process.
Prints details of all codes, including user number, name, level, and length.
Prints details of each zone in the system, including address, function, and descriptor.
Prints the entire LOG, consisting of up to 1000 events with time and date of events.
Prints all options: CODES, ZONES, and LOG. Starts with user codes.
Displays 'Printer off-line' if a print-out is attempted without a connected and online printer.
Tests system zones to ensure they are operating correctly, with options for all or selected zones.
Enter QUICK MENU, press key 6 then 'ent' to select 'Test All Zones' or 'Selected Zones'.
Starts the test immediately, including all valid zones. Sounder indicates open zones.
Displays zones sequentially; use A>/<B to include zones, '#' to select, and 'ent' to start the test.
Abort the walk test by pressing 'esc', or it remains active for 20 minutes after the last key press.
Allows modification of system time (hours/minutes) and date (day/month/year).
Enter QUICK MENU, press key 7 then 'ent', and select time or date using A>/<B keys.
Press A> to change time (HH:MM); system rejects invalid times greater than 23:59.
Press <B to change date (DD/MM/YY); system rejects invalid dates like 32/13/99.
Adjusts time to compensate for clock speed variations, ranging from 0 to 120 seconds per week.
Enables managers to allocate PINs and related information to users, divided into three sub-menus.
Sub-divided menus for PIN, level, name, time zones, groups; also assigns MAX details to user numbers.
Determines notification period before PIN change expiry, prompting users for a new code entry.
Assigns MAX card to users without PINs; MAX users operate Access Control functions of MAX modules.
Authorised to program user codes, allocate other codes, modify manager PIN, and assign MAX features.
Specific behavior for Galaxy 8 & 18 models where the manager code defaults to accessing the quick menu.
Accessing the QUICK MENU by pressing key 8 then 'ent' to select the Codes option.
Accessing User Codes to display numbers and options for PIN, level, name, time zones, and groups.
Assign or modify a user's PIN (4-6 digits, unique); '*' erases last digit, 'ent' accepts programming.
Existing PIN entries can be erased using '*'; a hollow square (o) indicates no PIN is assigned.
Program a user code as Dual Code by pressing '#' during Modify PIN; displays '#' before the PIN.
Single dual code entry requires a second code within 60s for access; displays 'NO ACCESS' message otherwise.
Assigns an access level to a user, determining which menu options are available to them.
Assigns a Duress Code by pressing '#' during Modify Level access; activates Duress or PA outputs.
Allocates time zones to user PINs to disable them during programmed Timer A and B periods.
Allows temporary PIN allocation for users, active for specified days (0-99), expiring at midnight.
Assigns a PIN Change code; user must assign a new PIN after a period, or the code expires.
Determines user access to system groups and operational control, only available if Group Mode is enabled.
Details group blocks (A, B, C, D) and how to use keys A>/<B and 1-8 to assign groups.
User assigned to a single group, allowing access, setting, and unsetting only for that specific group.
Users allocated to more than one group for collective access and operation.
Allows users to choose from allocated groups to view, set, or unset; pressing '*' assigns the feature.
Assigns a MAX card to a user by entering its unique 10-digit laser-etched number.
Assigns the MAX card to a single menu option, requiring user authorization for access.
Limits MAX card operation to a single keypad; specify keypad by pressing '#'.
MAX function activates when card is held to reader for three seconds; reader must share a common group.
Prevents multiple card uses at a reader within a preset time; clears antipassback restrictions.
Determines notification days before PIN change expiry, prompting users for a new code entry.
Assigns additional MAX users without PINs; MAX users operate Access Control functions of MAX modules.
Assigns group access to MAX user; group must be common to MAX module for access control functions to operate.
Sets British Summer Time (BST) Start/End dates, advancing/retarding system clock automatically.
Advises that the system is in use; Galaxy 8/18 models allow only one user at a time.
Indicates the system is in alarm condition and requires cancellation via PIN or keyswitch.
After PA zone activation, the system requires a reset by a high-level code (manager/engineer).
Following an alarm, the system requires a reset by a manager-level code.
System programmed for engineer reset after alarm; engineer must check modules before user can set system.
Appears if the log is empty or no omittable zones were selected.
Indicates that the selected option or entered value is illegal or out of the allowed range.
Indicates that the entered code is not a valid code registered in the system memory.
Displayed when attempting to select an option that was specifically not provided by the engineer.
Instructs to call the Alarm Monitoring Station and quote a five-digit number to reset the system.
Displayed when exiting Engineer Mode if the panel detects no change in the number of modules.
| Zones | 8 |
|---|---|
| Keypads | Up to 8 |
| Outputs | 4 |
| Partitions | 2 |
| Users | 32 |
| Communication | GSM |
| Battery Backup | 12V 7Ah |
| Weight | 2.5 kg |