4
51=Parameters
In this menu, all the general parameters are set up, such as
Bell time, entry/exit time, reset levels, and part set
signalling parameters. Select each particular parameter by
using the scroll keys (A> and <B) and press ent to edit the
settings for that parameter. Many parameters will have a
separate setting for each group, if group mode is enabled.
52=Zones
In this menu, the function of each individual zone input
can be customised. Select the zone address using the scroll
keys (A> and <B) and press ent to access the parameters
for that zone.
53=Outputs
In this menu, the function of each individual output can be
customised. Select the output address using the scroll keys
(A> and <B) and press ent to access the parameters for
that output.
69 = Access Control
In this menu, door access is controlled by either a MAX
module or a Door Control Module (DCM). The Mode
needs to be enabled if prox tags are to be used with a
keyprox, MAX reader or DCM reader.
56=Communications
In this menu, Alarm signalling to the ARC can be
configured. First, select the module type from the list using
the scroll keys (A> and <B) then press ent to access the
parameters for that module. The account number,
Telephone no/IP address and format need to be
programmed to enable basic communications.
Note: Telecom modules are not suitable for alarm
signalling on EN50131 Grade 3 systems.
42=Users
In this menu, use the further sub menu called User Codes
to program the attributes of individual users. Each user on
the system can have the following assigned: PIN code,
Prox tag, Type (authority level) and Group. PIN codes
must be at least 5 digits on Grade 3 compliant systems.
To program a Prox tag, first make sure Access mode is
enabled. Next select the user required then select option 7
Card no. on a keyprox, press 1 & A together then present
the user’s tag to the bottom of the keypad. The number
will enter automatically. For use on MAX readers, simply
type in the number printed on the MAX tag. Press ent to
save. To allow setting and unsetting with the tag, option 8
MAX MENU must be programmed as 12=Timed set for
each user.
Built-in Comms
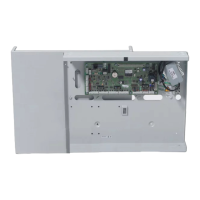
The Galaxy Dimension has a built-in telephone dialler.
The incoming telephone line should be wired to the ‘Line
A B’ terminals next to the phone symbol. The alarm panel
should always be the first device on the phone line.
Additional extensions should be connected to the serial
terminals marked ‘PHONE A B’. This will allow the
panel to snatch the line when it needs to dial out.
Note: Signalling via the on-board Telecom module will
meet EN50131/PD6662 Grade 2 requirements
only. It should not be used for alarm signalling to
an ARC on Grade 3 installations.
All comms programming is done in menu 56.
Connecting External Comms
When connecting external comms devices via the on-board
outputs, ensure that the outputs are switched to pull-up
operation. This is done by switching ON the first 7
switches on the 8-way dipswitch on the lower right corner
of the PCB. Leave the 8
th
switch in the OFF position in.
By default, the outputs are in “open collector” mode. The
output functions can be programmed in menu 53.
Remote Servicing
When using Remote servicing, The System ID field in
menu 51.15.1=System Text should be programmed. This
field is used to identify the panel to the PC software and is
a string up to 16 characters in length. Typically it can be
the installation’s contract number.
To comply with EN50131, the panel is defaulted to only
allow connection to remote servicing software, if
authorised via menu 47.1. Set this to Direct access on the
appropriate communication device and dial-in connection
will be authorised for 40 minutes. Alternatively, a dial out
to the remote servicing software can also be initiated from
this menu.
Remote Routine Inspection
A Remote Routine Inspection (RRI) is a regular system
check to assess its health and performance.
How to Set Up RRI
Select Call Back number 1 (menu option
56.1.12.2.3).
Enter the Start Time and End Time for the
Inspection (menu option 47.4.2). The panel will
dial out at a random time between the Start Time
and End Time.
Enter the Scheduled number of days between auto
RRI communications (menu option 47.4.6.1). The
number of days is selectable from 0-365.
Select No Code/Notice (menu option 47.4.6.2.3).
Zone Activity Monitoring
Zone activity can be monitored by programming a type in
menu option 52.8. The zones are checked for activity
during a set time period or set/unset cycles programmed in
menu option 51.61. If the zone does not activate at least
once within the programmed criteria a zone masked fault
is indicated at the panel.

 Loading...


