HE220, HE260 HUMIDIFIER INSTALLATION KIT
3 69-2518—03
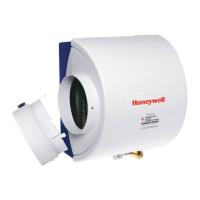
Fig. 2. Selecting duct location for humidistat.
Locating Closest 120V Electrical Outlet
• Select location with access to an outlet. If not
available, contact an electrician to have one installed.
Make sure that the 20 ft (6.2m) of thermostat wire is
adequate to reach from the humidifier solenoid, to the
sail switch, to the humidistat, to the plug-in transformer
in the outlet.
INSTALLING HUMIDIFIER
Hazardous Voltage.
Can cause personal injury or equipment
damage.
Do not cut or drill into any air conditioning or
electrical accessory.
Sharp Edges Installation Hazard.
Can cause personal injury.
Wear gloves and safety glasses.
1. Turn off power to the air handing system at the cir-
cuit breaker.
2. Draw a level line on the plenum in the location
chosen for the humidifier. (Leveling assures optimal
humidifier performance.)
3. Locate the template in the Humidifier Installation
Instructions.
4. Tape the template in position and trace around the
template.
5. Remove the template and carefully cut the rectan-
gular opening.
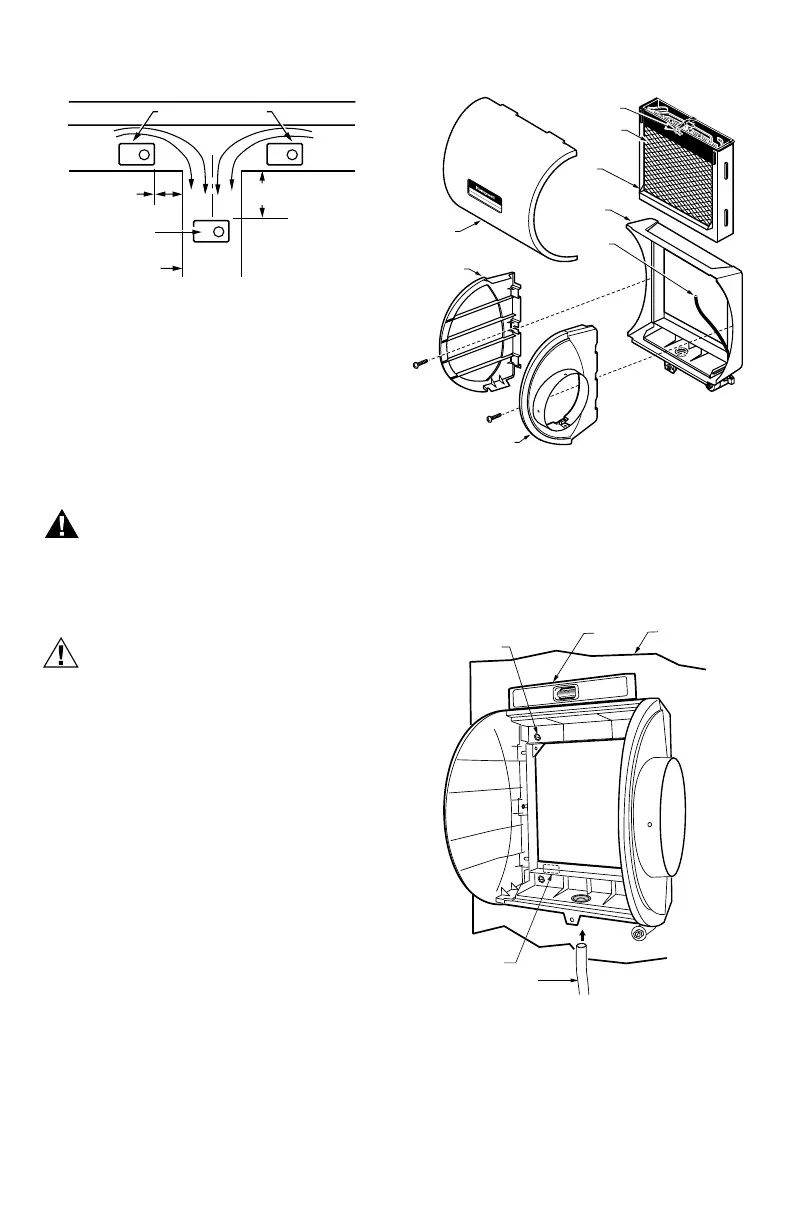
6. Disassemble the humidifier; remove the cover and
take out the humidifier pad assembly. See Fig. 3.
NOTE: Sidewalls are interchangeable for either left or
right bypass installation. To change direction,
remove the screws holding each sidewall,
reverse sidewall locations, and reinstall the
screws.
Fig. 3. Disassembling humidifier.
7. Make sure the humidifier housing is level, then posi-
tion it in the opening so the plastic tabs are in place
on the lower sheet metal edge of the opening. Use
pliers, as necessary, to flatten cut edges. See Fig.
4.
8. Secure the humidifier housing to the opening at the
top and bottom using sheet metal screws.
Fig. 4. Installing humidifier on duct.
9. Use the 6 in. (155 mm) starter collar as a template
to mark the opening for the bypass.
10. Carefully cut the opening for a 6 in.(155 mm) starter
collar. See Fig. 5. Use a drill, punch or awl to start
the cut in the middle of the circle. Cut in an outward
spiral to assist in controlling the cut.
ALTERNATE LOCATION
RETURN
AIR
RETURN
AIR
6 in. (152 mm)
MINIMUM
15 in. (381 mm)
MINIMUM
BEST
LOCATION
RETURN AIR DUCT
M12831
M12304A
WATER
FEED NOZZLE
FRAME
HUMIDIFIER
HOUSING
WATER
FEED TUBE
HUMIDIFIER
PAD ASSEMBLY
COVER
SIDEWALL
BY-PASS SIDEWALL
DUCT
LEVEL
SHEET METAL
SCREWS (4)
PLASTIC
TABS (2)
DRAIN TUBING
M20171
OPENING
TO AIR DUCT
 Loading...