Fig. 6. Installing the starter collar.
12. Remove liner to expose foam adhesive. Position starter collar over opening.
13. Slide one end of the flexible ducting over the starter collar and secure with one of the connecting straps.
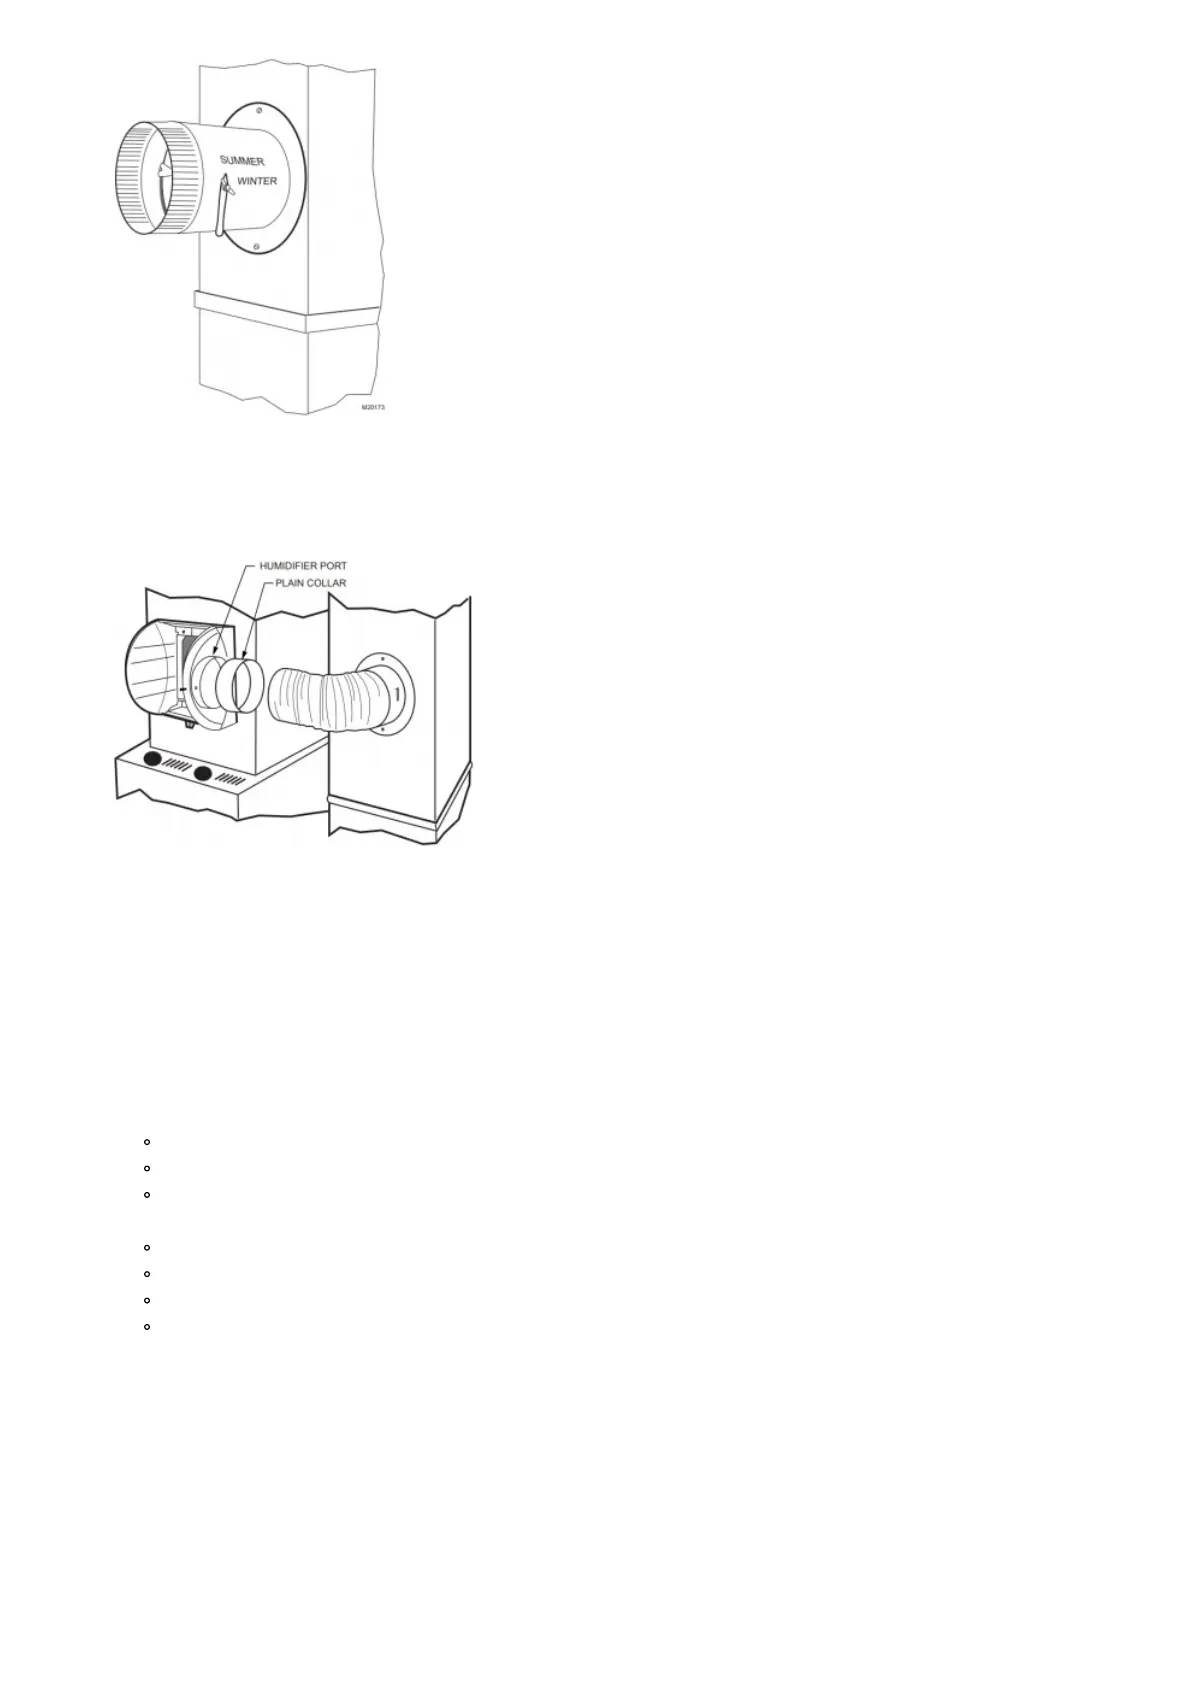
14. Insert the plain collar into the humidifier port and secure with sheet metal screws. Connect the flexible ducting
over the collar and secure with a connecting strap. See Fig. 7.
Fig. 7. Connecting bypass ducting.
15. 5. Seal the duct connections with duct tape (not included).
16. Reinstall the humidifier pad assembly in the humidifier housing.
17. Hinge the cover in place and secure with the thumbscrew located at the bottom of the cover.
Connecting the Plumbing
1. Shut off the water.
CAUTION
Chemical Hazard.
Can cause personal injury or equipment damage.
Do not use any line connected to an air conditioner.
Do not use gas line.
2. First, connect 1/4-in. line to the humidifier’s solenoid valve, located at the bottom of the humidifier.
a. Remove the compression nut.
b. Discard the brass ring, replacing it with the plastic ring.
c. Install the brass insert into the end of the tubing.
d. Insert the tubing into the solenoid valve fitting and support the valve while tightening the compression
nut.
NOTE: Do not over-tighten the compression nut. Moderate tightness prevents leaking.
3. Use the saddle valve (included) to tap into the water supply line at the location selected. See Fig. 8. If tapping
into galvanized pipe, drain line and pre-drill 3/17-in. tap for saddle valve.
NOTE: The saddle valve is not designed to regulate water flow. The valve is either open or closed.
 Loading...