'
! H<(I! H1$$1$)&&)& )))&
*"! 9'"&&
E&" )
Selecting a Camera
5200-100-001-V0
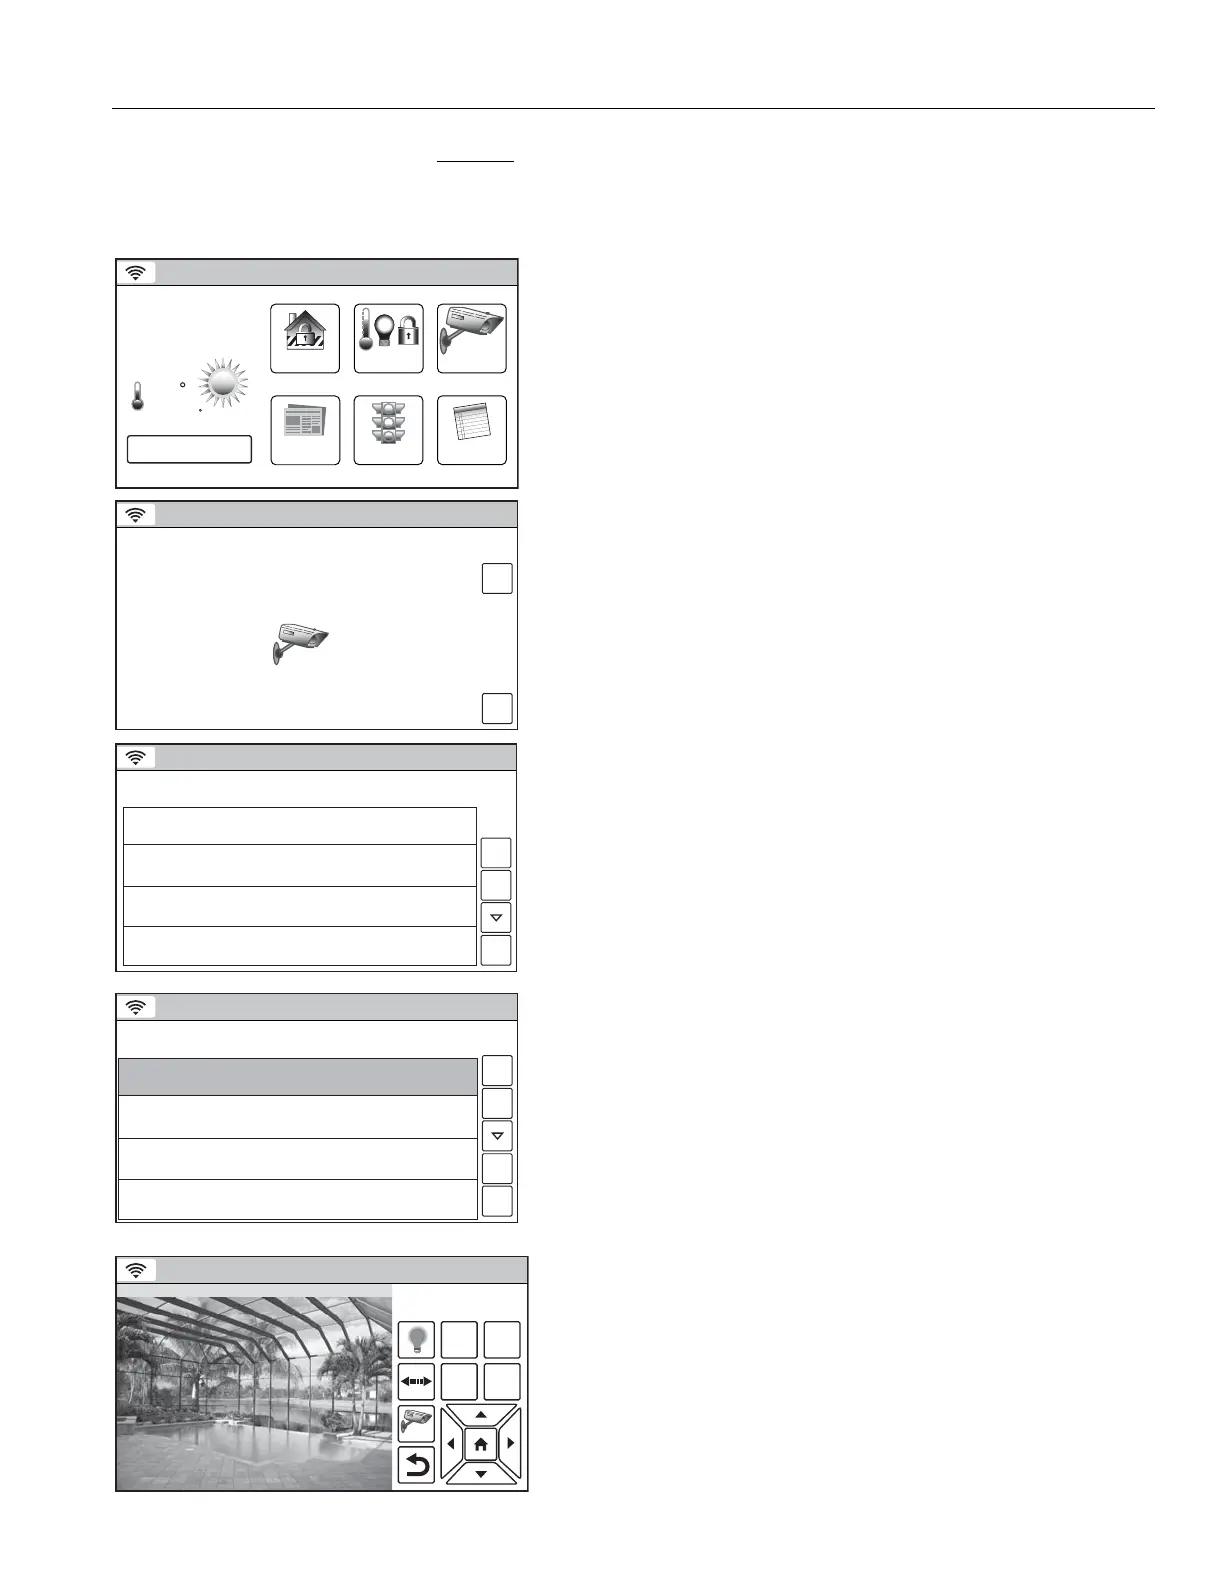
Video
Notices
Traffic
Security
News
5-Day Forecast
2
68
35
1:
F
PM
October 1, 2013
Feels Like 71
Mostly Sunny
F
Automation
Ready To Arm
1. With the system in the disarmed or armed state, select the
Video icon. The system advances to Cameras screen
5200-100-010-V0
IP
Cameras
MACName
Back
Scan
Ready To Arm
2. If no cameras have been discovered or if a list of discovered
cameras is invalid, a Camera scan will start automatically.
Note: The latter can occur if a WiFi connection is lost.
3. A Manual scan can be performed by selecting the “Scan”
button. When the scan is complete the available cameras will
be displayed.
Note: Multiple cameras will be viewable during scanning/
enrollment however, only four will appear on each page.
5200-100-007-V1
IP
Cameras
MACName
10.10.150.159 00:C0:02:8F:60:4E
10.10.150.67 00:0E:8F:79:CB:C2Name
10.10.150.158 00:0E:8F:79:C7:EFName
Name
10.10.150.176 00:C0:02:7B:67:E4Name
Back
Scan
Ready To Arm
4. Select the desired camera from the list. If applicable select
the “
V
” button to view additional pages of the list. Select the
“
U
” button to return to the previous page of the list.
5200-100-093-V1
IP
Cameras
MACName
10.10.150.159 00:C0:02:8F:60:4E
10.10.150.67 00:0E:8F:79:CB:C2Name
10.10.150.158 00:0E:8F:79:C7:EFName
Name
10.10.150.176 00:C0:02:7B:67:E4Pool
Back
Edit
Scan
Ready To Arm
5. The selected camera is highlighted in green. To edit the
camera name go to step 6 OR to save the camera go to step
9.
6. To edit the camera name tap the highlighted camera again.
After the highlight color changes to yellow, select the edit
button.
Note: To de-select a camera “tap” the highlighted camera two times.
7. Select the “Clear” button on displayed keypad, then enter the
deisred text.
8. Select “Done”.
9. Select the “Back” button.
5200-100-008-V0
1 2
3 4
Ready To Arm
POOL
10. The system displays video from the selected camera.
11. To select a different camera, select the camera button then
tap the selected camera two times and repeat steps 4 to 9 as
applicable.
12. Refer to the Video Camera Controls table for information
regarding the Video Function buttons. The available controls
are dependent upon the cameras that have been installed
and selected
.

 Loading...