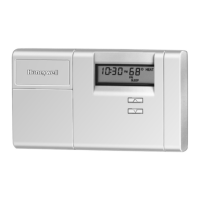
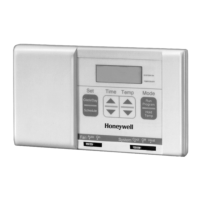
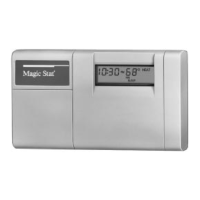
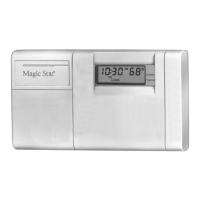
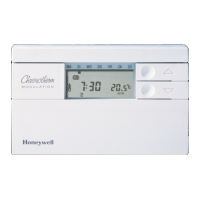
Welcome to the world of comfort and
energy savings with your new Honeywell
MagicStat@
programmable thermostat.
Your new thermostat will automatically
control the temperature in your home,
keeping you comfortable while saving energy
when programmed according to the instruc-
tions in this manual.
Direct any questions concerning the
application of this thermostat to Honeywell
Customer Assistance at 1-800-468-1502,
Monday-Friday
7:00
a.m.-53O p.m., Central
time.
@ RECYCLING THERMOSTAT
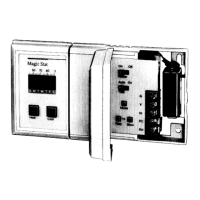
If this thermostat is replacing a thermostat
that contains mercury in a sealed tube (see
illustration below), do
not
place your old
thermostat in the trash. Contact your
Jocal
waste
management authority for instructions regarding
the recycling and proper disposal of your old
thermostat.
If you have questions, call Honeywell Inc.
at 1-800-468-1502.
Typical
location of a
MERCURY
SWITCH
mercury
switch in a
thermostat.
w
—.
o
0
M3701
Table Of Contents
STEP 1 Prepare For Installation . . . . . . . . . . . . . . . . . . . . . . . . . . . . . . . . . . . . . . . . . . . . . . . . . . . . . . . . . . . . . . . . . . . . . . . . . . . . . . . . . . . . . . . . . . . . . ...2
STEP 2 Remove Old Thermostat
. . . . . . . . . . . . . . . . . . . . . . . . . . . . . . . . . . . . . . . . . . . . . . . . . . . . . . . . . . . . . . . . . . . . . . . . . . . . . . . . . . . . . . . . . . . . . . .
4
STEP 3 Install The Batteries
. . . . . . . . . . . . . . . . . . . . . . . . . . . . . . . . . . . . . . . . . . . . . . . . . . . . . . . . . . . . . . . . . . . . . . . . . . . . . . . . . . . . . . . . . . . . . . . . . . . . . .
6
STEP 4 Program The Thermostat
. . . . . . . . . . . . . . . . . . . . . . . . . . . . . . . . . . . . . . . . . . . . . . . . . . . . . . . . . . . . . . . . . . . . . . . . . . . . . . . . . . . . . . . . . . . . . .
8
STEP 5 Adjust Fan Operation Switch, As Required . . . . . . . . . . . . . . . . . . . . . . . . . . . . . . . . . . . . . . . . . . . . . . . . . . . . . . . . . . . . . .
16
STEP 6 Adjust System On-Time, As Required . . . . . . . . . . . . . . . . . . . . . . . . . . . . . . . . . . . . . . . . . . . . . . . . . . . . . . . . . . . . . . . . . . . . . .
16
STEP 7 Mount Thermostat Mounting Plate . . . . . . . . . . . . . . . . . . . . . . . . . . . . . . . . . . . . . . . . . . . . . . . . . . . . . . . . . . . . . . . . . . . . . . . . . . . .
18
STEP 8 Wire Thermostat Terminals . . . . . . . . . . . . . . . . . . . . . . . . . . . . . . . . . . . . . . . . . . . . . . . . . . . . . . . . . . . . . . . . . . . . . . . . . . . . . . . . . . . . . .
..2O
STEP 9 Mount The Thermostat . . . . . . . . . . . . . . . . . . . . . . . . . . . . . . . . . . . . . . . . . . . . . . . . . . . . . . . . . . . . . . . . . . . . . . . . . . . . . . . . . . . . . . . . . . . . . ...24
STEP 10 Check Thermostat Operation After Programming And installing . . . . . . . . . . . . . . . . . . . . . . ...25
STEP 11 Set The Fan And System Switches . . . . . . . . . . . . . . . . . . . . . . . . . . . . . . . . . . . . . . . . . . . . . . . . . . . . . . . . . . . . . . . . . . . . . . . ...27
Troubleshooting Guide . . . . . . . . . . . . . . . . . . . . . . . . . . . . . . . . . . . . . . . . . . . . . . . . . . . . . . . . . . . . . . . . . . . . . . . . . . . . . . . . . . . . . . . . . . . . . . . . . . . . . . . . . ...29
Limited One-Year Warranty
. . . . . . . . . . . . . . . . . . . . . . . . . . . . . . . . . . . . . . . . . . . . . . . . . . . . . . . . . . . . . . . . . . . . . . . . . . . . . . . . . . . . . . . . . . . . . . . . . . . . . .
35
1
—
❑
Acquire tools and items below as needed. Also purchase two AA alkaline batteries; we
recommend Energizer batteries.
T
~
“(~,
CROSS-RECESSED
SCREWDRIVER
iiAND OR POWER
.
DRILL WITH 3/16 INCH
DRILL BIT, IF NEEDED, TO
DRILL HOLES IN WALL
~
~AsKING
TAPE
,F
WIRE CUTTEWSTRIPPER OR SHARP
KNIFE, IF NEEDED, TO STRIP WIRES
NEEDED, TO
Ll&EL
WIRES
AS DISCONNECTED FROM
OLD THERMOSTAT
UIall
ulEa-’-U
LEVEL, IF NEEDED, TO LEVEL
THERMOSTAT FOR APPEARANCE
M378B
3