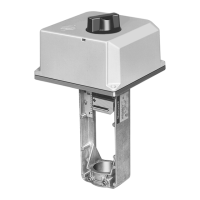
ML6984, ML7984 SERIES 4000 DIRECT COUPLED VALVE ACTUATORS
11 95C-10939—11
To Replace ML784 or ML984
1. The old ML784 or ML984 actuators cannot be used
with new ML7984 valve actuators in the same cir-
cuitry, unless the old models are each powered by
their own transformer to prevent cross-talking.
2. The ML7984 is a direct replacement for all old
ML784 and ML984, except:
a. When replacing the old reverse acting models, the
signal input wires to the new devices no longer
need to be reversed. Just follow the terminal
polarity designations and DIP switch settings.
b. When replacing the old actuator which has an
Electronic Series 90 “Supermod” controller - e.g.:
T775, W973, H775, or W7100 - the old interface
resistor must be removed. The ML7984 Series
4000 will work directly with the controller without
the external 240 ohm resistor.
c. When replacing the old ML784 (mA model) in
multiple-actuator installations, resistor(s) will be
needed. Use Resistor Kit (part no. 272822) and
set DIP switches accordingly. See Figures 17 and
18.
To Replace ML684A
1. The new ML6984 is a direct replacement for the old
ML684A in single actuator or parallel multiple actua-
tors hook-up. The old and new actuators can be
mixed in the same electrical circuit. For multiple
actuators controlled by a common controller in paral-
lel, these actuators must be wired so that they all
travel in the same direction.
2. When replacing the ML684A1009 (80 lbf) with this
new ML6984 on the V5045 valve, the installed valve
adaptor (part no. 272629A) on the valve stem and
actuator assembly is still needed.
NOTE: The 272630D position feedback/auxiliary switch
module cannot be used with ML6984 3-wire
installation. The 272630D requires continuous
power.
To Replace ML6874
1. The ML6984 is a direct replacement for the old
ML6874 in single actuator hook-up.
2. For parallel, multiple ML6874 actuators applications,
an isolation relay must be used. The isolation relay
contacts should be placed in the new ML6984 actua-
tor signal input “W” and “B” circuit.
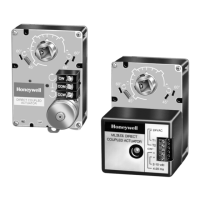
To Replace Line Voltage Auxiliary
Switches
These accessories are no longer available. Replace the old
actuator with new model and 272630D position feedback/
auxiliary switch module.
Operate an external relay, such as R8845U, using the
adjustable SPDT pilot duty output on the 272630D.
If a second, independent output switch is needed, wire the
2-10 Vdc position feedback signal to an Approved,
adjustable, voltage-controlled relay.
CHECKOUT
ML7984
1. Make sure the valve stem is completely screwed into
the actuator drive shaft with no threads showing
before applying power.
2. Make sure the valve stem is locked in place with the
set screw.
3. Make sure the Configuration DIP switches are set
correctly.
4. With 24 Vac or 28 Vdc power source connected to T5
and T6, actuator operation can be verified by con-
necting appropriate control signal (Series 70/90)
from controller to the signal input terminals (Figures
8 thru 16). For direct acting: A modulating action can
be obtained by increasing the control signal. The
actuator will travel from stem down to stem up. On
signal failure (disconnected/no signal), actuator
defaults to closed position. For reverse acting:
Decreasing controller signal will drive actuator from
full stem down to full stem up. On signal failure (dis-
connect/no signal), actuator defaults to open posi-
tion.
5. Operate the system (valve, actuator, and controller)
for several cycles to ensure proper installation.
6. When checkout is complete, return the controller to
the desired setting.
NOTE:
1. The Device will ignore any input changes until it
has completed its repositioning relative to the
initial signal input.
2. 272630D position feedback/auxiliary switch
module is inactive during self-calibration.
ML6984: 5-Wire Installation
1. Make sure the valve stem is completely screwed into
the actuator drive shaft with no threads showing
before applying power.
2. Make sure the valve stem is locked in place with the
set screw.
3. Connect 24 Vac or 28 Vdc power to T5 and T6.
4. Jumper R and B. The valve stem should move up.
5. Jumper R and W. The valve stem should move down.
6. For Floating operation, open R connection Valve stem
should remain in position.
7. Re-connect all control wiring.
8. Operate the system (valve, actuator, and controller)
for several cycles to ensure proper installation.
9. When checkout is complete, return the controller to
the desired setting.
ML6984: 3-Wire Installation
1. Make sure the valve stem is completely screwed into
the actuator drive shaft with no threads showing
before applying power.
2. Make sure the valve stem is locked in place with the
set screw.
3. Connect 24 Vac to T6.
4. Manually override the controller to signal the actua-
tor to open/close for a few cycles to ensure proper
installation.
5. When checkout is complete, return the controller to
the desired setting.
 Loading...