Document 800-22755 – Rev A – 12/2016
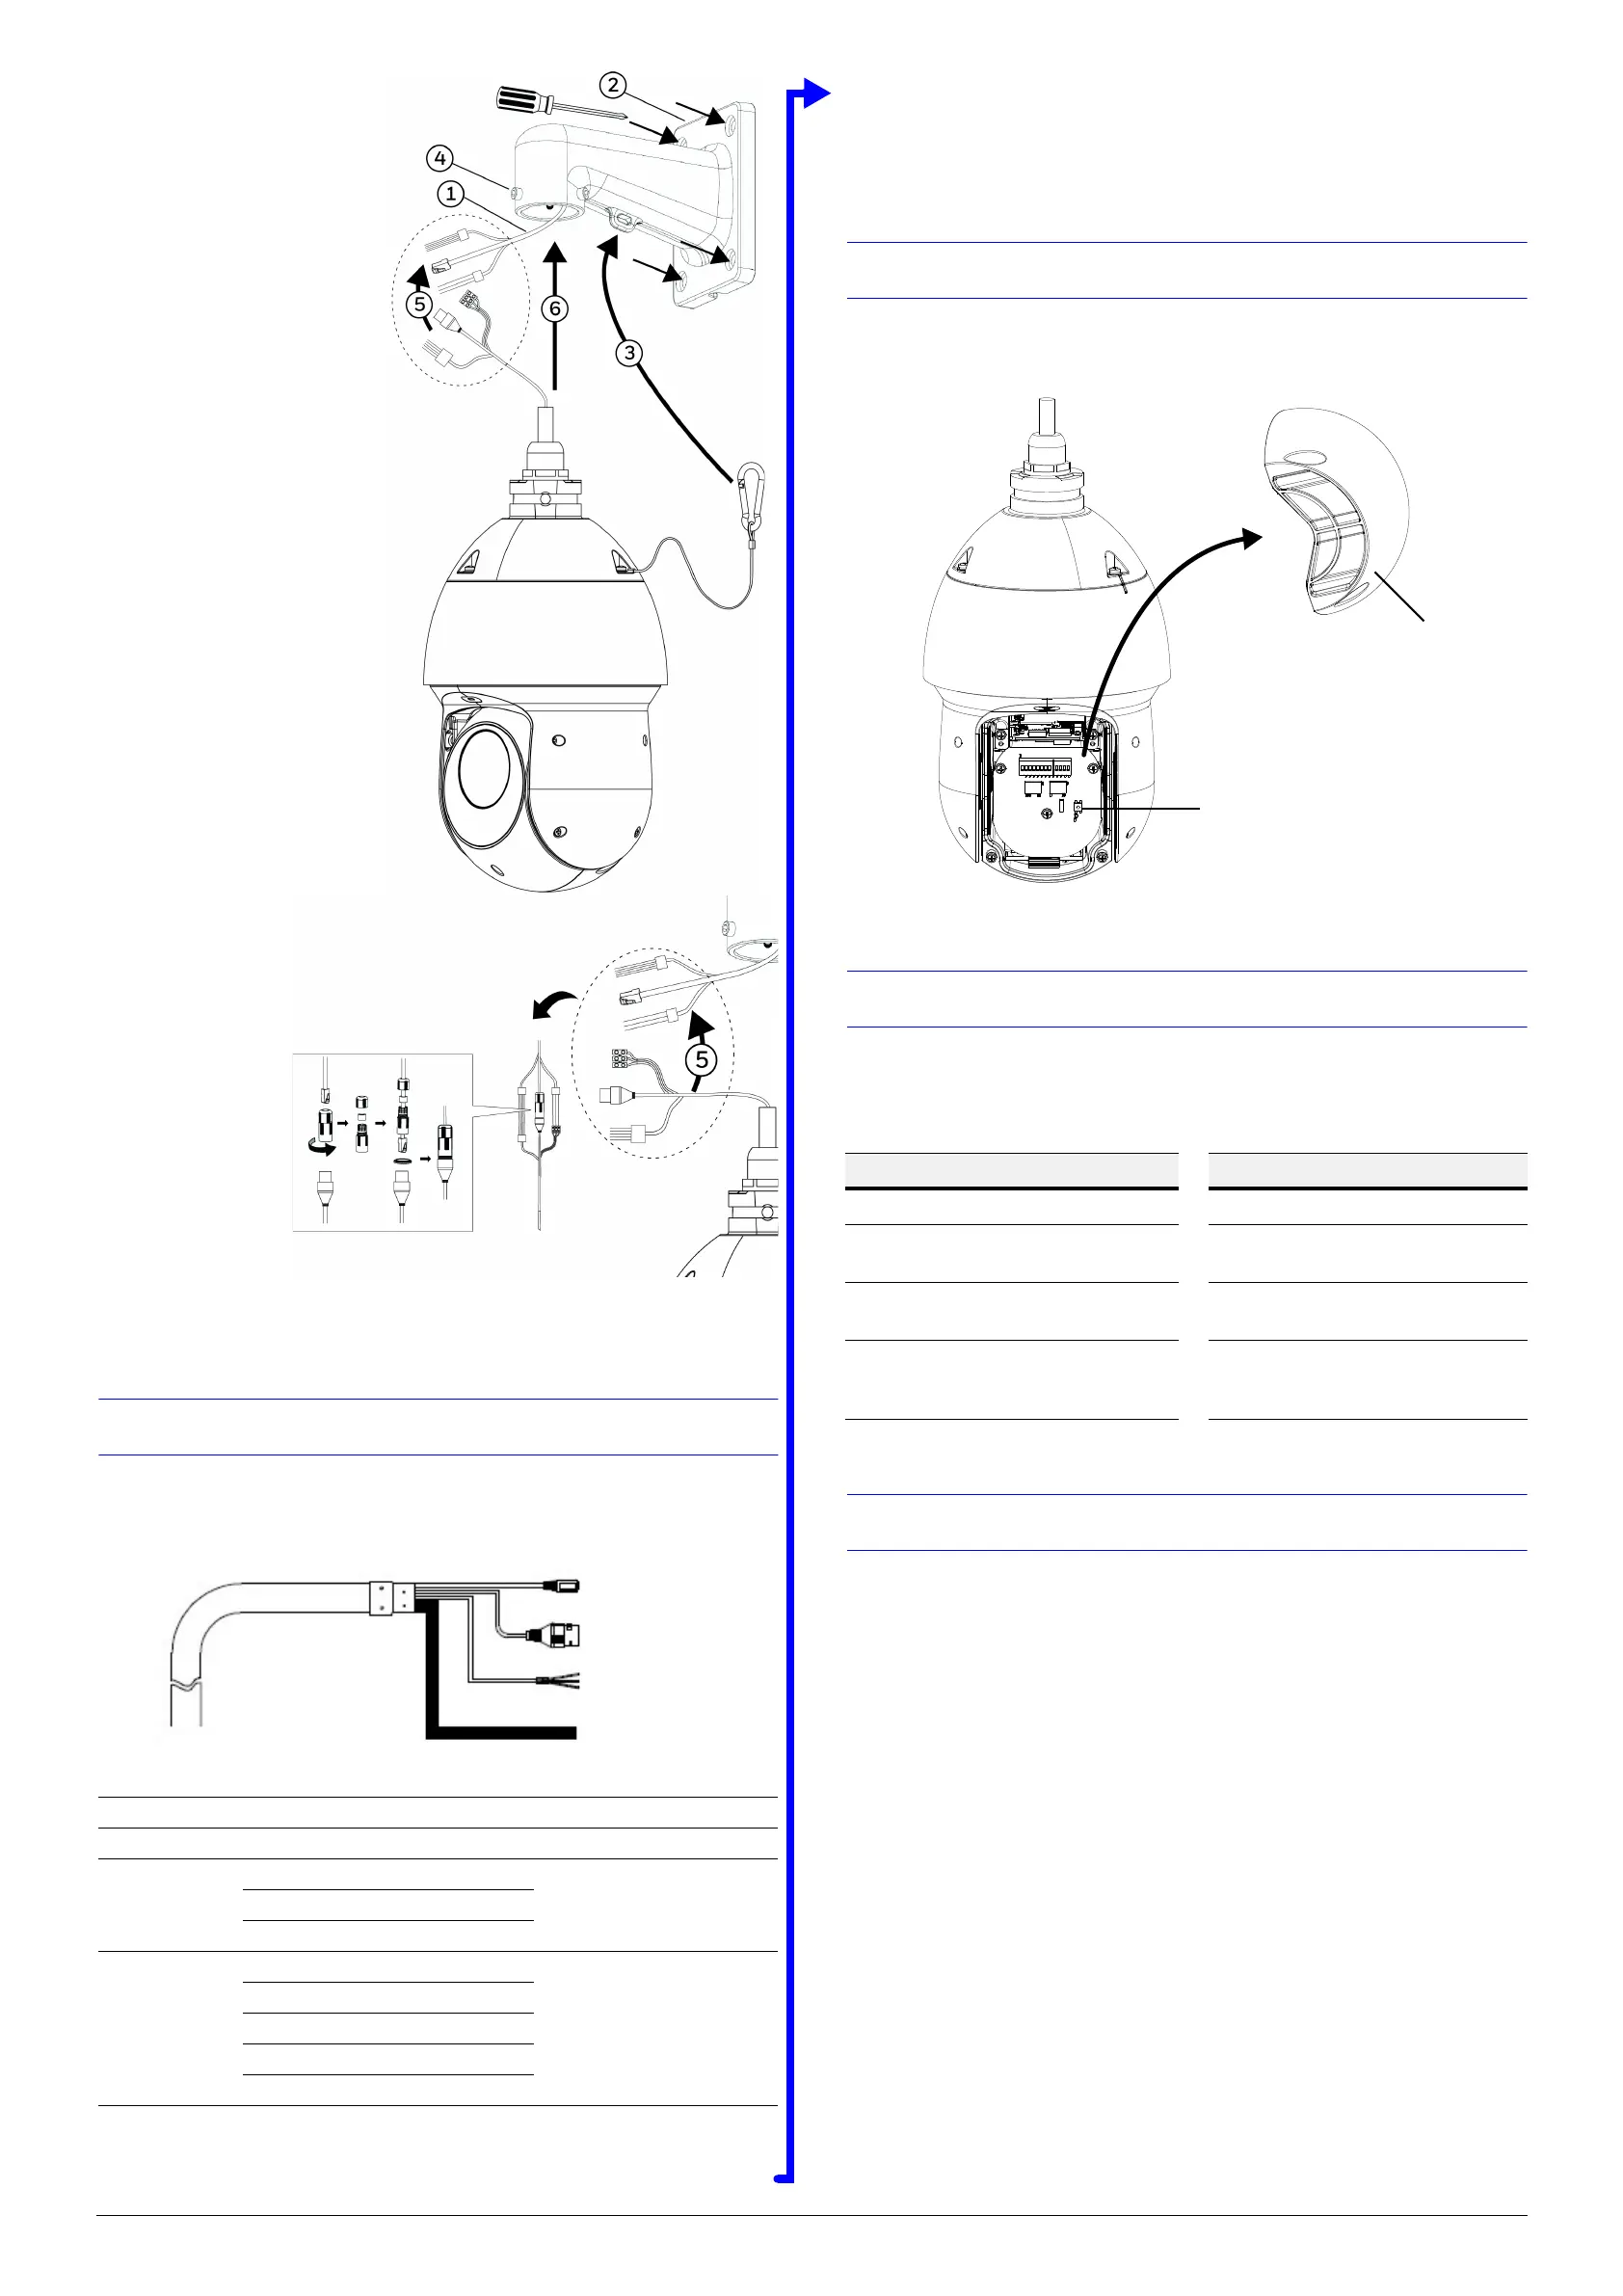
Installing the Wall
Mount and PTZ
The wall mount weighs 1.46 lb
(0.66 kg) and can be installed
directly to a load-bearing wall, or
to a corner or pole using an
appropriate adapter.
Important Notes:
• Ensure that the mounting
surface can support the
combined weight of the
camera and the mount (at
least 10.58 lb [4.8 kg]).
• If you are using a microSD
card, install the card first (not
supplied, refer to Inserting
the SD Card on page 1).
• When you attach the mount
to the wall in step 2, please
make sure the mount is fixed
to the wall with appropriate
material and is kept stable.
The PTZ is so heavy that it
might drop when you attach
it to the mount with the
security chain (step 3).
1. Feed the cables through the
mount, leaving
approximately 0.5 ft (0.15 m)
extending past the end of the
mount.
2. Attach the mount to the wall
using appropriate hardware.
3. Connect the
security chain to
the eyelet of the
wall mount.
4. Loosen the three
M6 stainless
locking screws.
5. Connect the
cables using the
waterproof joint
(see image
inset).
6. Screw the dome
camera onto the
wall mount and
tighten the three
locking screws.
Cable Connections
Before connecting the cables, take a minute to familiarize yourself with the cables, as
shown in the figures and table below.
Note The Ethernet cable should not be longer than 328 ft (100 m).
IMPORTANT NOTE
Regarding PoE operation of HDZP252DI models
A high power PoE injector capable of supplying at least 20 W is required for proper
operation of HDZP252DI models.
Resetting the Camera
Press and hold the reset button for 10 seconds when the camera is powered on to reset
the camera (refer to below image for reset button location).
Before Logging On to the Camera
Before logging on to the camera, ensure that Internet Explorer is set up to run ActiveX
controls. You can enable ActiveX controls manually or by setting the browser’s security
settings to the default level.
Logging On to the Camera
If the camera is connected to the PoE port of a Honeywell Embedded NVR, you can log
on to the camera directly from the NVR.
To log on to the camera from a PC:
1. Install the Honeywell Config Tool from the installation CD.
2. Use the Config Tool to discover the camera and open the camera’s webpage.
3. Log on to the camera as the admin user. The default user name is admin (case-
sensitive) and the default password is 1234.
Power Barrel Connector 12 V DC
Network RJ45
Audio
Red Audio OUT
White Audio IN
Black Audio GND
Alarm
Blue Alarm OUT 1
Outputs (x1): Relay output,
20 V DC, 1 A max. Use alarm
outputs for SELV circuits only.
Inputs (x2): 5 V, pull up.
Green Alarm COM 1
Red Alarm IN 1
Brown Alarm IN 2
Yellow & Green Alarm GND
Power (12 V DC)
Network: Ethernet
Audio
Alarm
ActiveX Controls and Plugins Settings Internet Security Level
1. Open Internet Explorer. 1. Open Internet Explorer.
2. On the Tools menu, click Internet
options, and then click Security.
2. On the Tools menu, click Internet
options, and then click Security.
3. Click the Internet icon, and then
click Custom level.
3. Click the Internet icon, click
Default level and click OK.
4. Set all ActiveX controls and plug-
ins to Prompt or Enable, and then
click OK.
4. Close the browser window and
open a new one to access the
camera.
Open rear cover
Reset button

 Loading...