R7426A,B,C TEMPERATURE CONTROLLER
11 63-2564—1
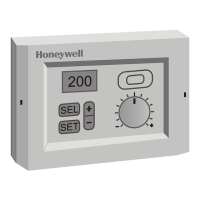
Standard Display Mode
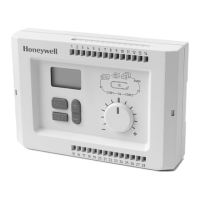
After power-up, the controller version and revision number
blink for approximately 20 seconds (See Fig. 18) and then the
controller enters standard display mode (see Fig. 17). In this
mode, selected input/output values are displayed.
Fig. 18. Controller Version.
Parameter Selection/Adjustment Mode
Use this mode for application configuration:
1. Press and hold the + and - buttons to display parameter
selection mode.
2. Press + or - until the desired parameter is displayed.
3. Press SET to enter adjustment mode.
4. Use + and - to adjust parameter to desired setting.
5. Return the controller to selection mode using either:
a. SET places the parameter value into the EEPROM.
b. SEL discards the change.
To Display Actual Values
In standard display mode, one of all listed below actual values
can be selected and displayed (see Table ) by pushing SEL.
Table 9. Standard Displays.
Resetting Parameter Values to Default
To reset all parameter values to default (see Tables 13 and 14
for default values):
1. Press and hold the + and - buttons prior to and during
power up.
2. When the display flashes dEF, release the buttons.
NOTE: Setting the DefProg parameter (C.23) to 1
resets parameter values to default.
Time out
After approximately 10 minutes of inactivity (no buttons
pressed) the controller automatically returns to standard
display mode. Inputs not yet confirmed by the SET button are
discarded and old parameter values retained.
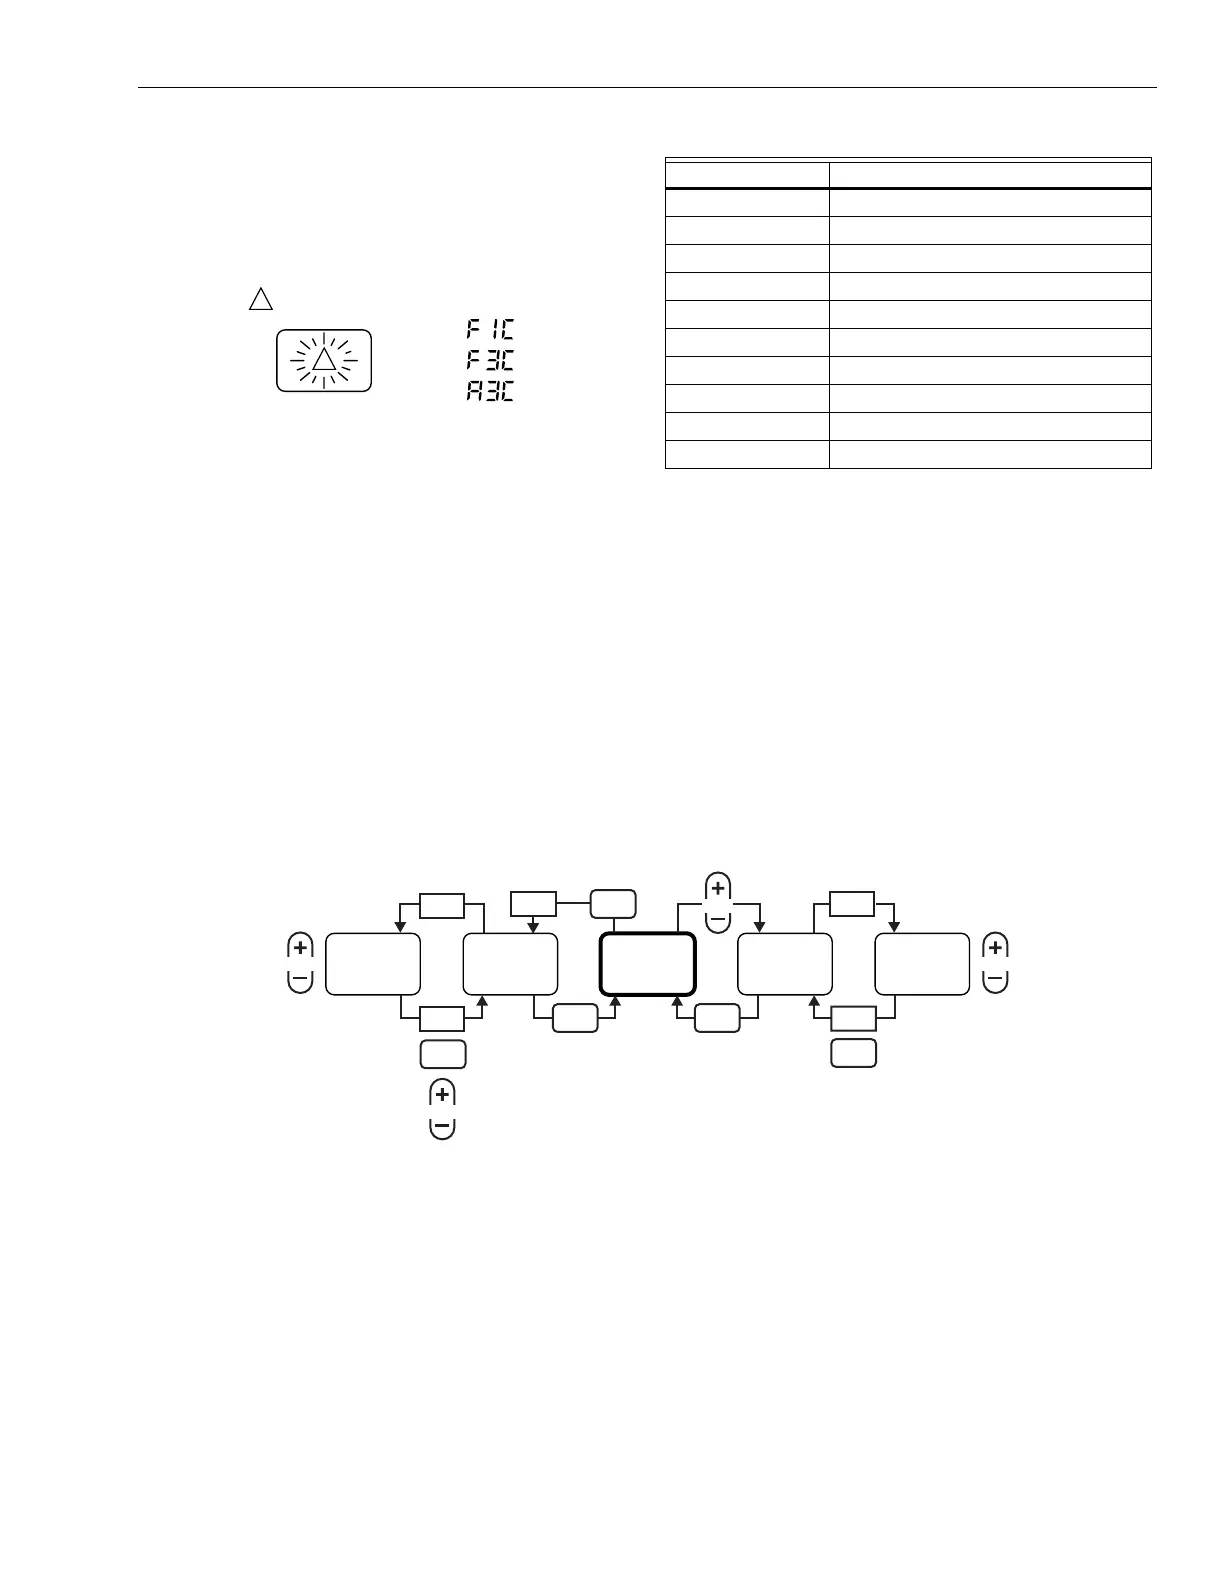
Fig. 19. Operating Overview.
Output Manual Override Mode
Output selection mode displays the output value and indicates
manual overrides. An activated manual override is indicated
by a displayed F (fixed). Use this mode for manual override. It
is especially useful during installation and setup:
1. Press and hold the SET and SEL buttons to display
output data selection mode.
2. Press +or - until the desired output is displayed.
3. Press SET to enter adjustment mode.
4. Use + and - to adjust the output to the desired value.
5. Return the controller to selection mode:
a. SET changes the output to fixed.
b. An activated manual override is indicated by an F
(fixed) on the display.
c. SEL discards the change.
6. To disable the manual override:
a. Repeat steps 2 and 3.
b. Press and hold + and - until the device displays rEL.
NOTE: Before exiting manual override, disable all
overrides according to step 5.
7. To exit manual override, press SEL.
NOTE: If necessary, repeat step 6.
M17455
R7426A:
R7426B:
R7426C:
1
1
WHEN POWER IS APPLIED, THE DISPLAY
FLASHES MODEL CODE:
Display Description
hour:minutes Clock (A = am, P = pm)
month.day.year Date
I01 Main Sensor I01
CP.1 Main Setpoint CTRP1
I02 Limit or Cascade Sensor I02
CP.2 Limit/Cascade Setpoint CTRP2
I03 Outdoor Air Compensation Sensor I03
O1 Output 1
O2 Output 2
O3 Output 3
M21038
AND
NO PARAMETER
VALUE CHANGE
NO
OUTPUT FIXING
OUTPUT FIXING
RELEASE OF
OUTPUT FIXING
SET
SET
SET
SEL
SEL
SEL
TO ADJUST
VALUE
TO ADJUST
VALUE
OUTPUT
ADJUSTMENT
MODE
OUTPUT
SELECTION
MODE
STANDARD
DISPLAY
MODE
PARAMETER/
CONFIG.
SELECTION
MODE
PARAMETER/
CONFIG.
ADJUSTMENT
MODE
SET
SELSEL
SET
AND
AND
OR OR
 Loading...