Remote
Control
15
Fig. 26
Fig. 27
Remote
Battery
Battery Cover
Battery
Compartment
D/CFL Switch
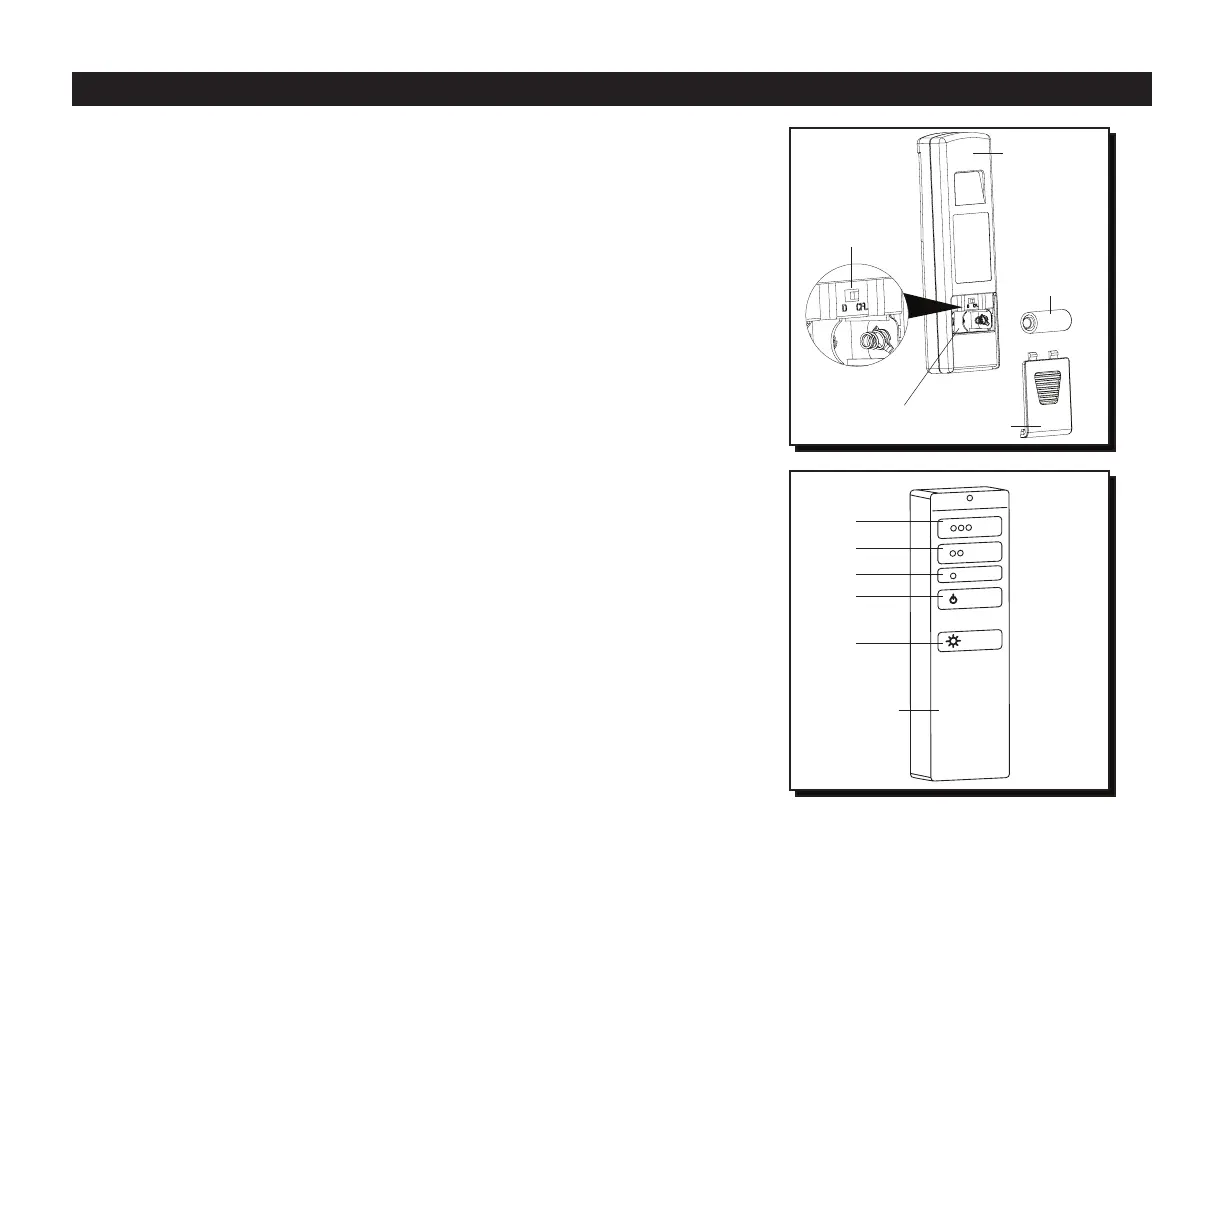
26. Remove the battery cover from the back of the
remote (Fig. 26). After removing the protective
plastic, insert the battery. Replace the battery
cover.
D/CFL Switch: Located inside the battery
compartment of the remote, this switch should
be moved to either “D” for dimmer or “CFL” for
compact uorescent bulbs depending on which
type of bulbs you’ve installed in the fan.
Note: The switch is pre-set to “CFL”. Move the
switch to “D” to correspond with the included
incandescent bulbs which will enable the dimming
function.
Important: The dimmer function does not work with
CFL bulbs.
27. To operate the fan using the remote, press and
release the following buttons (Fig 27) :
1 - High fan speed
2 - Medium fan speed
3 - Low fan speed
4 - Power - Turns the fan off.
Light Delay Off mode - Press and hold the power
button (4) for ve seconds, which will turn off light
after one minute. The LED indicator on the remote
will ash four times to conrm mode setting.
5 - Light Control - Press button to turn lights off and
on (all bulbs). Press and hold light control to dim or
brighten the lights (incandescent bulbs only).
OPERATING INSTRUCTIONS

 Loading...