GB
1. Application
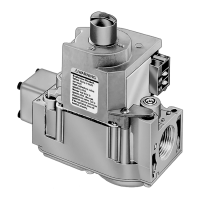
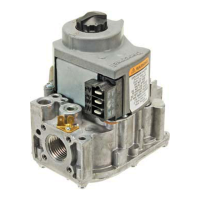
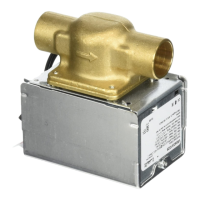
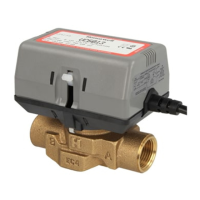
VC series hydronic valves are used in domestic and small
commercial applications to control the flow of hot and/or cold
water or glycol solutions up to 50% concentration. The valves
are NOT suitable for potable water installations. They consist of
an actuator, valve and cartrige.
Both 2-way and 3-way valves are designed for on/off control.
3-way valves can be piped for either diverting or mixing valve
applications for domestic hot water service, in central heating
and/or cooling systems; or for individual room temperature
control.
Depending on model selected, they can be controlled by either a
low or line voltage SPST or SPDT two-position
controller, such as a room thermostat.
Controllers with semiconductor output might be destroyed if not
protected against voltage peaks.
2. Specifications
The following specifications are nominal and conform to gene-
rally accepted industry standards. Honeywell is not responsible
for damages resulting from misapplication or misuse of its
product.
3. Manual Opener
The manual opener (Fig. 4) can be manipulated only when in up
position. This must be done without electrical hook-up. The
motorized valve can be opened by firmly pushing white manual
lever down to midway and in. This holds valve in open position,
and with auxiliary switch models the N.O. switch is closed.
This "manual open" position may be used for filling, venting, or
draining the system, or for opening valve in case of power
failure.The valve can be restored manually to closed position
(stem up) by depressing white manual lever lightly and then
pulling lever out. Valve and actuator will return to the automatic
position when power is restored.
4. Installation
4.1 General notes
4.2 Before installing this product
1. Read these instructions carefully. Failure to follow them could
damage the product or cause a hazardous condition
2. Check and make sure the ratings of this product are suitable
for your application
3. Check the controller for SPDT or SPST output to make sure
it matches the valve actuator selected.
4. Always conduct a thorough checkout when installation is
completed
5. Disconnect power supply before connecting wiring to prevent
electrical shock and equipment damage
4.3 Plumbing
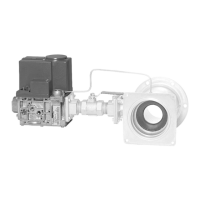
1. While not necessary to remove actuator from body, it can be
removed for ease of installation.
2. You don't need any tool to remove the actuator. The actuator
head is automatically latched to the valve. To remove, (Fig. 2)
press up on latch mechanism (1) located directly below white
manual open lever with thumb. Simultaneously press actuator
down towards body with moderate hand force and turn
actuator counter-clockwise by 1/8 turn (45 degrees). Lift
actuator off valve body.
3. The valve may be installed with flow from A to B, or B to A
(Fig. 1). The valve body may be plumbed in any angle but not
with actuator below horizontal level of valve body. Make sure
there is enough room around actuator for servicing or repla-
cement. Install valve in a good location for future mainte-
nance, leaving an extra 25 mm head clearance required to
remove actuator.
4. Prepare pipes according to valve connections.
5. For compression fitted models, tighten compression nuts
enough to make a watertight seal. Maximum torque limit is
45 Nm for 22 mm compression fitting, and 65 Nm for the
28 mm compression fitting. Take care not to over tighten
6. Either hold valve body in hand (Fig. 3A) or attach adjustable
spanner (38mm or 1-1/2") across hexagonal or flat faces on
valve body (Fig. 3B). If assembling valve train on a bench,
take care not to deform body with vice. Do not place raised
"H" logo between jaws of vice. Excess jaw force can deform
body.
7. Install actuator by reversing process in (2).
4.4 Commissioning hydronic system
For trouble-free operation of product, good installation practice
must include initial system flushing, chemical water treatment,
and use of fine system side stream filter(s).
Put VC actuator manual lever (Fig. 4) in manual open (middle)
position to allow initial system flushing with actuator mounted.
This operation must be done without electrical hook-up
Voltage 230V 50-60Hz
24V 50-60Hz
Power
consumption
6 watts max. at nominal voltage (during
valve position change).
Use 24 V class 2 transformer. Provide 6
VA for transformer and connection wire
size.
Maximum duty cycle 15 %
End switch rating 2.2 A inductive from 5 to 110 Vac,
1.0 A inductive above 110 to 277 Vac.
Min. DC switching capability: 5 mA @ 24
Vdc
Nominal timing Valve opens in 7 seconds ≅ 50 Hz (20%
faster ≅ 60 Hz)
Electrical
termination
With integral 1 meter leadwire cable or
with Molex™ connector
Line voltage models with Molex™
connection are suitable for incorporated
controls only.
Operating ambient
temperature
0...65°C (32...149°F)
Shipping & storage
temperature
-40...+65°C (-40...149°F)
Atmosphere non-corrosive, non-explosive
Min. & max. fluid
temperatures
1...95°C (34...203°F)
Operating pressure
differential
Max. - 4 bar (400 kPa)
Pressure rating Static - 20 bar (2000 kPa)
Burst - 100 bar
Valve materials Body of bronze; cartridge of Ryton™
(polyphenylene sulphide) & Noryl™
(polyphenylene oxide); O-ring seals of
EPDM rubber; stainless steel stem
Insulation class Double insulation
Protection class IP40*
Approval CE
* (see note in 5. Wiring/Warning)
If valve is powered open, it cannot be manually closed
WARNING:The products are intended to be installed by a
trained, experienced service-person and according to the
RATINGS given in the instructions and on the product.
 Loading...