Do you have a question about the Honeywell VR8205 and is the answer not in the manual?
Warnings and procedures for converting between natural and LP gas.
Instructions for connecting the gas control to ignition modules and circuits.
Step-by-step instructions for performing a gas leak test.
Verifying and adjusting gas input and burner ignition for proper operation.
Instructions for checking and adjusting standard, slow-opening, and step-opening regulators.
Performing safety shutdown tests for various control types.
Describes valve positions when the thermostat is not calling for heat.
Details how valves and regulators operate when heat is called.
Explains how servo regulators maintain outlet pressure.
Critical safety instructions for users before lighting appliance.
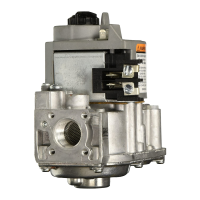
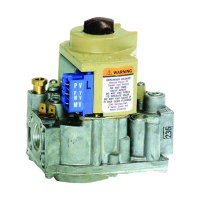
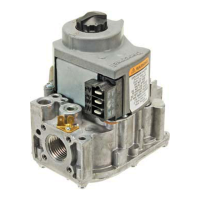
The Honeywell VR8205 and VR4205 are direct ignition dual automatic valve combination gas controls designed for use in gas-fired appliances. These controls integrate several key safety and operational features, including a safety shutoff, a manual valve, two automatic operators, and a pressure regulator. The VR4205 model also includes a conduit cover.
The primary function of these gas controls is to manage the flow of gas to the main burner in direct ignition systems. They are compatible with both natural (and manufactured) gas and liquefied petroleum (LP) gas, depending on the specific model.
The VR8205 is designed for 24 Vac heating appliances, while the VR4205 is for 120 Vac direct ignition modules and heating appliances. Both models feature a solenoid-operated first automatic valve that opens when the thermostat calls for heat and closes when the call for heat ends. A diaphragm-operated second automatic valve, controlled by the regulator, opens under regulator control and closes if the gas or power supply is interrupted, providing an additional layer of safety.
The gas control knob has two positions: ON and OFF. In the OFF position, gas flow to the main burner is mechanically blocked. In the ON position, gas can flow to the main burner under the control of the thermostat and the direct ignition module.
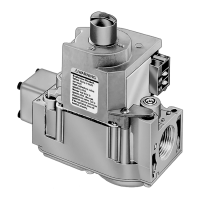
An adjustable servo regulator is integrated into the design to maintain a nearly constant gas output pressure, even when there are wide fluctuations in the gas supply pressure. This ensures stable and efficient burner operation. Inlet and outlet screens are included to prevent contamination.
For electrical connections, the controls use 1/4 inch male quick-connect terminals. The wiring terminal block is color-coded brown, indicating its use in direct ignition control systems.
The VR8205 and VR4205 controls are designed for flexible installation. They can be mounted at any angle between 0 and 90 degrees from the upright position, including vertically, making them adaptable to various appliance configurations. All adjustments and wiring connections are conveniently accessible from the top of the control.
The controls feature a straight-through body pattern, but right-angle adapters are available for both inlet and outlet connections, offering further installation flexibility. They come with 1/2 inch inlet and 1/2 inch outlet connections, with adapters available for 3/8 inch or 3/4 inch pipe sizes.
Inlet and outlet pressure taps are standard and accessible from the top of the control, facilitating easy pressure measurement during installation and troubleshooting.
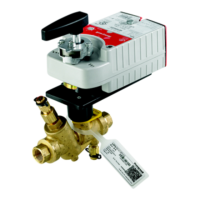
The controls are available in standard, slow-opening, and step-opening models. Slow-opening models gradually increase gas flow to the main burner, providing a smoother ignition. Step-opening models combine two pressure regulators, one for low pressure and one for full-rate pressure, allowing for a controlled initial flame before transitioning to full-rate operation.
When installing, it's crucial to follow the appliance manufacturer's instructions. If adapters are used, they should be mounted carefully, ensuring O-rings are properly seated and screws are tightened to the specified torque to provide a gas-tight seal. Pipe compound should be applied to pipe threads, leaving the two end threads bare, and for LP installations, a compound resistant to LP gas should be used.
A sediment trap must be installed in the gas supply line to prevent contamination of the gas control. The control should be located in a well-ventilated area, high enough to avoid flooding or splashing water, and protected from steam cleaning, high humidity, dripping water, corrosive chemicals, dust, grease accumulation, or excessive heat.
Wiring connections must comply with local codes and ordinances. It's essential to disconnect the power supply before wiring to prevent electrical shock or equipment damage. The thermostat heat anticipator should be adjusted according to the appliance manual.
Before operating the system, a gas leak test must be performed on all pipe connections, including adapters and control inlet and outlet, using a soap and water solution. Bubbles indicate a leak, which must be corrected by tightening connections or replacing parts if necessary.
When turning on the system, the gas control knob should be rotated counterclockwise to the ON position. To turn on the main burner, the thermostat should be set to call for heat. For step-opening models, allow 60 seconds after shutdown before re-energizing to ensure lightoff at step pressure.
Regular preventive maintenance is crucial for these gas controls, especially in applications with heavy system loads, such as commercial cooking, agricultural, and industrial settings. These environments can lead to rapid wear and tear due to frequent cycling (100,000-200,000 cycles per year) or exposure to water, dirt, chemicals, and heat.
A maintenance program should include regular checkout of the gas control and the control system as described in the Startup and Checkout section and the appliance manufacturer's literature. The frequency of maintenance depends on several factors:
The gas control should be replaced if it:
It's important not to disassemble the gas control, as it contains no replaceable components, and attempted disassembly or repair can damage the control. Also, never apply a jumper across or short the valve coil terminals, even temporarily, as this can burn out the heat anticipator in the thermostat or damage the electronic direct ignition (DI) module.
When checking and adjusting gas input and burner ignition, ensure the input rating stamped on the appliance nameplate is not exceeded. If checking gas input by clocking the gas meter, ensure no other gas flow is occurring. If checking with a manometer, the gas control knob must be in the OFF position before removing the outlet pressure tap plug, and the gas supply must be shut off before removing the inlet pressure tap plug. Always replace the cap screw and tighten firmly after adjusting the pressure regulator to prevent gas leakage.
| Voltage | 24V |
|---|---|
| Voltage Rating | 24V AC |
| Frequency | 60 Hz |
| Maximum Load Current | 0.8 A |
| Maximum Pilot Current | 0.25A |
| Terminals | Screw |
| Gas Type | Natural Gas or LP Gas |
| Inlet/Outlet Size | 1/2 in |
| Mounting | Vertical or Horizontal |
| Operating Temperature | -40°F to 150°F (-40°C to 65°C) |
| Operating Temperature Range | -40 to 175°F |