MISCELLANEOUS SYSTEM FIELDS (*174-*181)
∗
∗∗
∗174 Clean Me Reporting Options [0]
(for ESL smoke detectors)
0 = disable; 1 = Clean Me signal reports;
NOTE:
If Clean Me is enabled, you must enter “3” in field ✱56
programming for zone 1 response time.
∗
∗∗
∗177 Device Duration 1, 2 [0] [0]
(used in *80 Menu mode-Device Actions 5/6) 1 2
0 = 15 seconds 6 = 2-1/2 min #+11 = 7 min
1 = 30 seconds 7 = 3 min #+12 = 8 min
2 = 45 seconds 8 = 4 min #+13 = 10 min
3 = 60 seconds 9 = 5 min #+14 = 12 min
4 = 90 seconds #+10 = 6 min #+15 = 15 min
5 = 2 minutes
∗
∗∗
∗181 50/60 Hertz AC Operation [0]
0 = 60 Hz; 1 = 50 Hz
CONFIGURABLE ZONE TYPE OPTIONS (*182-*185)
(see Configurable Zone Type Worksheet on page 7)
∗
∗∗
∗182 Configurable Zone Type 90
1 2 3 4 5 6 7 8 9 10
Enter the appropriate value for each entry, 1-10, based on the charts
provided on the next page. Each entry is the sum of the values of its
selected options
(0-9, #+10=10, #+11=11, #+12=12, #+13=13, #+14=14, #+15=15).
UL: Do not configure zones as a fire alarm or UL burglar alarm zone.
∗
∗∗
∗183 Zone Type 90 Report Codes
IMPORTANT: Use existing Contact ID® codes, if appropriate, or
define unique codes in CID code range 750-789. See important note
in installation instructions.
90 ALARM ID: XXX
TROUBLE ID: XXX
Enter the desired 3-digit Contact ID® report codes for alarms and
troubles occurring on zones assigned to this zone type. Enter the
codes sequentially (all 6 digits). When entering digits, [#] moves
cursor back, [∗] moves forward. Press [∗] when done to continue.
∗
∗∗
∗184 Configurable Zone Type 91
1 2 3 4 5 6 7 8 9 10
Enter the appropriate value for each entry, 1-10, based on the charts
provided on the next page. Each entry is the sum of the values of its
selected options
(0-9, #+10=10, #+11=11, #+12=12, #+13=13, #+14=14, #+15=15).
UL: Do not configure zones as a fire alarm or UL burglar alarm zone.
∗
∗∗
∗185 Zone Type 91 Report Codes
IMPORTANT: Use existing Contact ID® codes, if appropriate, or
define unique codes in CID code range 750-789. See important note
in installation instructions.
91 ALARM ID: XXX
TROUBLE ID: XXX
Enter the desired 3-digit Contact ID® report codes for alarms and
troubles occurring on zones assigned to this zone type. Enter the
codes sequentially (all 6 digits). When entering digits, [#] moves
cursor back, [∗] moves forward. Press [∗] when done to continue.
∗
∗∗
∗189 AUI Device 1 and 2 Enable [1] [1]
(for Touch Screen Style Keypads)
AUI 1 AUI 2
System supports up to two touch screen style keypads (e.g., Symphony
Advanced User Interface, and 6270 Touch Screen Keypad).
AUI Compatibility Note: To ensure proper AUI device operation,
connect only to controls having microprocessor version 3.0 or higher,
and use AUI devices with the following rev levels: 6270 series use
version 1.0.9 or higher; 8132/8142 (Symphony) series use version
1.1.175 or higher.
Touch Screen (AUI) device 1: Must set AUI device address to 1
Touch Screen (AUI) device 2: Must set AUI device address to 2
VISTA-20P: Enter each touch screen keypad’s home partition
0 = disable; 1 = partition 1; 2 = partition 2; 3 = partition 3 (common)
VISTA-15P: 0 = disable; 1 = enable
NOTE: Use of touch screen style keypads does not affect the number
of standard keypads supported.
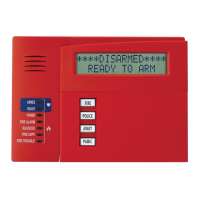
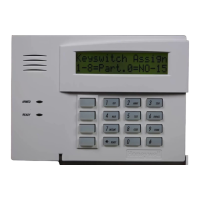
KEYPAD OPTIONS *190-*196
NOTES: 1. Options for keypad address 16 are set by the factory and cannot
be changed.)
2. Each keypad must be assigned a unique address. Keypads
programmed with the same address will give unpredictable results.
∗
∗∗
∗190 Keypad 2 Device Address 17 [0] [0]
†Partition/Enable: Part./ Sound
VISTA-20P: Enter partition where: Enable
†
0 = keypad disabled; 1-3 = part. no. (3 = com)
VISTA-15P: 1 = enable; 0 = disable
Sound: 0 = no suppression
1 = suppress arm/disarm and E/E beeps
2 = Suppress chime beeps only
3 = suppress arm/disarm, E/E, and chime beeps
∗
∗∗
∗191 Keypad 3 Device Address 18 [0] [0]
See field ∗190 for entries. Partition/ Sound
Enable
∗
∗∗
∗192 Keypad 4 Device Address 19 [0] [0]
See field ∗190 for entries. Partition/ Sound
Enable
∗
∗∗
∗193 Keypad 5 Device Address 20 [0] [0]
See field ∗190 for entries. Partition/ Sound
Enable
∗
∗∗
∗194 Keypad 6 Device Address 21 [0] [0]
See field ∗190 for entries. Partition/ Sound
Enable
∗
∗∗
∗195 Keypad 7 Device Address 22 [0] [0]
See field ∗190 for entries. Partition/ Sound
Enable
∗
∗∗
∗196 Keypad 8 Device Address 23 [0] [0]
See field ∗190 for entries. Partition/ Sound
Enable
∗
∗∗
∗197 Exit Time Display Interval [0]
0 = no display; 1-5 = seconds between display refresh
NOTE: If enabled and using only 2-digit fixed-word keypads (e.g.,
6150RF), do not set exit delay time greater than 96 seconds. See Inst.
Instr. for explanation.
∗
∗∗
∗198 Display Partition Number [0]
(VISTA-20P; for Alpha Display Keypads)
0 = no; 1 = yes (partition no. appears on Alpha Display)
∗
∗∗
∗199 ECP Fail Display [0]
0 = 3-digit display (“1” + device address)
1 = 2-digit fixed-display as “91”
– 6 –
 Loading...