EasyManua.ls Logo

Honeywell ZIO TR70-H User Manual

Honeywell ZIO TR70-H
24 pages
To Next Page IconTo Next Page
Page #1 background imageLoading...
Page #1 background image
OPERATING GUIDE
63-2719-03
Zio
®
/Zio Plus LCD Wall Modules
TR70, TR71, TR75 with Sylk
®
Bus
APPLICATION
The Zio TR70 Series (TR70, TR70-H, TR71, TR71-H, TR75,
and TR75-H OS numbers) LCD Wall Modules provide an
operator interface for monitoring and adjusting parameters in
the wall module itself and in the programmable controller
(refer to the
Honeywell Spyder
®
User’s Guide,
form 63-2662,
or the
ComfortPoint™ Programmable Controller User’s Guide,
form 63-2663, depending on the programmable controller
used) to which it is wired. The wall module may be customized
and supports both a contractor and a tenant user interface.
NOTE: This document illustrates the wall module configura-
tion process using information from the
Honeywell
Spyder User’s Guide
(form 63-2662).
The wall module has a snap in mounting to a subbase that
may be mounted on a wall, on a standard utility conduit box, or
on a 60 mm wall outlet box. Wiring connections to the wall
module are made through a cutout in the back of the wall
module.
All models have a space temperature sensor, network bus
jack, and an LCD panel with three softkeys and two Up/Down
adjustment keys. Models with -H also include an onboard
humidity sensor.
PREFACE
This Operating Guide is intended to provide configuration
information (using the Niagara Workbench tool) and a general
overview of the TR70 Series operator interface. Configuration
begins with “Initial Power-Up” on page 2, and the general
overview begins with “Operating the Zio Wall Module” on
page 19.
It is intended to guide you through the features and operation
of the TR70 Series as you interface with the programmable
controller and establish pre-programmed or custom
configurations.
Fig. 1. LCD Wall Module features.
Contents
Application ........................................................................ 1
Preface ............................................................................. 1
TR70 Series Features ....................................................... 2
Compatibility ............................................................. 2
Initial Power-Up ................................................................. 2
Setup and Configuration ................................................... 3
Initial Setup and Configuration .................................. 3
Selecting the Wall Module ......................................... 3
TR71/TR75 Labels .................................................... 3
Navigation and Memory Usage ................................. 3
Wall Module Configuration ........................................ 4
General Settings ................................................... 5
Categories and Parameters .................................. 5
Home Screen Options ........................................... 9
Occupancy and Override ...................................... 10
Fan Command ....................................................... 12
System Status and Command .............................. 13
Schedule/Time ...................................................... 14
Password ............................................................... 15
Preview .................................................................. 16
Completing the Setup and Configuration .................. 17
Operating the Zio Wall Module ......................................... 19
Contractor Mode Operation ...................................... 19
Tenant Mode Operation ............................................ 22
LCD PANEL
M27344
SOFTKEYS (3)
UP/DOWN
ARROW KEYS
NETWORK BUS PORT (ON BOTTOM OF CASE)
Question and Answer IconNeed help?

Do you have a question about the Honeywell ZIO TR70-H and is the answer not in the manual?

Honeywell ZIO TR70-H Specifications

General IconGeneral
BrandHoneywell
ModelZIO TR70-H
CategoryThermostat
LanguageEnglish

Summary

Operating Guide

Application Overview

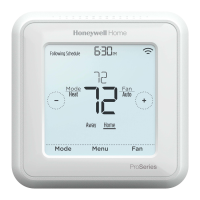
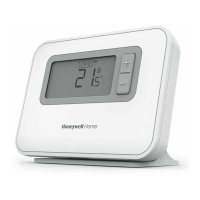
Describes the wall modules' function as an operator interface for monitoring and adjusting controller parameters.

Preface and Introduction

Outlines the document's purpose for configuration information and a general overview of the TR70 Series interface.

TR70 Series Features

Compatibility with Controllers

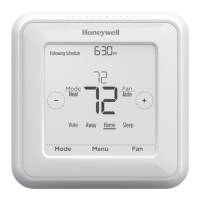
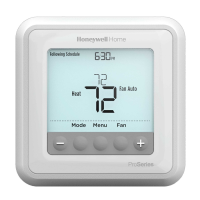
Details compatibility of TR70, TR71, TR75 Series LCD Wall Modules with Spyder or ComfortPoint controllers.

Initial Power-Up Procedure

Guides users through the initial power-up sequence before configuring the wall module.

Setup and Configuration

Initial Setup and Configuration Steps

Details the initial steps for configuring the wall module using the Niagara Workbench Tool.

Configuration Tools and Features

Covers bus address, module selection, navigation, memory usage, and TR71/TR75 label characters.

Memory Usage Details

Save Button Functionality

Explains the function of the SAVE button for entries and selections within the configuration.

Wall Module Configuration Steps

Guides through the process of configuring the wall module by accessing the Configuration Wizard.

General Settings Configuration

Categories and Parameters Management

Allows creation, editing, and deletion of categories and parameters for the wall module.

Category Details Configuration

Details how to enter category names, descriptions, and view parameter counts.

Parameter Configuration

Adding and Editing Parameters

Describes how to add, edit, or remove parameters under each category in the configuration wizard.

Managing Categories and Parameters

Explains how to cut, copy, paste, and delete categories and parameters using context menus.

Parameter Types and Limits

Parameter Options Explained

Defines parameter types like Controller Value, Value From Wall Module, and Network Setpoints.

Enumerated Values Configuration

Guides on displaying meaningful enumerated values using the Enumerated option.

High/Low Limit Parameter Linking

Zio Enum Library Usage

Describes how to select from or define enumerated values using the Zio Enum Library dialog box.

Home Screen Options Configuration

Setting the Default Home Screen

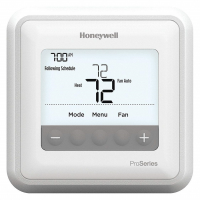
Explains how to select and set the default Home screen displayed on the wall module.

Adding and Changing Home Screens

Details the process of creating or modifying Home screens, including option name and type.

Occupancy and Override Settings

Enabling Occupancy Override

Describes how to enable the Occupancy Override feature and configure valid override states.

Occupancy Status Display Options

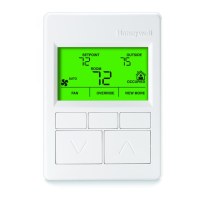
Explains how the occupancy and override status is displayed on the LCD screen.

Override Settings Details

Timed Override Settings (Hours/Days)

Details how to set timed overrides for Occupancy, Unoccupied, and Standby states.

Fan Command Configuration

Enabling Fan Command

Describes how to enable fan command functionality and select fan states.

Selectable Fan State Values

Lists the available fan state values such as 2-state, 3-state, and 5-state.

System Status and Command

Displaying System Status

Explains how to enable the System Status line and the System softkey on the LCD.

Enabling System Command

Details how to enable system command functionality and select valid system commands.

Schedule and Time Configuration

Schedule/Time Options for TR75

Provides access to Spyder schedule and time clock for the TR75 model.

Schedule/Time Options for TR70/TR71

Notes that Schedule/Time options are not supported for TR70/TR71 models.

Password Protection Configuration

Assigning Password for TR71/TR75

Details how to configure a password for TR71/TR75 to limit access to contractor level changes.

Previewing Configuration

Preview Screen Functionality

Explains how to verify the configuration and setup parameters using the preview screen.

Completing Setup and Configuration

Custom Configuration Saving

Details saving a custom configuration to the library using the Save to Library button.

Confirm Memory Usage Limits

Guides on checking memory usage to ensure it is within acceptable limits before finishing.

Linking Slots on the Wire Sheet

S-Bus Wall Module Block Integration

Describes dropping the S-Bus Wall Module function block into existing applications and linking slots.

Operating the Zio Wall Module

Contractor Mode Operation

Details contractor mode operations, including accessing setup and customizing the tenant view.

Contractor Home Screen Softkeys

Explains the function of softkeys on the contractor's Home screen for setting up the tenant interface.

View More Functionality

Setting Tenant View More Access

Describes how to provide parameter access (view or adjustable) to the tenant via the VIEW MORE softkey.

Using the Parameters Softkey

Explains how contractors use the PARAMETERS softkey to monitor and adjust controller parameters.

Sample Contractor LCD Displays

Editing Schedule or Time

Guides on modifying the schedule and changing the Spyder's time using the wall module.

Tenant Mode Operation

Tenant Home Screen Softkeys

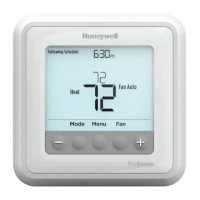
Details the softkeys available on the tenant's Home screen for FAN, OVERRIDE, and SYSTEM & VIEW MORE.

Tenant Fan Adjustment

Explains how tenants adjust fan settings based on configured fan options (2, 3, or 5 position).

Tenant Override Functionality

Describes how tenants can override Occupancy settings using the OVERRIDE softkey.

Tenant System and View More

Tenant System State and Parameter View

Explains how tenants change system state and view/adjust configured parameters.

Tenant Home Screen Display Examples

Illustrates typical tenant home screens with various parameter combinations.

Related product manuals