2
USING YOUR CLEANER
BEFORE YOU BEGIN CLEANING
1. Release the clean water tank by sliding the water release button upwards and
remove tank from cleaner main body. [5]
2. Pull the cap on the Water Tank to open. [6]
3. Fill the clean water tank with cold tap water. Replace cap [7] and ret water tank.
Do not add any chemicals, detergents or perfumes to the clean water tank.
NOTE: In order to signicantly reduce mineral build-up and prolong the life of your steam
mop the use of distilled or de-mineralized water in the unit is highly recommended.
4. Attach a Textile Pad to the base of the Floor Head. [8]
IMPORTANT: Always unplug the cleaner when adding water or changing a Textile Pad.
NOTE: Wash the Textile Pad prior to use to remove any lint.
STEAM CLEANING HARD FLOORS
NOTE: Always sweep or vacuum the oor prior to use to remove any loose
dirt or debris.
IMPORTANT: Do not use the cleaner without a Textile Pad attached to the
Floor Head.
NOTE: Do not use the Carpet Glider when cleaning hard oors.
1. Plug the steam cleaner into the main power. Press the power on/off button, the
power on light (red) will illuminate.
2. After a few seconds the steam ready light (green) will illuminate indicating the
cleaner is ready for use.
3. Recline the cleaner by placing a foot on the oor head and lowering the main body
towards the oor. [11]
4. To produce steam press the Steam Trigger Button. [12]
5. Move the cleaner slowly backwards and forwards paying particular attention to high
trafc areas. [13]
6. Variable steam release control are used to select Low, Medium or High volume of
steam, depending on your specic cleaning requirement. [14]
Steam cleaning hard oor - intensive clean
Use the triangular oor brush for hard oors that require deep cleaning. Please note that
there is no mop and the area will have to be dried separately.
NOTE: Always sweep or vacuum the oor prior to use to remove any loose dirt or debris.
1. Remove the triangular oor brush from the oor head by pressing the release pedal
at the rear of the oor head. [15]
2. Plug the steam cleaner into the main power.
The power on light (red) will illuminate
.
After a few seconds the green Steam Ready light will illuminate indicating the
cleaner is ready for use.
3. Recline the cleaner by placing a foot on the oor brush and lowering the main body
GETTING TO KNOW YOUR CLEANER
A. Steam Release Trigger
B. Handle Assembly
C. Upper&Lower Cord Storage Hooks
D. Power Cord
E. Handheld Release Button
F. Handheld Steam Release Trigger
G. Cleaner Main Body
H. Triangular Brush Release Pedal
I. Triangular Brush
I2
Floor Head*
J.
Handle Fix Location
K. Variable Steam Release Control Slider Low, Medium & High
L. Power On Indicator Light ( Metallic Red )
M. Steam Ready Light ( Green )
N. Power On /Off Button
O. Clean Water Tank
P. Clean Water Tank Release Button
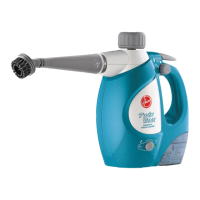
Q. Conic Tool
R. Hose
S. Curved Nozzle
T. Round Brush
U. Small Metal Brush
V. Big Metal Brush
W. Window Squeegee
X. Small Cloth
Y. Textile Pad
Z. Carpet Glider
AA. Carpet Glider Release Pedal
AB. Bolt
ASSEMBLING YOUR CLEANER
Remove all components from the packaging.
1. Line up the ergonomic handle to the main body of the cleaner and x in position with
the supplied Bolt. [1,2]
2. Assemble the main body of the cleaner to the Triangular Brush. [3]
3. Assemble the main body of the cleaner to the oor Head or assemble the Triangular
Brush into the Floor Head*. [4]
GB
*Certain Models Only