! Cut the tube straps, being careful
not to damage the tube and
power cord.
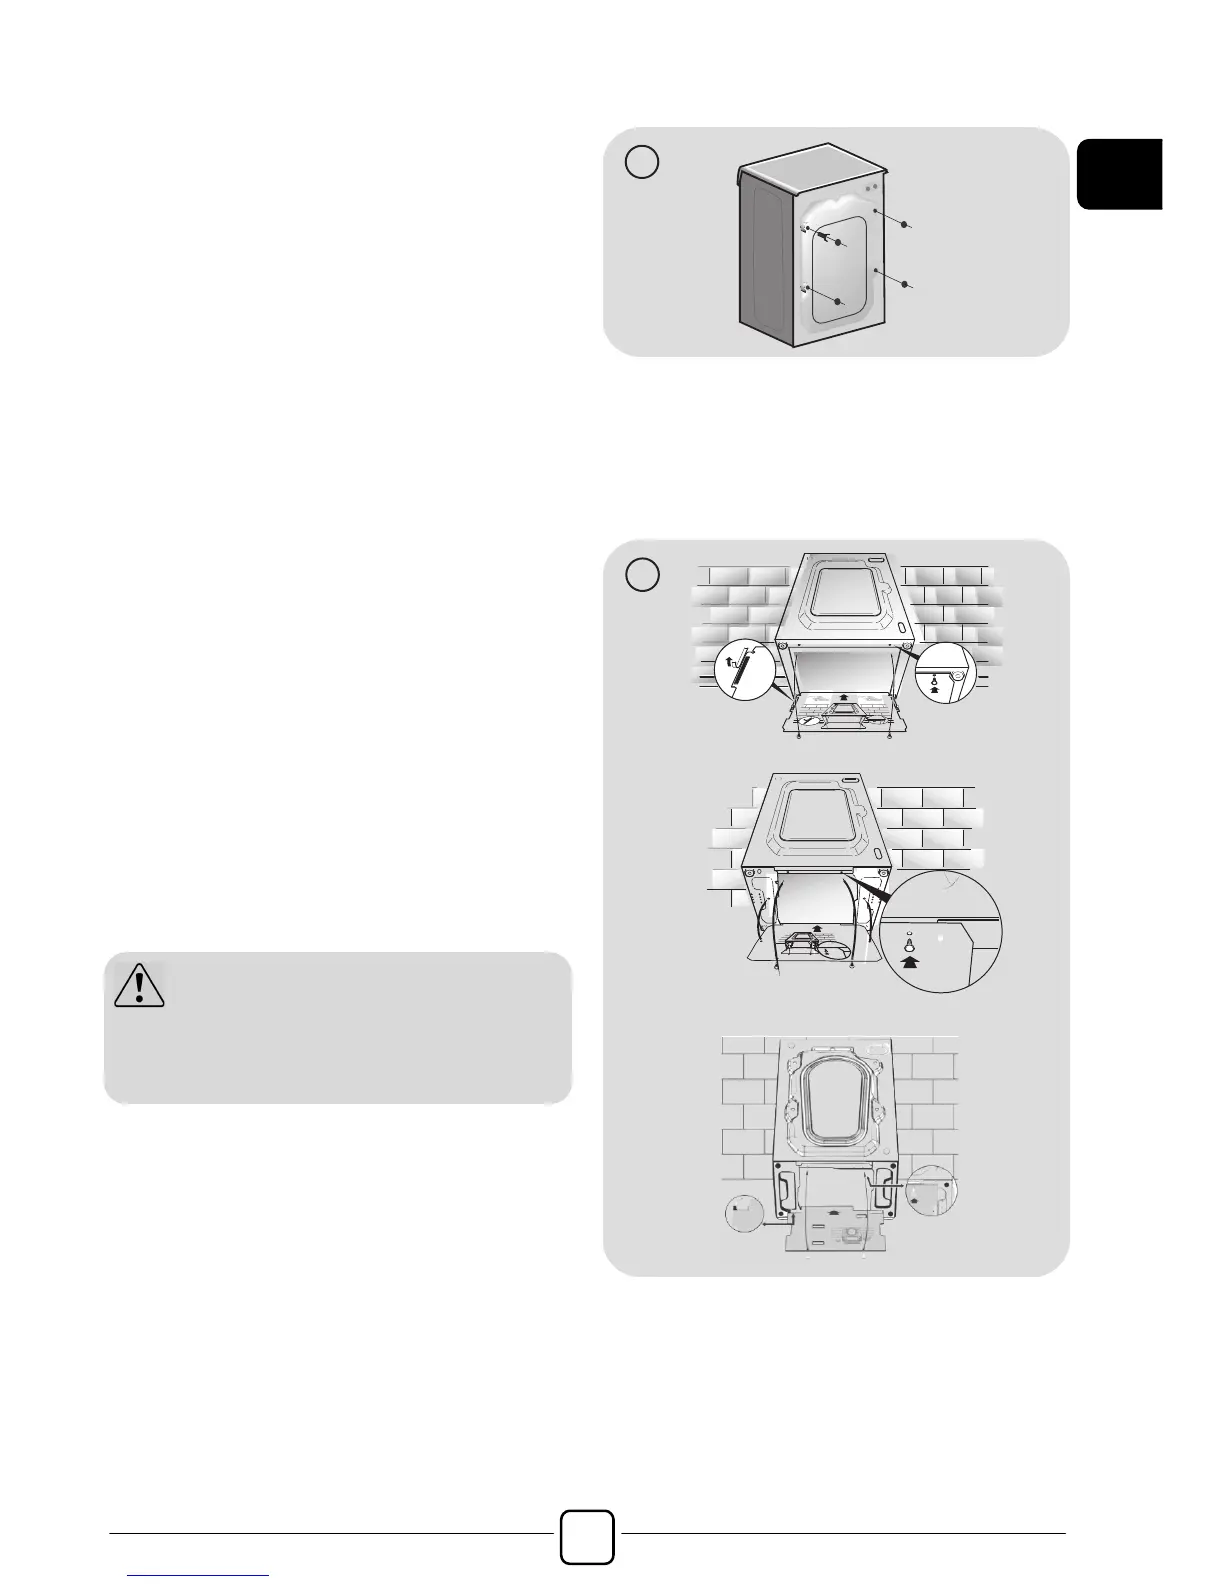
! Unscrew the 2 or 4 screws (A) on
the back and remove the 2 or 4
shims (B) as illustrated in figure
1.
! Close the 2 or 4 holes using the
plugs included in the instruction
envelope.
! If the washing machine is built-in,
after cutting the hose straps,
unscrew the 3 or 4 screws (A)
and remove the 3 or 4 shims (B).
! In some models, 1 or more
shims will fall inside the machine:
tilt the washing machine forward
to remove them. Close the holes
using the plugs found in the
envelope.
! Place the polionda sheet on the
bottom as shown in figure 2
(according to the model, consider
version A, B or C).
 Loading...