EasyManua.ls Logo

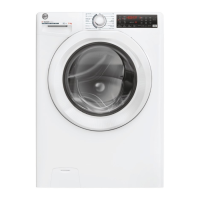
Hoover H3W 4105TAE/1-80 - User Manual

Hoover H3W 4105TAE/1-80
28 pages
Print Icon
To Next Page IconTo Next Page
Loading...
EN

Questions and Answers

  • R
    Randall RoseAug 12, 2025
    Why my Hoover H3W 4105TAE/1-80 Washer does not work / start?
    • P
      Paul JenningsAug 12, 2025
      If your Hoover Washer isn't working or starting, ensure it's properly plugged into a working power socket and that the power is on. Test the wall socket with another appliance. Also, check that the door is correctly closed, and the required program is selected with the start button pressed. Make sure the washer isn't in pause or time delay mode.
  • E
    Eric CameronAug 16, 2025
    Why is there water leaked on the floor near my Hoover Washing machine?
    • B
      Briana HoAug 16, 2025
      If you see water leaked on the floor near your Hoover Washing machine, it could be due to a leak from the seal between the tap, supply hose, and fill valve; in this case, replace it and correctly tighten the hose connections. Also, make sure the front filter is correctly closed.
  • D
    Daniel TownsendAug 20, 2025
    What to do if my Hoover H3W 4105TAE/1-80 Washer does not spin?
    • M
      Michelle WatersAug 20, 2025
      If your Hoover Washer is not spinning, try these steps: First, remove the load, de-tangle it, reload it, and restart the spin program. If water hasn't completely drained, wait a few minutes. Also, some models have a "no spin" function, so ensure it's not selected. Check the selected options and their effect on the spin cycle. Finally, using too much detergent can impede the spin cycle, so ensure you're using the correct amount.
  • J
    Joseph RodriguezAug 25, 2025
    Why is my Hoover H3W 4105TAE/1-80 Washer making strong vibrations / noises during the spin cycle?
    • K
      Kristen MaddoxAug 25, 2025
      To address strong vibrations or noises during the spin cycle of your Hoover Washer, first, ensure the appliance is fully leveled by adjusting the feet. Next, verify that all transport screws, rubber bungs, and spacer tubes have been removed. Finally, check the drum for any foreign objects like coins or buttons.
  • C
    Christopher BlanchardAug 27, 2025
    What to do if my Hoover H3W 4105TAE/1-80 Washer shows E7 error / 7 flashes?
    • R
      Robin SnyderAug 28, 2025
      If your Hoover Washer displays 'E7' or the LEDs flash 7 times, ensure the door is correctly closed and that no clothes are preventing it from fully closing. If the door is locked, turn off and unplug the washing machine, wait 2-3 minutes, and then reopen the door.
  • T
    Thomas ReyesAug 31, 2025
    How to fix Hoover Washer E2 error / 2 flashes?
    • A
      Andrew OwensAug 31, 2025
      If your Hoover Washer displays 'E2' or the LEDs flash 2 times, make sure the water supply tap is open and that the water supply hose isn’t bent, kinked, or trapped. Ensure the drain pipe is at the proper height. Close the water supply tap, unscrew the filler hose, and check that the “anti-sand” filter is clean and not blocked. Also, check that the filter is not clogged and that there are no foreign bodies inside the filter compartment.
  • C
    Charlotte MatthewsSep 4, 2025
    What does E3 error / 3 flashes mean on Hoover H3W 4105TAE/1-80 Washer?
    • J
      jacob70Sep 4, 2025
      If your Hoover Washer displays 'E3' or the LEDs flash 3 times, check that the filter is not clogged and that there are no foreign bodies inside the filter compartment. Also, make sure the drain hose isn’t bent, kinked, or trapped. Ensure the home drainage system is not blocked, allowing water to flow freely; try draining water in the sink.
  • S
    Susan CunninghamSep 8, 2025
    What to do if my Hoover Washer shows E4 error / 4 flashes?
    • C
      courtneycochranSep 8, 2025
      If your Hoover Washer displays 'E4' or the LEDs flash 4 times, ensure the correct amount of detergent is being used and that the detergent is designed for use in a washing machine.

Summary

General Safety Rules

Electrical Connections and Safety Instructions

Guidance on electrical safety, earthing, socket compatibility, and cord usage.

Installation

Water Supply Hose Connection

Connecting the water hose to the supply tap using the provided hose.

Aquastop Safety Feature

Explanation of the AQUASTOP device and its function in case of tube deterioration.

Aquaprotect Supply Tube

Description of the AQUAPROTECT supply tube with guard for leak detection.

Detergent Drawer

Detergent Drawer Compartment Overview

Details on the three compartments for prewash, washing detergent, and additives.

Practical Hints

Practical Hints: Detergent Dosing

Tips on selecting detergent and using the correct amount for optimal results.

Cleaning and Maintenance

Cleaning and Maintenance: Pump Filter Cleaning

Procedure for checking and cleaning the pump filter to prevent blockages.

Remote Control (Wi-Fi)

Remote Control: Enabling Remote Operation

Instructions for enabling remote control via the Hoover Wizard app.

Controls and Programs

Controls: Start;Pause, Pausing, and Cancelling Cycles

How to start, pause, resume, and cancel wash cycles using the START/PAUSE button.

Troubleshooting and Warranty

Troubleshooting: Error Code Format

Explains how error codes are displayed on models with and without displays.

Troubleshooting: Common Error Codes and Solutions

Provides solutions for errors like no water load, no drain, and foam issues.

Troubleshooting: Other Anomalies

Addresses issues such as the machine not working, water leaks, and spin problems.

Overview

This document is a user manual for a Hoover washing machine, specifically models H3W/H3WS 5D/5T. It provides comprehensive information on the appliance's operation, installation, maintenance, and troubleshooting.

Function Description

The Hoover washing machine is designed for household use and similar applications, such as staff kitchen areas, farmhouses, hotels, motels, and bed and breakfast environments. It automatically adjusts water levels based on the type and quantity of laundry, aiming to reduce energy consumption and washing times. The machine offers various wash programs tailored to different fabric types and soiling levels, including specific programs for cottons, synthetics, wool, delicate items, and specialized care like "Allergy Care" and "Fresh Care." Some models are equipped with Wi-Fi technology, allowing for remote control via the Hoover Wizard App. Certain models also feature automatic detergent and softener dosing systems.

Important Technical Specifications

  • Water Pressure: Minimum 0.05 MPa / Maximum 0.8 MPa (0.05 MPa dispenses approximately 1 liter of water in 10 seconds).
  • Spin Speed: Refer to the rating plate for specific RPM.
  • Power Input / Current Fuse Amp / Supply Voltage: Refer to the rating plate.
  • Maximum Load Capacity: Depends on the model (refer to the control panel).
  • Electrical System: Must be earthed and compatible with the appliance's plug.
  • Water Supply Connection: Requires the hose-sets supplied with the appliance; old hose-sets should not be reused.
  • Drain Hose Height: Between 50 cm and 85 cm above the floor.
  • WEEE Compliance: Marked according to European directive 2012/19/EU on Waste Electrical and Electronic Equipment.
  • Standard Programmes (EU) No 1015/2010 & No 1061/2010: ECO 40-60 Programme at 40°C and 60°C.
  • Standard Programme (EU) No 2019/2023: ECO 40-60 Programme.

Usage Features

  • Program Selection: Turn the program selector to the desired program.
  • Adjustable Settings: Modify wash settings, including temperature, spin speed, and options like "Extra Rinse," "Prewash," "Rapid," and "Stain Level."
  • START/PAUSE Button: Initiates or pauses the selected wash cycle.
  • DELAY START Button: Allows pre-programming the wash cycle to delay its start by up to 24 hours.
  • TEMPERATURE SELECTION Button: Changes the wash temperature, with safeguards to prevent exceeding the maximum allowed for fabric protection. Cold wash is possible by turning off all indicators.
  • SPIN SPEED Button: Reduces or cancels the maximum spin speed.
  • RAPID / STAIN LEVEL Button: Offers two options depending on the program: "Rapid" for selecting one of three quick wash durations (14', 30', 44') or "Stain Level" for adjusting wash intensity across three levels based on fabric soiling.
  • EASY IRON Option (certain models): Minimizes creases by eliminating intermediate spins or reducing the intensity of the last one.
  • STEAM Option (certain models): Adds a specific steam treatment to some washing cycles to relax folds, shorten ironing times, regenerate fibers, and remove smells.
  • CHILD LOCK (F+G buttons): Locks the control panel keys to prevent accidental changes during a cycle.
  • Digital Display: Provides real-time information on cycle duration, selected options, and machine status.
  • DOOR LOCKED Indicator Light: Illuminates when the door is fully closed and locked. For safety, the door remains locked for 2 minutes after a cycle or until water levels and temperature are safe.
  • Kg Mode Indicator Light (Cotton and Synthetics programs only): Appears during the initial minutes of the cycle while the intelligent sensor weighs laundry and adjusts cycle time, water, and electricity consumption.
  • Wi-Fi Connectivity (certain models): Allows remote control via the Hoover Wizard App. The Wi-Fi indicator light shows connection status (fixed on for remote control enabled, slow flashing for disabled, quick flashing for connection issues, slow blinking for Wi-Fi network reset, and on for 1 second then off for open door).
  • Automatic Dosage (some models): Precisely measures detergent and softener.
  • Liquid Detergent Cup (some models): Placed in compartment "2" for liquid detergent or bleach during the "Rinse" program.

Maintenance Features

  • Exterior Cleaning: Disconnect from power, clean with a damp cloth, avoiding abrasives, alcohol, and diluents.
  • Detergent Drawer Cleaning: Regularly remove and clean the drawer under running water to prevent residue accumulation. For models with automatic dosing, empty all compartments before cleaning. Pull out the drawer completely by pressing the release button, being careful of detergent leakage. Fill with hot water, shake, empty, and reinsert. Avoid acid products or aggressive detergents.
  • Pump Filter Cleaning: Recommended 5-6 times a year. Disconnect from power, ensure drum is empty. Place an absorbent cloth under the filter. Unscrew the filter counter-clockwise, remove, clean, and replace by turning clockwise until locked horizontally. Apply liquid soap to the seal for easier refitting.
  • Prolonged Disuse/Moves: If stored in a non-heated room, drain all water from pipes. Disconnect from power. Detach the drain tube, lower it to fully drain water into a bowl, then re-secure it. Keep the door glass and gasket clean. For models with automatic dosing, remove the detergent drawer and keep it horizontal to prevent leakage when tilting or moving the machine.
  • Warranty: The product is guaranteed under specified terms and conditions. Original spare parts are available from Authorised Customer Service Centres.
  • Troubleshooting Guide: Provides solutions for common error codes (E2, E3, E4, E7) and anomalies (machine not starting, water leakage, machine not spinning, strong vibrations/noises).


Hoover H3W 4105TAE/1-80 Specifications

General IconGeneral
BrandHoover
ModelH3W 4105TAE/1-80
CategoryWasher
LanguageEnglish

Related product manuals