Do you have a question about the Hoover HOZP717IN and is the answer not in the manual?
This document serves as a comprehensive manual for a Hoover oven, model HOZP717IN, providing detailed instructions for its safe operation, maintenance, and installation. It is structured to guide users through various aspects of the appliance, from initial setup to advanced cooking functions and troubleshooting.
The manual begins with crucial safety warnings, emphasizing that the oven and its accessible parts become hot during use, requiring caution, especially around children. It stresses the importance of switching off the appliance before replacing the bulb to prevent electric shocks. For automatic cleaning cycles, specific preparatory steps are outlined: cleaning the oven door, removing coarse food residues, and taking out all accessories and sliding racks. For ovens equipped with a meat probe, it's essential to close its hole with the provided nut when not in use or during cleaning. Children under 8 must be supervised, and older children or individuals with limited capacities should only use the appliance with supervision and proper instruction. Harsh or abrasive cleaners and sharp metal scrapers are prohibited for cleaning the oven door glass to prevent damage. The oven must be switched off before removing removable parts for cleaning. Only the recommended meat probe should be used, and steam cleaners are explicitly forbidden. Electrical safety is paramount, with instructions for connecting the appliance to a suitable power supply with an earth contact. The earth conductor is yellow-green, and connection should be performed by a qualified professional. Incompatible sockets must be replaced, and an omnipolar breaker may be used for connection, ensuring it's easily accessible. Damaged power cables must be replaced by the manufacturer or customer service. Failure to comply with these guidelines can compromise safety and invalidate the warranty. Any spilled material should be removed before cleaning. During pyrolytic cleaning, surfaces can become hotter than usual, necessitating keeping children at a safe distance. The oven should not be installed behind a decorative door to prevent overheating. When placing shelves, ensure the stop is directed upwards and towards the back. Aluminum foil or other protective materials should not line the oven walls as they can melt and damage the enamel. The oven door seal should never be removed.
General instructions thank the user for choosing the product and advise reading the manual carefully. It recommends noting the serial number for future service needs. Upon unboxing, users should inspect for transportation damage and contact a qualified technician if any doubts arise. Packaging materials should be kept away from children. A strong smell may occur during the first use due to insulation panel glue, which is normal and will dissipate. The manufacturer disclaims responsibility for damages resulting from non-observance of instructions. The manual notes that specific functions and accessories may vary by model. The oven is intended solely for cooking food; any other use is considered improper and dangerous. Users are warned against pulling the power cable, touching the appliance with wet hands, or using adaptors/extension cables. In case of malfunction, the appliance should be switched off and not tampered with.
After each use, a minimum of cleaning helps maintain the oven's cleanliness. Users are advised against lining oven walls with aluminum foil or single-use protection, as direct contact with hot enamel can cause melting and deterioration. To prevent excessive soiling and strong smells, it's recommended to avoid cooking at very high temperatures; instead, extend cooking time and lower the temperature slightly. Only dishes and baking molds resistant to high temperatures should be used.
Regarding installation, the manufacturer is not obligated to perform it, and faults arising from incorrect installation are not covered by the guarantee. Installation must be carried out by professionally qualified personnel, as incorrect installation can cause harm. The oven can be placed in a column or under a worktop, requiring good ventilation to ensure proper air circulation for cooling and protecting internal parts. Specific openings, as detailed on the last page, must be made according to the fitting type.
The appliance is labeled according to European Directive 2012/19/EU for Waste Electrical and Electronic Equipment (WEEE). WEEE contains pollutants and reusable base elements, requiring specific treatments for proper disposal and material recovery. Individuals play a crucial role in preventing environmental problems by ensuring WEEE is not treated as domestic waste but taken to dedicated collection areas or returned to vendors when purchasing a new appliance.
For environmental protection and energy saving, users are encouraged to avoid pre-heating the oven and to fill it whenever possible. Opening the oven door infrequently helps retain heat. Switching off the oven 5-10 minutes before the end of cooking utilizes residual heat. Keeping seals clean prevents heat dispersal. For those with hourly tariffs, the "delayed cooking" program can shift cooking to reduced tariff times.
The appliance's parts that contact foodstuffs comply with EEC Directive 89/109. The CE mark confirms compliance with all relevant European safety, health, and environmental requirements.
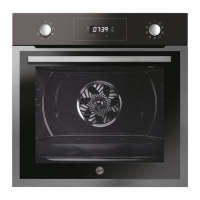
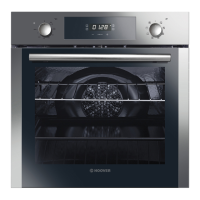
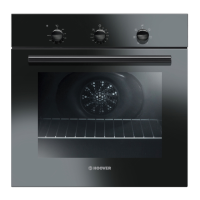
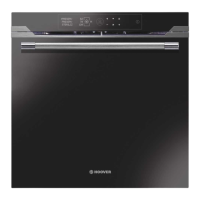
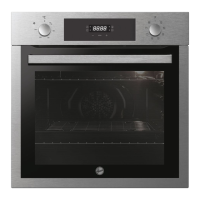
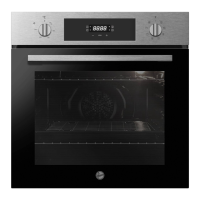
The oven features a control panel, shelf positions (with lateral wire grids if included), a metal grill, a drip pan, a fan (behind a steel plate), and an oven door.
Accessories include:
Before first use, a preliminary cleaning is required: wipe external surfaces with a damp soft cloth, wash all accessories, and clean the oven interior with hot water and washing-up liquid. Then, set the empty oven to maximum temperature for about an hour to remove any lingering smells.
The display shows the clock when the oven is off. When inactive, all functions are available except cooking duration and end of cooking. If the clock is not set, the oven will not work, displaying "12:00" and only allowing access to functions via the "Extra" key.
HOOVER ONEFI: Provides a link for detailed information on connecting and using the OneFi appliance.
Language Setting: Can be set when the oven is off by pressing "Extra" and "Select" simultaneously for 3 seconds. The current language is shown and can be changed using "<" or ">" keys, confirmed by "SELECT." Available languages include Italian, English, French, and German.
SELECT: Any selection must be confirmed within 15 seconds, or it will be canceled. Changing menus without confirmation loses the selection.
"HOT" ICON: When cooking finishes or the oven switches off and is still hot, the display alternates between the current time and "HOT" every 3 seconds.
The oven offers various cooking modes, each with default and range temperatures:
Regular cleaning extends the appliance's lifecycle. Always wait for the oven to cool before manual cleaning. Avoid abrasive detergents, steel wool, or sharp objects to prevent damage to enamelled parts. Use only water, soap, or bleach-based detergents.
| Type | Built-in |
|---|---|
| Oven Type | Electric |
| Oven Size | Large |
| Number of Ovens | 1 |
| Energy Rating | A |
| Number of Functions | 8 |
| Self-Cleaning | Yes |
| Dimensions (H x W x D) | 595 x 595 x 568 mm |
| Thermostat Range | 50-250 °C |
| Built-in Display | Yes |
| Oven Interior Light | Yes |
| Number of Lamps | 1 |
| Lamp Power | 25 W |
| Width | 595 mm |
| Height | 595 mm |
| Depth | 568 mm |
| Oven Capacity | 70L |