EasyManua.ls Logo

Hoover Insight User Manual

Hoover Insight
2 pages
To Next Page IconTo Next Page
Page #1 background imageLoading...
Page #1 background image
6
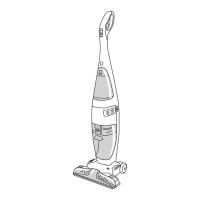
1. Cleaner asseMBlY
A. Handle Assembly
B. Nozzle Assembly
C. Wand with Handle Grip and Hose
D. Cleaner Body
E. Extension Cord
F. Instruction manual
Remove all parts from carton and identify
each item shown.
Make sure all parts are located before
disposing of packing materials.
Carton Contents
WARNING
! !
To reduce the risk of electric shock,
unplug before cleaning or servicing.
attaCh Main BodY to nozzle
1.2 Place the nozzle on a flat surface with
the neck (A) and the support lever (B) in the
upright locked position.
1.3 Hold the bag housing vertically and
place over neck and support lever.
1.4 Push firmly down until the bag housing
locks in place
1.5 Push the end of the nozzle hose (C) into
the opening on the bottom of the bag hous-
ing (D) until it clicks into place.
1.1
A
B
C
D
E
F
1.2
A
B
1.3
1.5
C
D
1.4
Question and Answer IconNeed help?

Do you have a question about the Hoover Insight and is the answer not in the manual?

Hoover Insight Specifications

General IconGeneral
BrandHoover
ModelInsight
CategoryVacuum Cleaner
LanguageEnglish

Summary

1. CLEANER ASSEMBLY

CARTON CONTENTS

Identifies and checks all parts received in the cleaner packaging.

ATTACH MAIN BODY TO NOZZLE

Connects the main cleaner body to the nozzle assembly, ensuring it locks securely.

ATTACH HANDLE

Installs the handle assembly into the cleaner body and secures it with the lock button.

ATTACH HOSE

Connects the hose to the cleaner body and the wand assembly for operation.

POSITION TOOLS

Places the crevice tool and upholstery tool in their designated storage locations on the machine.

POWER CORD ASSEMBLY

Connects the extension cord to the cleaner's power cord and plugs into a grounded outlet.

Related product manuals