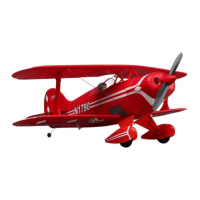
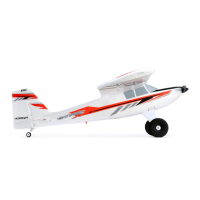
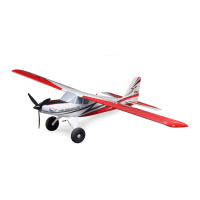
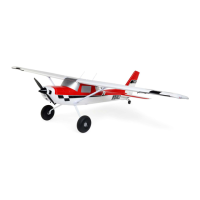
Pitts S-1S BNF Basic and PNP, 850mm
Manual Addendum | Ergänzung zum Handbuch | Addenda au manuel | Addendum al manuale
EFL35500, EFL3575
EN
DE
A
A
B
B
C
C
D
D
E
E
F
F
G
G
Motorwartung
Der Abschnitt Motorwartung der Anleitung ist nicht korrekt. Nachstehend finden Sie die aktualisierten
Schritte zum Zerlegen und Explosionszeichnungen von Propeller und Spinner-Baugruppe.
ACHTUNG: Vor der Motorwartung immer den Flugakku trennen.
Zerlegen
1. Entfernen Sie die Schraube (A) vom Spinnerkegel (B), um den Spinnerkegel zu entfernen. Achten
Sie darauf, die Unterlegscheibe (C) zwischen Kegel und Propellermutter nicht zu lockern.
2. Mit einem kleinen Sechskantschlüssel, den Sie über die Öffnung in die Propellermutter
einführen entfernen Sie die Mutter (D).
3. Den Propeller und die Spinner-Rückplatte (E) entfernen.
4. Die Motorhaube nach vorne ziehen, um die Magneten zu lösen und die Motorhaube zu entfernen.
5. Die drei Sechskantschrauben entfernen, um den Propelleradapter (F) vom Motor zu entfernen.
6. Die vier Schrauben entfernen, um den Motor mit der X-Halterung vom Rumpf zu entfernen.
7. Die Motordrähte von den Drähten des Geschwindigkeitsreglers trennen.
8. Die vier Schrauben entfernen, um den Motor von der X-Halterung (G) zu entfernen.
Alles in umgekehrter Reihenfolge wieder zusammenbauen. Siehe nachstehend Montage von
Propeller und Spinner.
Montage von Propeller und Spinner
1. Schieben Sie die Spinner-Rückplatte auf den Propelleradapter.
2. Montieren Sie den Propeller auf dem Propelleradapter und achten Sie dabei darauf, dass er
wie angezeigt auf die Spinner-Rückplatte ausgerichtet ist, die Flügelblätter sich zwischen
den Schlitzen an der Rückplatte befinden und die eingeprägten Größennummern des
Propellers von der Rückplatte weg weisen.
3. Installieren Sie die Propellermutter am Propelleradapter und achten Sie dabei darauf, dass
Propeller und Rückplatte richtig ausgerichtet bleiben. Das Festziehen erfolgt mit einem
kleinen Sechskantschlüssel, den Sie über die Öffnung in die Propellermutter einführen.
4. Die Schraube durch die Vorderseite des Spinnerkegels einführen.
5. Die Unterlegscheibe über der Schrauben im Spinnerkegel installieren.
6. Den Spinnerkegel an der Spinner-Rückplatte installieren und dabei darauf achten, dass die Laschen
im Spinnerkegel vollständig in die Schlitze der Rückplatte eingesetzt sind, die Unterlegscheibe auf
der Schraube bleibt und die Schraubengewinde in der Vorderseite der Propellermutter.
WICHTIG: Der Spinnerkegel darf nicht ohne die Unterlegscheibe (C) zwischen Kegel und
Propellermutter installiert werden.
Montage des unteren Flügels
Schritt 2 des Abschnitts Montage des Flügels muss folgendermaßen lauten:
2. Sichern Sie den unteren Flügel mit der Gehäuseklemme.
WICHTIG: Der Halterungspfosten des unteren Flügels wird in den Rumpf geschraubt und
muss eventuell ausgerichtet werden, bevor die Gehäuseklemme installiert werden kann.
Schlitze
Ausrichtung von Propeller und Spinner-Rückplatte
Motor Service
The Motor Service section of the manual is incorrect. Below are the updated disassembly steps
and exploded view of the propeller and spinner assembly.
CAUTION: Always disconnect the flight battery before performing motor service.
Disassembly
1. Remove screw (A) from spinner cone (B) to remove the spinner cone. Be careful not to lose
the washer (C) from between the cone and propeller nut.
2. Use a small hex driver inserted through the hole in the propeller nut to remove the nut (D).
3. Remove the propeller and spinner backplate (E).
4. Pull the cowl forward to disengage the magnets and remove the cowl.
5. Remove the three hex screws to remove the prop adaptor (F) from the motor.
6. Remove the four screws to remove the motor with the X-mount from the fuselage.
7. Disconnect the motor wires from the ESC wires.
8. Remove the four screws to remove the motor from the X-mount (G).
Assemble in reverse order. See below for propeller and spinner installation.
Propeller and Spinner Installation
1. Slide the spinner backplate on the propeller adapter.
2. Install the propeller on the propeller adapter, ensuring it aligns with the spinner backplate
as shown, with the blades between the slots in the backplate, and the embossed propeller
size numbers facing away from the backplate.
3. Install the propeller nut on the propeller adapter, ensuring the propeller and backplate stay
in correct alignment, tightening with a small hex driver inserted through the hole in the
propeller nut.
4. Insert the screw through the front of the spinner cone.
5. Install the washer over the screw, inside the spinner cone.
6. Install the spinner cone to the spinner backplate, ensuring the tabs in the spinner cone
fully insert into the slots in the backplate, the washer remains on the screw, and the screw
threads into the front of the propeller nut.
IMPORTANT: Do not install the spinner cone without the washer (C) between the cone and
the propeller nut.
Bottom Wing Installation
Step 2 of the Installing the Wings section should read as follows:
2. Secure the bottom wing with the single body clip.
IMPORTANT: The bottom wing mounting post is threaded into the fuselage and may need to
be adjusted before the body clip can be installed.
SlotsPropeller
Propeller
Propeller and Spinner Backplate Alignment