Do you have a question about the Horizon Hobby Mystique RES 2.9m ARF and is the answer not in the manual?
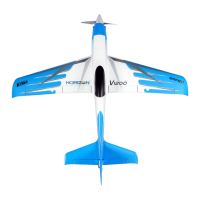
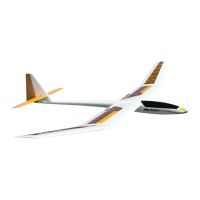
| Material | Balsa and plywood |
|---|---|
| Type | Sailplane |
| Skill Level | Intermediate |
| Wingspan | 2.9m (114 in) |
| Completion Level | Almost Ready-to-Fly (ARF) |
| Radio | 4+ channel |
| Servos | 4 servos required |
| Construction | Balsa and plywood construction |
| Covering | UltraCote |
Explains terms like NOTICE, CAUTION, and WARNING used in the manual.
Instruction to read the entire manual before operating the product.
Steps like unpacking, inspecting parts, charging batteries, and binding radio.
List of small, unillustrated parts.
List of necessary RC components.
Components for the motor and power system.
Battery for receiver-only setup.
Additional items available for purchase.
Explains consequences of incorrect hinge positioning.
Ensuring free movement before gluing hinges.
Explains two setup options for radio control.
Important notice regarding LiPo battery shipping.
Connecting rudder servo to receiver.
Preparing and connecting the stabilator servo.
Securing the servo and routing wires.
Repeating steps for the stabilator servo.
Preparing the surface for tape adhesion.
Connecting servos and routing wires.
How to operate the spoilers.
Positioning the receiver in the fuselage.
Ensuring servo arms clear the receiver.
Assembling the clevis onto the pushrod fitting.
Connecting the clevis to the rudder servo horn.
Routing the pushrod wire through the fuselage.
Reattaching the servo arm and checking alignment.
Aligning the rudder with the fuselage centerline.
Marking and bending the pushrod wire.
Assembling clevis onto stabilator pushrod.
Connecting clevis to stabilator servo horn.
Inserting pushrod and preparing servo arm.
Using glue stick for rod securement.
Sliding rods into the stabilator.
Connecting rods to the fuselage bellcrank.
Setting the neutral position for the stabilator.
Using tape to mark stabilator position.
Centering the stabilator servo.
Bending and trimming the pushrod wire.
Modifying servo arm holes for clearance.
Connecting pushrod to bellcrank.
How spoilers affect flight performance.
Marking the spoiler servo cover.
Taking off the spoiler servo cover.
Transferring marks onto the servo cover.
Connecting the spoiler servo to the receiver.
Using flap channel for spoiler control.
Centering the spoiler servo.
Removing extra servo arm parts.
Mounting the servo onto the cover.
Applying epoxy to secure the servo.
Preparing the control horn by sanding.
Gluing the horn with epoxy.
Showing the spoiler opened for clarity.
Attaching a servo extension to the lead.
Using nuts, clevises, and threaded rod.
Modifying the servo arm hole.
Clearing extra holes in the servo arm.
Connecting the linkage to the servo arm.
Using string and tape to guide the extension.
Using string to pull the servo extension.
Routing linkage through the shear web.
Connecting linkage to the spoiler control horn.
Using hemostats for linkage connection.
Connecting the spoiler servo to the receiver.
Using a switch to operate spoilers.
Installing the spoiler servo cover.
Securing linkage nuts to prevent vibration.
Installing screws for the servo cover.
Using CA to harden threads.
Fastening the servo cover with screws.
Option to skip for pure sailplane build.
Aligning and securing the motor.
Connecting ESC leads to motor.
Ensuring correct motor rotation direction.
Attaching the speed control with tape.
Connecting battery and mounting switch.
Options for connecting ESC to receiver.
Attaching hook and loop tape to battery tray.
Preparing the battery tray for tape adhesion.
Attaching battery with hook and loop tape.
Positioning battery for center of gravity adjustment.
Caution regarding propeller handling.
For pure sailplane builds.
Using epoxy to secure ballast.
Inserting wing pins.
Sealing the covering with an iron and tape.
Fitting the canopy tab.
Applying epoxy to the pins.
Connecting spoiler servo leads.
Inserting the rod into the fuselage.
Using tape to hold the wing assembly.
Determining and marking the CG point.
Steps for balancing the model.
Caution regarding CG adjustment.
Adjusting throws for elevator, rudder, and spoilers.
Impact of spoiler deployment on flight.
Advice on using trims.
Recommending re-binding after setting throws.
Steps for test gliding and trimming.
Basic understanding of thermals.
Tips on identifying thermal locations.
Using wind and birds as indicators.
Adjusting the model's pitch.
Flying for maximum time aloft.
Flying for maximum distance.
Flying against wind or sink.
Steps for test gliding and trimming.
Caution about making small trim adjustments.
Essential checks before flying the model.
Details of what the warranty covers.
Exclusions from the warranty coverage.
Exclusive remedy for defective products.
How to contact for support and service.
Procedure for submitting products for inspection/service.
Service procedures for non-warranty items.
Proof of purchase needed for warranty claims.
General rules for model aircraft operations.
Safety rules specific to radio-controlled aircraft.
Information regarding aviation regulations.