21
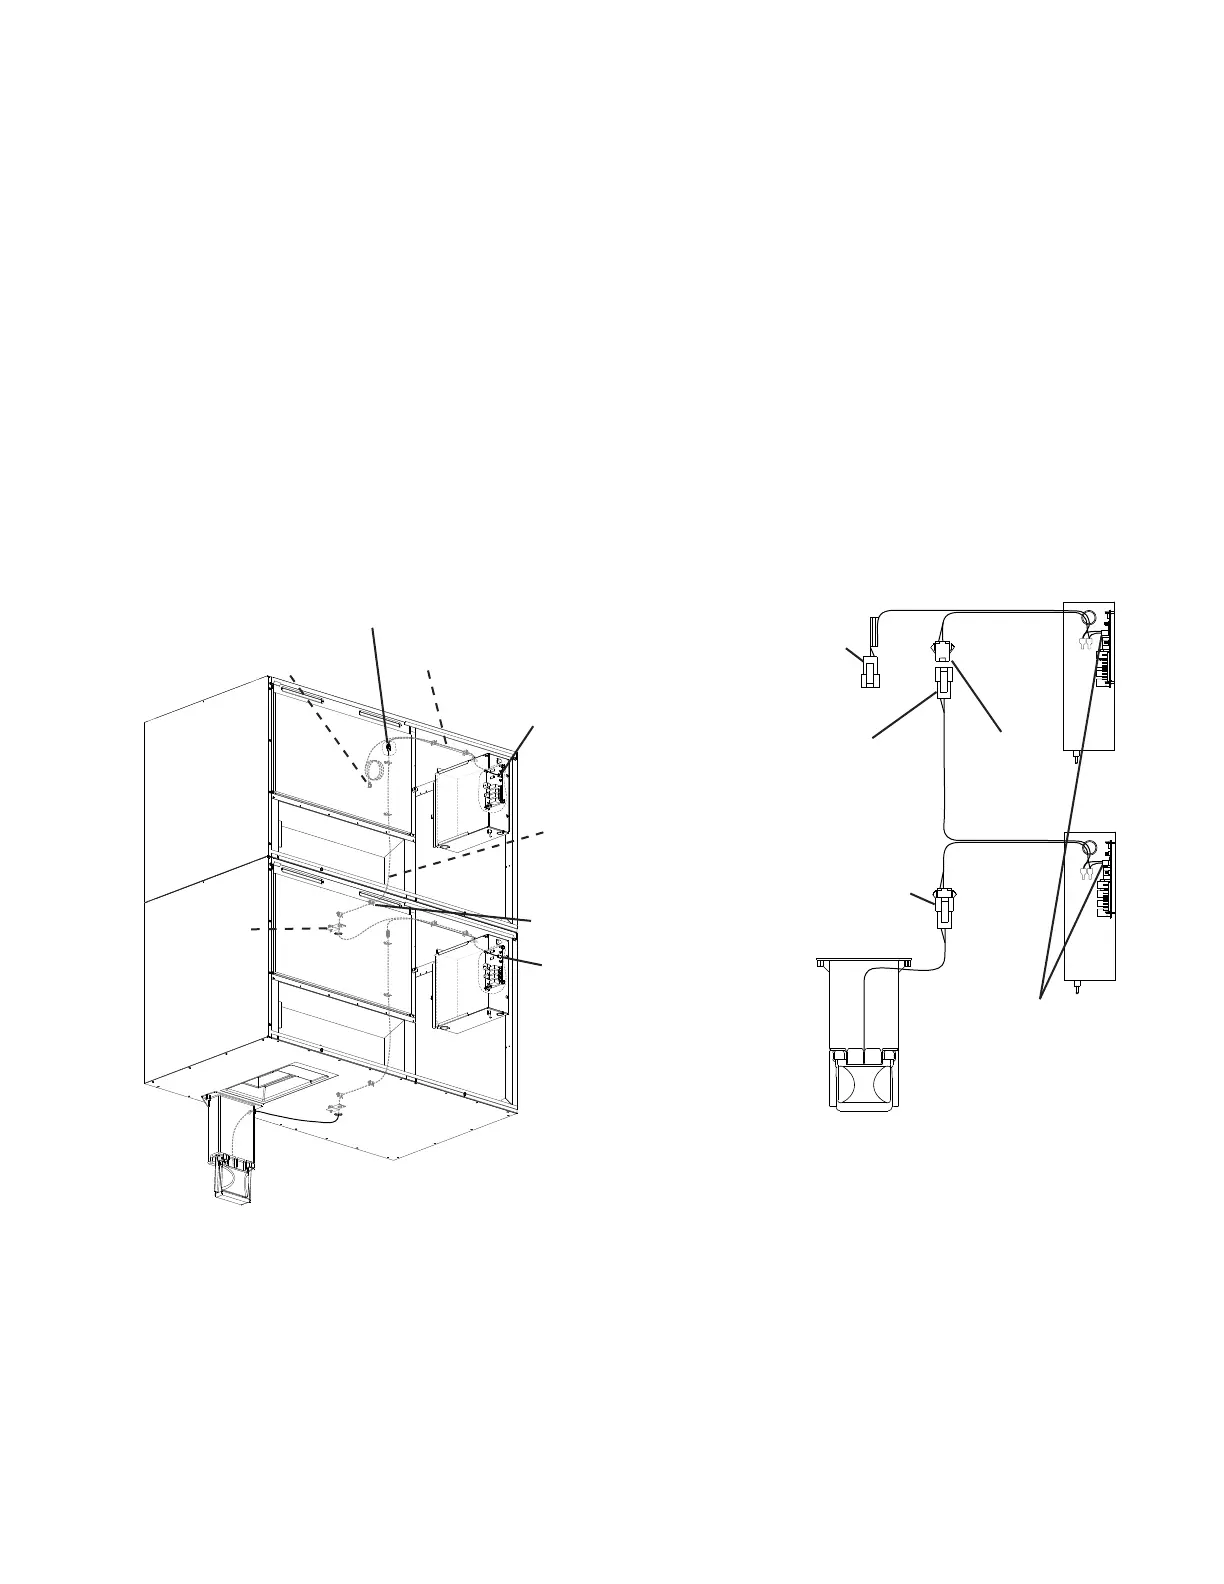
7) Remove the bin control cable bracket from inside the upper unit. See Fig. 6. Leave the
upper unit's bin control assembly in its original position. It will not be used.
8) Route lower unit wire harness connector B through the hole in the bottom of the upper
unit. Route the wiring through the bushing in the bin control cable bracket, then through
the wire saddles.
9) Connect lower unit wire harness connector B to upper unit wire harness connector A.
10) Make sure the wire harnesses are secured in the wire saddles and do not interfere with
any components.
11) Secure the bin control cable bracket.
12) Replace the panels and storage bin baffle in their correct positions.
Fig. 6
Upper Unit Wire Harness
Connector B (not used)
Bin Control
Cable
Bracket
Control Board
Red K4 Connector
Upper Unit Wire Harness
Wire Saddle
Lower Unit Wire Harness Connector B to
Upper Unit Wire Harness Connector A
Lower
Unit Wire
Harness
Control Board
Red K4 Connector
Upper Unit Connection Overview
Upper Unit Connection Detail
See "II.D.1. Dispenser
Unit/Ice Storage Bin
and Icemaker Setup"
and "II.D.2. Bin Control
Installation" for the
Lower Unit Connection
Control Board
Red K4 Connector
Lower Unit Wire Harness
Connector B
Upper Unit
Wire Harness
Connector A
Upper Unit Wire Harness
Connector B (not used)
 Loading...