Do you have a question about the Hotpoint HFC2B19UKN and is the answer not in the manual?
This document serves as a comprehensive guide for the Hotpoint dishwasher, covering its functions, usage, and maintenance.
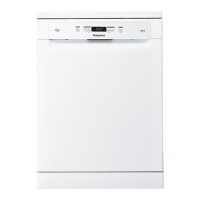
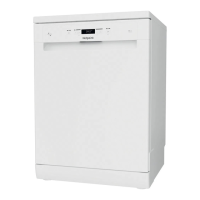
The Hotpoint dishwasher is designed to efficiently clean dishes, offering various programs and options to suit different soiling levels and user preferences. Its core function is to automate the dishwashing process, from pre-wash to drying, ensuring optimal hygiene and cleanliness.
The appliance features an upper rack and a lower rack for loading crockery, with a dedicated cutlery basket. The upper rack is designed for delicate and light dishes such as glasses, cups, saucers, and small salad bowls. It includes foldable flaps with adjustable positions to accommodate wine glasses and optimize drying results. The height of the upper rack can be adjusted to create more space in either the upper or lower basket, allowing for bulky items. The lower rack is intended for pots, lids, plates, and larger salad bowls, with recommendations for placement to avoid interference with the spray arm.
The dishwasher incorporates a sophisticated water softening system that requires the use of salt to prevent limescale formation on dishes and internal components. The salt reservoir, located in the lower part of the dishwasher, needs to be filled when the SALT REFILL indicator light illuminates on the control panel. The water hardness setting is adjustable to match the local water supply, ensuring the softener operates effectively.
For enhanced drying, the dishwasher uses rinse aid, which is dispensed from a dedicated compartment. The RINSE AID REFILL indicator light signals when a refill is needed. The dosage of rinse aid can be adjusted to achieve desired drying results, preventing streaks or water marks on dishes.
Detergent is introduced into a dispenser on the door, which automatically opens at the appropriate time during the wash program. The dispenser has indications to assist with proper dosing. For all-in-one detergents, a TABLET button is available to optimize the program for best washing and drying performance.
The control panel provides access to various programs, including Eco, Intensive, Normal, Express 30', and Soak. Each program is tailored for specific types of loads and soiling levels. Options such as Half Load and Delay can be selected to customize cycles further. The Half Load option is useful for smaller loads, saving water, electricity, and detergent. The Delay function allows users to postpone the start of a program by 2, 4, or 8 hours. A Drain Out function is also available to stop and cancel an active cycle, draining the water from the dishwasher.
Operating the Hotpoint dishwasher involves a straightforward sequence of steps. First, ensure the water connection is open and the appliance is switched on using the ON/OFF button. Dishes should be loaded into the racks, following guidelines for optimal placement to ensure proper water circulation and cleaning. Detergent is then added to its dispenser.
Users select a program based on the type and soiling level of the crockery, using the program selection button. Desired options, such as Half Load or Delay, can be chosen. The wash cycle is initiated by pressing the START/PAUSE button. The end of the cycle is indicated by beeps and a flashing indicator light. It is recommended to wait a few minutes after the cycle ends before unloading to avoid burns. The machine automatically switches off after extended periods of inactivity to conserve energy.
If a wrong program is selected, it can be modified shortly after starting by switching the machine off and on, then selecting a new program. Extra crockery can be added during a cycle by opening the door and pressing START/PAUSE to resume. In case of power cuts or accidental door openings, the cycle can be resumed from where it left off by closing the door (if applicable) and pressing START/PAUSE.
The dishwasher provides indicator lights for salt and rinse aid refills, ensuring these essential components are maintained for optimal performance. The water hardness setting is crucial for the water softener and can be adjusted through a specific sequence of button presses.
For best results, it is advised to remove food residues from crockery before loading, but pre-rinsing under running water is not necessary. Arranging crockery firmly, with openings facing downwards, is important for effective cleaning. Small items should be placed in the cutlery basket, and sharp utensils should be placed with points facing downwards or horizontally in the upper rack's tip-up compartments.
Regular maintenance is crucial for the Hotpoint dishwasher's longevity and efficient operation. The filter assembly, located at the bottom of the wash tub, requires periodic cleaning to prevent clogging and ensure proper waste water drainage. The assembly consists of three filters: a cylindrical filter, a cup filter, and a stainless-steel plate filter. These should be removed and cleaned thoroughly under running water with a non-metallic brush. It is essential to re-place and fix the filter assembly correctly after cleaning.
The spray arms can become encrusted with food residues, blocking the holes. Users are advised to check and clean the spray arms occasionally with a small non-metallic brush. The upper spray arm can be removed by turning its plastic locking ring anti-clockwise, and it should be replaced with the side having more holes facing upwards. The lower spray arm can be removed by pulling it upwards.
For the water inlet hose, if it is new or has not been used for an extended period, it is recommended to let water run through it to clear any impurities before connecting it to the dishwasher. This prevents blockages and potential damage to the appliance.
To maintain hygiene and prevent odors and sediment buildup, it is suggested to run a high-temperature program at least once a month with a teaspoon of detergent and no loading.
The document also provides troubleshooting guidance for common issues such as the dishwasher not starting, not draining, making excessive noise, or not cleaning dishes properly. Solutions often involve checking connections, ensuring the door is closed, cleaning filters, adjusting detergent/rinse aid levels, or correctly loading crockery. For more detailed maintenance procedures and troubleshooting, users are directed to the Use and Care Guide, available through After-Sales Service, website download, or QR code.
| Type | Freestanding |
|---|---|
| Appliance placement | Freestanding |
| Control type | Electronic |
| Inlet hose length | 1.5 m |
| Outlet hose length | 1.5 m |
| Noise emission class | C |
| Noise Level | 49 dB |
| Number of washing programs | 9 |
| Delayed start timer | Yes |
| Energy consumption per 100 cycles | 94 kWh |
| Power consumption (off) | 0.5 W |
| Current | 10 A |
| Half Load Option | Yes |
| Number of place settings | 13 |
| Washing programs | Eco, Intensive, Normal |
| Cycle time | 190 min |
| Delay start (max) | 24 h |
| Height | 850 mm |
| Width | 60 cm |
| Connected load | 1900 W |