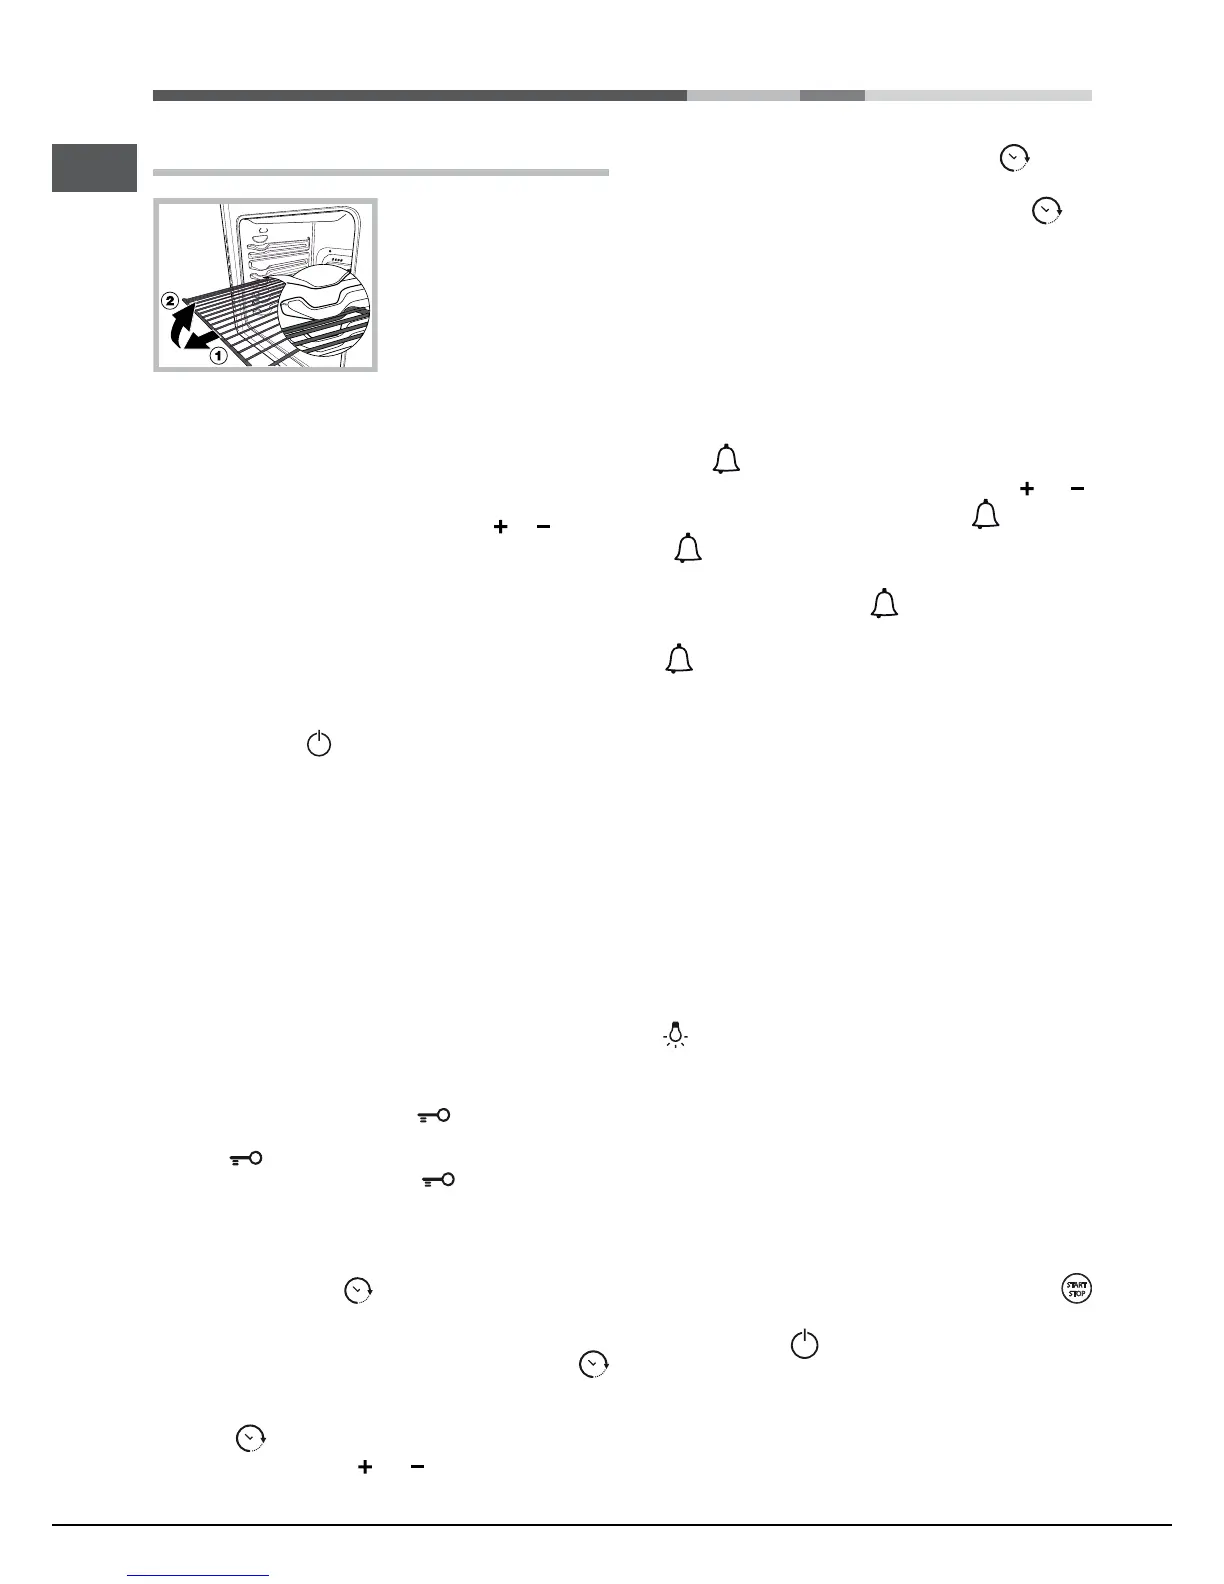
Start-up and use
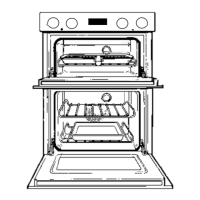
WARNING! The oven is provided
with a stop system to extract the
racks and prevent them from coming
out of the oven (1).As shown in the
drawing, to extract them completely,
simply lift the racks, holding them on
the front part, and pull (2).
! The rst time you use your appliance, heat the empty oven with its door
closed at its maximum temperature for at least half an hour. Make sure that
the room is well ventilated before switching the oven off and opening the
oven door. The appliance may emit a slightly unpleasant odour caused by
protective substances used during the manufacturing process burning away.
! To make the setting process easier, keep the knob in “
” or “ ” position:
this will increase the scrolling speed of the numbers on the display.
! Each setting will automatically be stored in the appliance memory after 10
seconds.
! During operation, we recommend the removal of any crockery or delicate
foodstuffs from the cavities not being used.
! Once cooking has begun, before the DIVIDER is removed, the oven must
be switched off using the
icon.
! Every time the oven is switched on it is set to the CREATION cooking mode.
! The touch controls cannot be activated if the user is wearing gloves.
! In order to optimise the cooking performance, when starting the selected
function, product settings will be applied that could cause a delayed start of
the fan and heating elements.
! The oven will begin its preheating phase after 2 seconds from selecting
the desired cycle.
Control panel lock
! The control panel can be locked while the oven is off, once cooking has
started or nished and during programming.
To lock the oven controls, press and hold the icon for at least 2 seconds.
A buzzer will sound and the TEMPERATURE display shows the key symbol
“O—n”. The icon will light up to indicate lock activation.
To deactivate the lock, press and hold the icon again for at least 2
seconds.
Setting the clock
! The clock can only be set when the oven is switched off. If the oven is
in standby mode, pressing the
icon once will display the current time
setting. Press it again to set the time.
After connection to the power supply network or after a blackout, the
icon and the digits on the display will ash for 10 seconds.
To set the clock:
1. Press icon
.
2. Turn the TIMER knob towards “ ” and “ ” to adjust the hour value.
3. Once you have reached the correct hour value, press the icon.
4. Repeat the above process to set the minutes.
If a blackout occurs, it will be necessary to reset the clock. If the
icon
ashes on the display, this indicates that the clock has not been set correctly.
Setting the minute minder
! The minute minder may be set regardless of whether the oven is switched
on or off. It does not switch the oven on or off.
When the set time has elapsed, the minute minder emits a buzzer that will
automatically stop after 30 seconds or when any active button on the control
panel is pressed.
To adjust the minute minder, proceed as follows:
1. Press the
icon.
2. Adjust the time as desired by turning the TIMER knob towards “ ” and “ ”.
3. Once you have reached the desired value, press the
icon again.
The lit
symbol will remind you that the minute minder is on. The DISPLAY
will show the countdown.
To cancel the minute minder, press the
icon and use the knob to set the
time to 00:00. Press button again.
The
icon will switch off to indicate that the minute minder has been
disabled.
Cooling ventilation
In order to cool down the external temperature of the oven, a cooling fan
blows a stream of air between the control panel and the oven door, as well
as towards the bottom of the oven door.In the FAST COOKING mode, the
fan is activated automatically after ten minutes.
! Once the cooking has been completed, the cooling fan remains on until the
oven has cooled down sufciently.
Oven light
The light comes on when the oven door is opened or when a cooking mode
starts.
When models featuring LED INSIDE technology begin cooking, the LEDs on
the door light up for improved illumination of all cooking levels.
The
icon can be used to switch on the light at any time.
Residual heat indicators
The appliance is tted with a residual heat indicator. When the oven is off, the
“residual heat” light on the display comes on to indicate high temperatures
inside the oven cavity. The indicator light switches off when the inside of the
oven has cooled down.
Restoring the factory settings
The oven factory settings can be restored to reset all selections made by
the user (clock and customised durations). To carry out a reset, switch off
the oven, then keep the SELECTOR knob turned while pressing the
icon for 6 seconds. Once the restore procedure is complete, a buzzer will
sound. The rst time the
icon is pressed, the oven will behave as if it
is being switched on for the rst time.
Standby
This product complies with the requirements of the latest European Directive
on the limitation of power consumption in standby mode. If no buttons are
 Loading...