EasyManua.ls Logo

Hotpoint RLA80 User Manual

Hotpoint RLA80
20 pages
To Next Page IconTo Next Page
Page #1 background imageLoading...
Page #1 background image
LARDER FRIDGE - MODEL RLA80, RLM80, RLS80
INSTRUCTIONS FOR INSTALLATION & USE
GETTING STARTED:
To ensure that your fridge runs reliably and efficiently follow these steps.
SAFETY &
INSTALLATION CONTROLS
USEFUL ADVICE
CLEANING &
MAINTENANCE
SERVICE &
GUARANTEE
TROUBLESHOOTING
Choose a location for
your fridge, away from
any heat sources and
allow adequate
ventilation - 100mm
(4 inches) gap above.
To prevent the fridge
tilting forwards it must be
held in place with the
stability bracket supplied.
NB.This is the responsibility of
the customer.
Level the fridge by
adjusting the front feet.
This will stop rocking or
vibration and keep the
door aligned.
NB.The spanner is for illustration
only and is not supplied with the
fridge.
Plug in and switch on.
Allow the fridge to cool
before placing food
inside.
All food in the fridge
should be covered.
Move the fridge into
position, using the sides
of the cabinet. Take care
to avoid damaging the
refrigerant circuit pipe
work on the rear.
Before plugging in and
switching on, leave the
fridge in its final
location for at least 15
minutes to allow it to
settle.
STEP 1
STEP 2
STEP 3
After the front feet have
been adjusted and the
fridge is level, fit the left
and right hand bottom
hinge covers supplied.
Align with the cover plate
slots and push into
position.
STEP 5
STEP 4
STEP 6
STEP 7
Your fridge is now
working.
If after 24 hours your
fridge is not operating as
you want, refer to the
TROUBLESHOOTING
section.
STEP 8
Read the rest of these instructions to get the best from your appliance
and remember to fill in your guarantee registration.
Keep this Book in a safe place for quick reference.
Question and Answer IconNeed help?

Do you have a question about the Hotpoint RLA80 and is the answer not in the manual?

Hotpoint RLA80 Specifications

General IconGeneral
BrandHotpoint
ModelRLA80
CategoryRefrigerator
LanguageEnglish

Summary

Getting Started with Your Fridge

Step 1: Choose Location

Selecting an appropriate place for the fridge, considering heat and ventilation.

Step 2: Move into Position

Safely moving the fridge to its final location, avoiding damage to pipes.

Step 3: Install Stability Bracket

Securing the fridge with the provided stability bracket to prevent tilting.

Step 4: Level the Fridge

Adjusting front feet to ensure the fridge is level and stable.

Step 5: Fit Hinge Covers

Attaching the bottom hinge covers after levelling the appliance.

Step 6: Allow Fridge to Settle

Letting the fridge stand for 15 minutes before plugging in after relocation.

Step 7: Plug In and Cool

Connecting the fridge to power and allowing it to cool before adding food.

Step 8: Fridge is Now Working

Confirmation that the fridge is operational; refer to troubleshooting if needed.

For Your Safety

Installation

Location and Air Circulation

Proper placement and ventilation are crucial for performance and longevity.

Minimum Door Opening Space

Details required clearance for door to open fully and access furniture.

Stability Bracket Installation

Details on installing the stability bracket to prevent tilting.

Levelling and Hinge Covers

Instructions on levelling the fridge and fitting the bottom hinge covers.

Electrical Supply Requirements

Information on earthing, fuses, and plug/lead replacement.

Controls

Temperature Control

How to adjust the fridge's internal temperature using the control wheel.

Useful Advice

Storage Zones

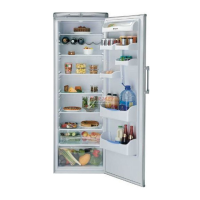
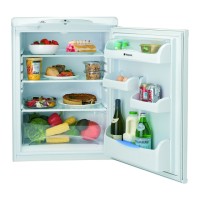
Guide to optimal food placement within the fridge.

Efficient Fridge Use and Food Storage

Tips for maximizing efficiency and proper food packaging techniques.

Door and Shelf Adjustments

How to use door racks, egg rack, and adjust interior shelves for storage.

Specialized Storage Bins and Racks

Using salad bins, vegetable bin, and wine rack for specific food items.

Defrosting

Automatic Defrosting

The fridge compartment defrosts automatically; precautions for food contact.

Cleaning

Interior Cleaning

Instructions for cleaning the fridge's interior, shelves, and bins.

Exterior Cleaning

Guidance on cleaning the outside surface of the fridge.

Door Seal Cleaning

How to carefully clean the door seal without damage.

Maintenance

Preparing for Absence (Going Away)

Recommendations for preparing the fridge before leaving it unused.

Changing the Interior Light Bulb

Step-by-step guide to replacing the interior light bulb.

Door Reversal and Handle Adjustment

Reversing the Main Door Swing

Detailed steps for changing the direction of the fridge door opening.

Reversing the Door Handle

Instructions for repositioning the door handle to match the reversed door.

Troubleshooting Common Issues

Fridge Not Working or Making Noise

Diagnosing and resolving issues with fridge operation and noise.

Temperature Control Issues

Adjusting and troubleshooting temperature settings for optimal cooling.

Water Leaks and Interior Light

Addressing water leakage and fixing interior light problems.

Rapid Ice Buildup and Normal Sounds

Resolving ice formation and understanding normal fridge operating sounds.

Guarantee, Recycling, and After Sales Support

Hotpoint Guarantee and Satisfaction Promise

Details about the appliance guarantee, satisfaction promise, and terms.

Recycling and Disposal Information

Guidance on environmentally friendly disposal of packaging and old appliances.

After Sales Service and Contact Information

Information on repair services, extended warranties, and parts.

Related product manuals