26 of 43
Service Manual UK
Whirlpool UK Appliances Ltd
English
ACCESSORIES
Soak the accessories in a washing-up liquid solution after use, handling them with oven gloves if they
are still hot. Food residues can be removed using a washing-up brush or a sponge.
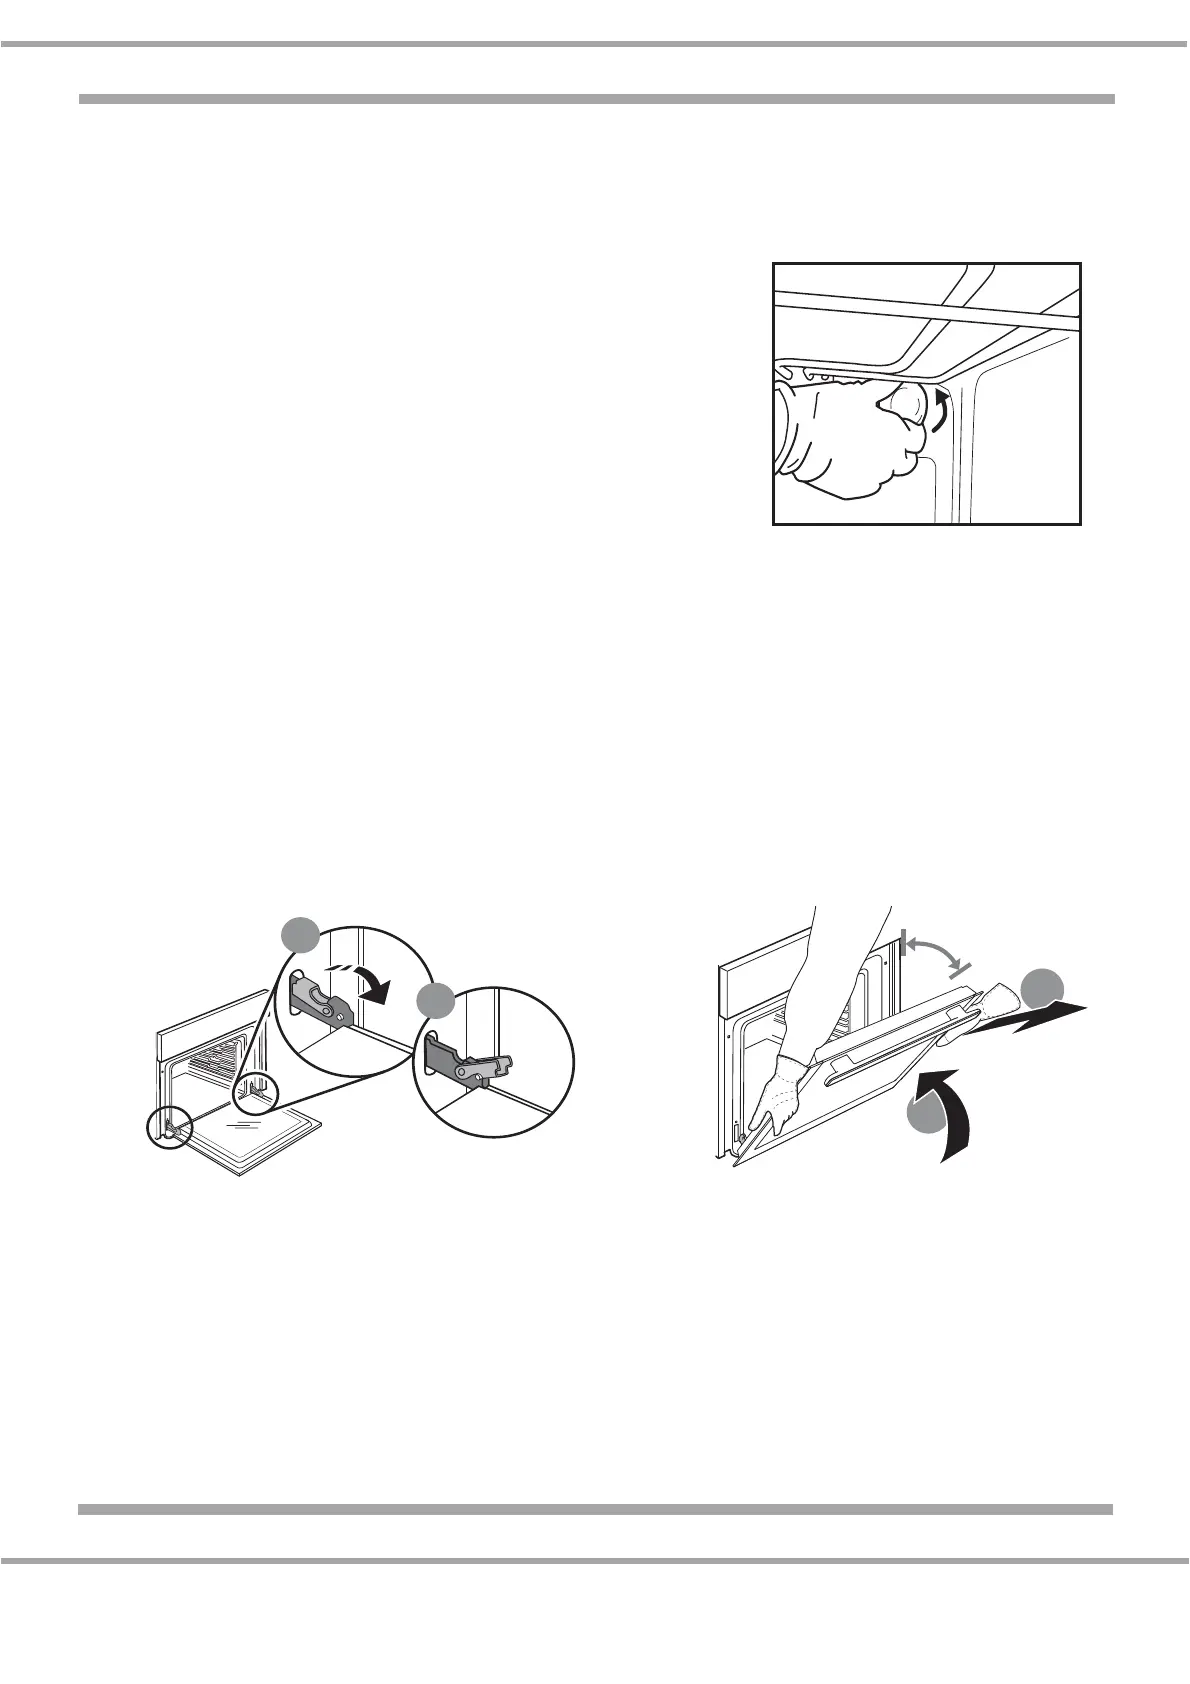
REPLACING THE LIGHT
1. Disconnect the oven from the power supply and ensure the
oven is cool.
2 Unscrew the cover from the light, replace the bulb and screw
the cover back on the light.
3. Reconnect the oven to the power supply.
Please Note: Only use 25 - 40 W/230 ~ V types E-14,
T300°C incandescent bulbs or 20 - 40 W/230 ~ V type G9,
T300°C halogen bulbs. The bulb used in the product is
specifically designed for domestic appliances and is not
suitable for general room lighting within the home
(EC Regulation 244/2009). Light bulbs are available from our After-sales Service.
If using halogen bulbs, do not handle them with your bare hands as your fingerprints could cause
damage. Do not use the oven until the light cover has been refitted.
REMOVING AND REFITTING THE DOOR
1. To remove the door, open it fully (a) and lower the catches until they are in the unlock position (b).
2. Close the door as much as you can.
Take a firm hold of the door with both hands - do not hold it by the handle.
Simply remove the door by continuing to close it (a) while pulling it upwards at the same time (b)
until it is released from its seating. Put the door to one side, resting it on a soft surface.
3. Refit the door by moving it towards the oven, aligning the hooks of the hinges with their seating
and securing the upper part onto its seating.
4. Lower the door and then open it fully. Lower the catches into their original position (a): Make sure
that you lower them down completely (b). Apply gentle pressure to check that the catches are in
the correct position.
b
a
a
b
~15°
 Loading...