38 of 43
Service Manual UK
Whirlpool UK Appliances Ltd
English
2) Removing the Oven from the Cabinet
a) Remove the 2 screws from the perimeter of the frame.
3) Control Panel
a) Remove the oven from the cabinet (see 2).
b) Remove the top panel (4 screws).
c) Remove the control knob by pulling off.
d) Disconnect the cable from the timer display board to the main board.
e) Remove the control panel by removing the four securing screws (2 each side). Lift away the control
panel including the display board from the bottom.
4) Display Timer Board
a) Remove the oven from the cabinet (see 2).
b) Remove the top panel (4 screws).
c) Remove the control knob by pulling off.
d) Disconnect the cable from the timer display board to the main board.
e) Remove the control panel by removing the four securing screws (2 each side). Lift the control panel
including the display board away.
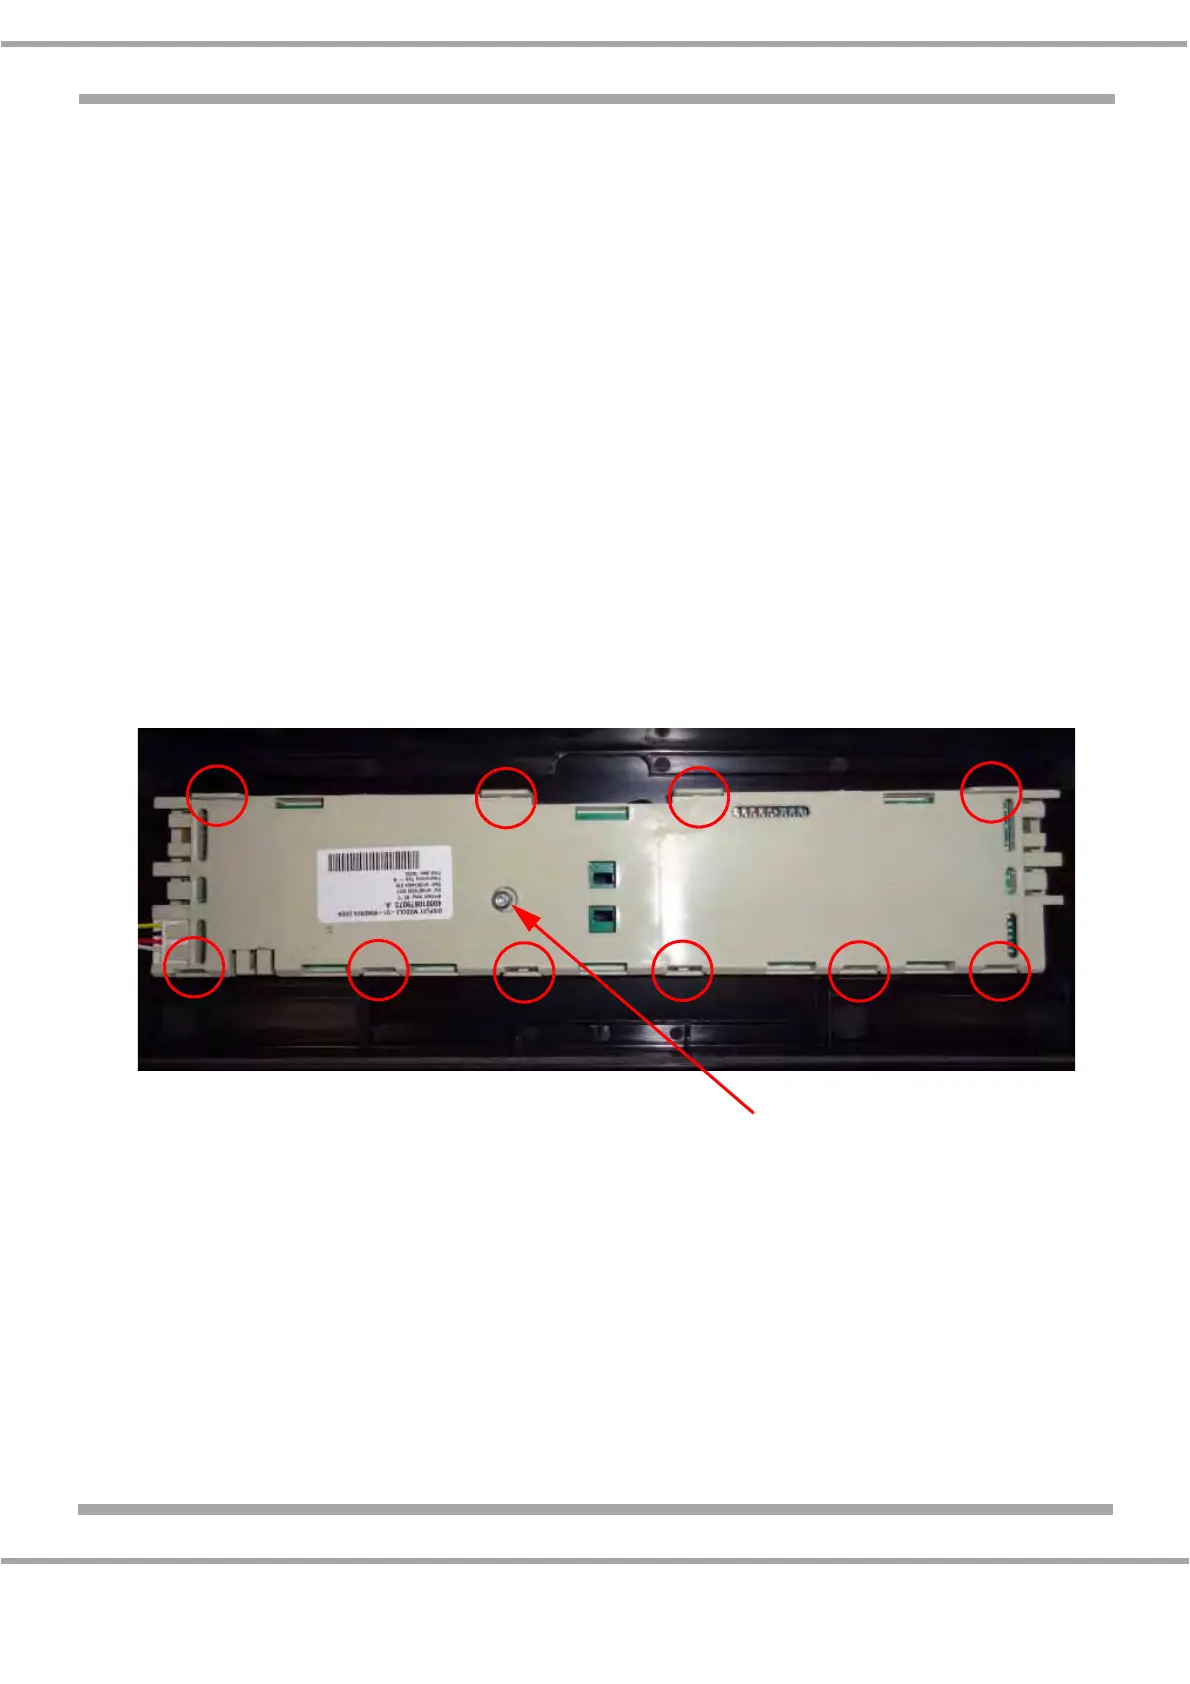
f) Remove the single silver screw into the display board.
g) Disengage the 10 securing tabs and remove the board from the support (Fig. 1).
h) Reassemble in reverse order.
5) Main Control Board
a) Remove the oven from the cabinet (see 2).
b) Remove the top panel (4 screws).
c) The control board is supplied with the mounting support. To remove, unscrew the 2 securing
screws, note and disconnect the wiring and lift the board clear.
d) Reassemble in reverse order.
Fig. 1
Securing Screw
 Loading...