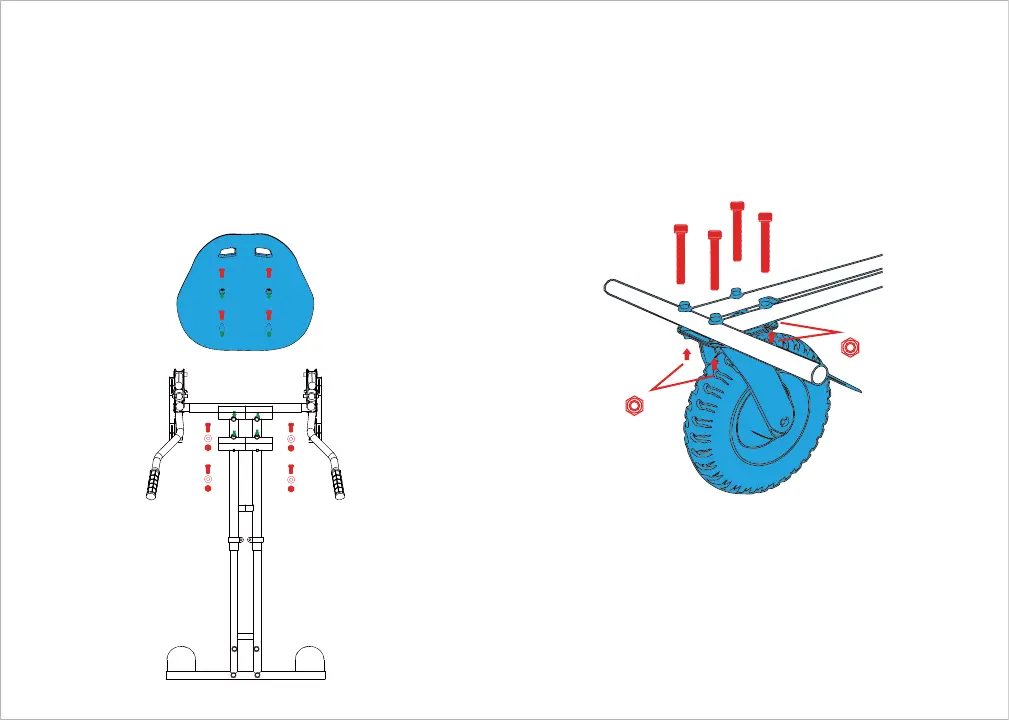
4. Align the holes of the seat with the holes of the
seat frame as show below. Insert the M6 X16 screws.
Attach the 20 mm washers and the 6 mm nuts to
the bottom of each screw, under the seat frame.
Twist the nuts on clockwise. Hold the 6 mm nuts still
with the wrench while turning the screws clockwise
with the larger hex key to tighten the screws. Make
sure all 4 screws are tightly secured.
5. Align the holes of the wheel plate with the
holes in the frame extension. Insert the M8 X 40
screws into each hole and attach the 6 mm lug
nuts to each screw. Hold the 6 mm nuts still with
the wrench while turning the screws clockwise
with the larger hex key to tighten the screws.
Make sure all 4 screws are tightly secured.
8