2-2 Hardware Installation
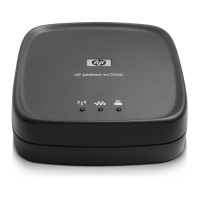
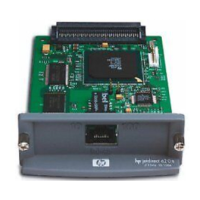
4. For the 300X or 500X Ethernet print servers (J3263A or
J3265A), verify that the auto-negotiation switches are in their
default positions—all down. (For other options, see page 1-9.)
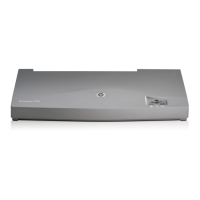
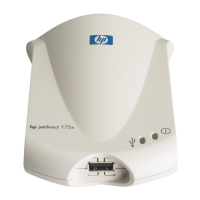
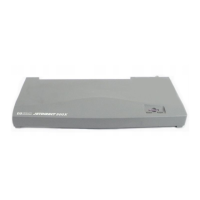
Figure 2.2 Hardware connections using a U.S. power module for the
HP JetDirect J3265A Print Server
Note
In the following steps, the circled numbers
correspond to those in Figure 2.2. The HP JetDirect
300X, 170X, and EX Plus have one printer port ➌.
The HP JetDirect 500X Token Ring and 300X have
no BNC port ➊. On the HP JetDirect 500X and
300X, the RJ-45 connector ➋ is used for either 10 or
100 Mbps operation. The JetDirect 170X has no
BNC port ➊.
5. Connect the print server to the network ➊ or ➋.
6. Connect the print server to the printer(s) ➌, ➍, and ➎.
If you are attaching only one printer to the 500X, HP
recommends that you attach that printer to Port 1 ➌.
If you are using DLC/LLC network protocols, your printer must
be connected to Port 1 (the DLC/LLC protocol is supported only
on Port 1).
7. Plug the power module into the power receptacle in the back of
the print server ➏.