Do you have a question about the HP 27f 4k and is the answer not in the manual?
Essential safety precautions and warnings for service personnel to minimize risk of injury.
Key guidelines, precautions, and best practices for performing service operations safely and effectively.
Details RoHS (Restriction of Hazardous Substance) and ERP Lot5 compliance requirements for parts and service.
Overview of service levels and instructions for checking and performing firmware updates for the monitor.
Procedures to ensure product safety and functionality before returning a repaired unit to the customer.
Details the various features and capabilities of the monitor, including display size and connectivity.
Identifies and describes components located on the rear of the monitor using an illustration and table.
Guides users on finding the serial and product numbers on the monitor for support purposes.
Instructions and information on how to order replacement parts from authorized distributors.
Steps and necessary equipment required to prepare for the monitor's disassembly process.
Provides specific steps for the removal of the RC component from the monitor assembly.
Detailed steps for repairing HDMI and DisplayPort connectors on the main board.
Specific instructions and methods for repairing the HDMI connector on the PCB.
Specific instructions and methods for repairing the DisplayPort connector on the PCB.
Procedures to test monitor functions and confirm proper operation after repair.
Lists common issues, their potential causes, and recommended solutions for troubleshooting.
This document is a Maintenance and Service Guide for the HP 27f 4k model, identified by part number L52867. It provides comprehensive information for trained service personnel regarding the monitor's features, spare parts, removal and replacement procedures, diagnostic tests, and troubleshooting.
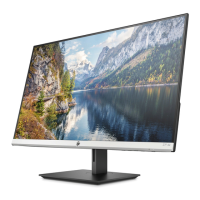
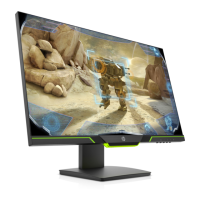
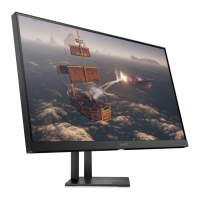
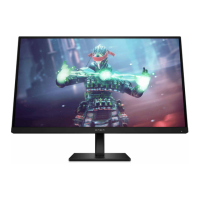
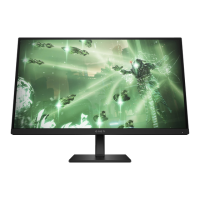
The HP 27f 4k monitor is designed for a high-quality visual experience, featuring a 68.47 cm (27-inch) diagonal viewable area with a 3840 x 2160 resolution, offering full-screen support for lower resolutions and custom scaling for maximum image size while preserving original aspect ratio. It utilizes a Liquid Crystal Display (LCD) with active matrix and in-plane switching (IPS) technology, ensuring vibrant and accurate colors. The monitor boasts a wide color gamut to provide coverage of sRGB color spaces, enhancing color reproduction for various applications. Its nonglare panel with an LED backlight minimizes reflections, contributing to a comfortable viewing experience. The monitor also offers a wide viewing angle, allowing for clear visuals from a sitting or standing position, or when moving from side to side. For user comfort, it includes tilt, height, and swivel adjustment capabilities.
Connectivity options are robust, with one DisplayPort video input and two High-Definition Multimedia Interface (HDMI) video inputs, allowing connection to multiple source devices. The monitor is equipped with four On-Screen Display (OSD) buttons, which can be configured to quickly access and control the most commonly used operations. Plug and Play capability is supported by your operating system, simplifying setup. For security, a cable slot is located on the rear of the monitor, allowing for the connection of an optional security cable. The OSD adjustments are available in several languages for easy setup and screen optimization. HP Display Assistant software is also available for adjusting monitor settings and enabling theft deterrence features. Furthermore, the monitor incorporates an energy saver feature to meet requirements for reduced power consumption.
For maintenance and service, the guide outlines a structured approach. It emphasizes the importance of reading "Important safety information" and "Important service information and precautions" before performing any procedures. Service should only be performed by trained service personnel familiar with the product. Key safety precautions include ensuring a dry and clean working environment, using proper safety devices, always disconnecting power before opening the cabinet, and following ESD safety procedures when handling electrical components. The guide also highlights the importance of using lead-free solder wire for repairs to comply with RoHS requirements and matching capacitor polarity and specifications during replacement.
The service procedures are categorized into two levels: Level 1 for cosmetic/appearance/alignment service and Level 2 for circuit board or standard parts replacement. The guide provides an illustrated parts catalog to help identify major components, along with instructions on how to order spare parts from Digi-Key, including specific part numbers for HDMI, DisplayPort, and DC power connectors. It notes that connectors may need modification to fit if they are not an exact match.
Detailed removal and replacement procedures are provided, starting with preparation for disassembly, which includes cleaning the work area, identifying the disassembly area, and ensuring the availability of necessary equipment such as a press fixture, working table, screwdriver, knife, gloves, cleaning cloth, ESD protection, and a scraper bar of specified dimensions. The guide walks through the quick release of the base stand, disassembling the base and stand, stripping screws from the rear cover, removing the deco, and detaching internal components like the 8-pin FFC from the main board. It also details the removal of acetate tapes covering LVDS/LED FFCs, pulling out LVDS/LED FFCs to separate the base assembly, and removing screws to separate shielding from the control board (CB) and the rear cover supporter. Stripping screws and removing thermal pads are also covered.
A significant section is dedicated to connector repair, specifically for HDMI (P200/P201) and DisplayPort (P300) connectors on the main board (part number R352718820150). The repair process involves using a soldering iron and desoldering pump to remove existing solder, followed by a hot air gun to melt remaining solder on the pins. Once the old connector is lifted, a new component is placed, ensuring it matches the PCB footprint, and then soldered into place.
After any repair, a function test is mandatory to confirm that all monitor functions are working correctly. This includes testing HDMI and DisplayPort for image display and sound playback using a computer or DVD player. The guide also includes a comprehensive troubleshooting section that lists common problems, their possible causes, and recommended solutions. These range from basic issues like a blank screen due to a disconnected power cord or the monitor being off, to more complex problems such as blurred images, "Check Video Cable" messages, "Input Signal Out of Range" errors, and OSD/power button lock functions. Solutions include connecting cables properly, exiting Sleep mode, adjusting OSD settings like brightness and input control, and disabling lock functions by pressing and holding specific buttons.
Firmware updates for the monitor, if available, can be found on support.hp.com. Before returning a repaired product to the customer, it is crucial to perform an AC leakage current check on exposed metallic parts to ensure electrical safety. Measurements outside specified limits indicate a potential shock hazard, requiring further repair before the product can be returned. This guide ensures that service personnel have the necessary information to maintain and service the HP 27f 4k monitor effectively and safely.
| Screen Size | 27 inches |
|---|---|
| Resolution | 3840 x 2160 (4K UHD) |
| Panel Type | IPS |
| Refresh Rate | 60 Hz |
| Aspect Ratio | 16:9 |
| Brightness | 350 cd/m² |
| Contrast Ratio | 1000:1 |
| Color Gamut | 99% sRGB |
| Viewing Angle | 178° horizontal, 178° vertical |
| VESA Mount | No |
| Response Time | 5 ms |
| Ports | 1 x DisplayPort 1.2, 1 x HDMI 2.0 |