Installation
K. Replace all covers
and
then connect
the
power
cord. All X3 PC Assemblies were fully tested at the fac-
tory, however, the Performance Tests should be per-
formed to verify that the X3 Output is fully operational.
2-13.
RE·PACKAGING
A
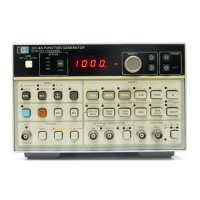
3314A
The best material to re-pack a 3314A is the original
material used by the factory.
If
this material has not
been retained, the following steps should be performed:
1. Wrap the 3314A in heavy paper
or
plastic.
If
you
are shipping the 3314A to a -hp- office,
attach
one
of
the Service Repair Tags. The front panel should also be
protected with an addinonal piece of
cardboard.
2. Use a strong shipping contamer. A double wall
carton made
of
350 pound test material is adequate.
3. Use a layer
of
shock-absorbing material 70 to 100
mm (3 to 4 inches) thick
around
all sides
of
the
instru-
ment to provide firm cushioning. Do
not
use loose filler
such as styrofoam chips.
4. Seal the shipping container.
5. Mark the shipping container
FRAGILE
to ensure
careful handling.
6. In any correspondence, refer to
the
3314A by its
full serial number.
2-14.
INSTALLING
ACCESSORIES
.18
-hp- manufactures several kits to
adapt
your 3314A with
handles, feet and rack mounts. These kits
are
available
from -hp-,
Model 3314A
5
1/4
H
Front
Handle Kit
5 I /4 H Rack Adapter Kit
(Half
Module)
5
1/4
H Support Shelf Kit
Slide Kit
(For Support Shelf)
Lock Link Kit
(Vertical and Horizontal)
5 114 H Bail Handle Kit
(Half
Module)
Feet-Rear Panel Stand-Off
Feet-Rear and
Cord
Wrap
2-6
5061-9689
Option
907
5061-9657
Option
908
5061-0097
1494-0041
5061-0094
5061·2002
5061-2009
5061-0095