ENWW Covers 203
8 Lifting up slightly on the front door to relieve the pressure on the hinges, pull the hinges out
and then remove the front door.
Reassembly note: Each hinge is keyed and will only fit into the side from which it was
removed. You may want to initial the hinge with an "R" or "L" to identify them.
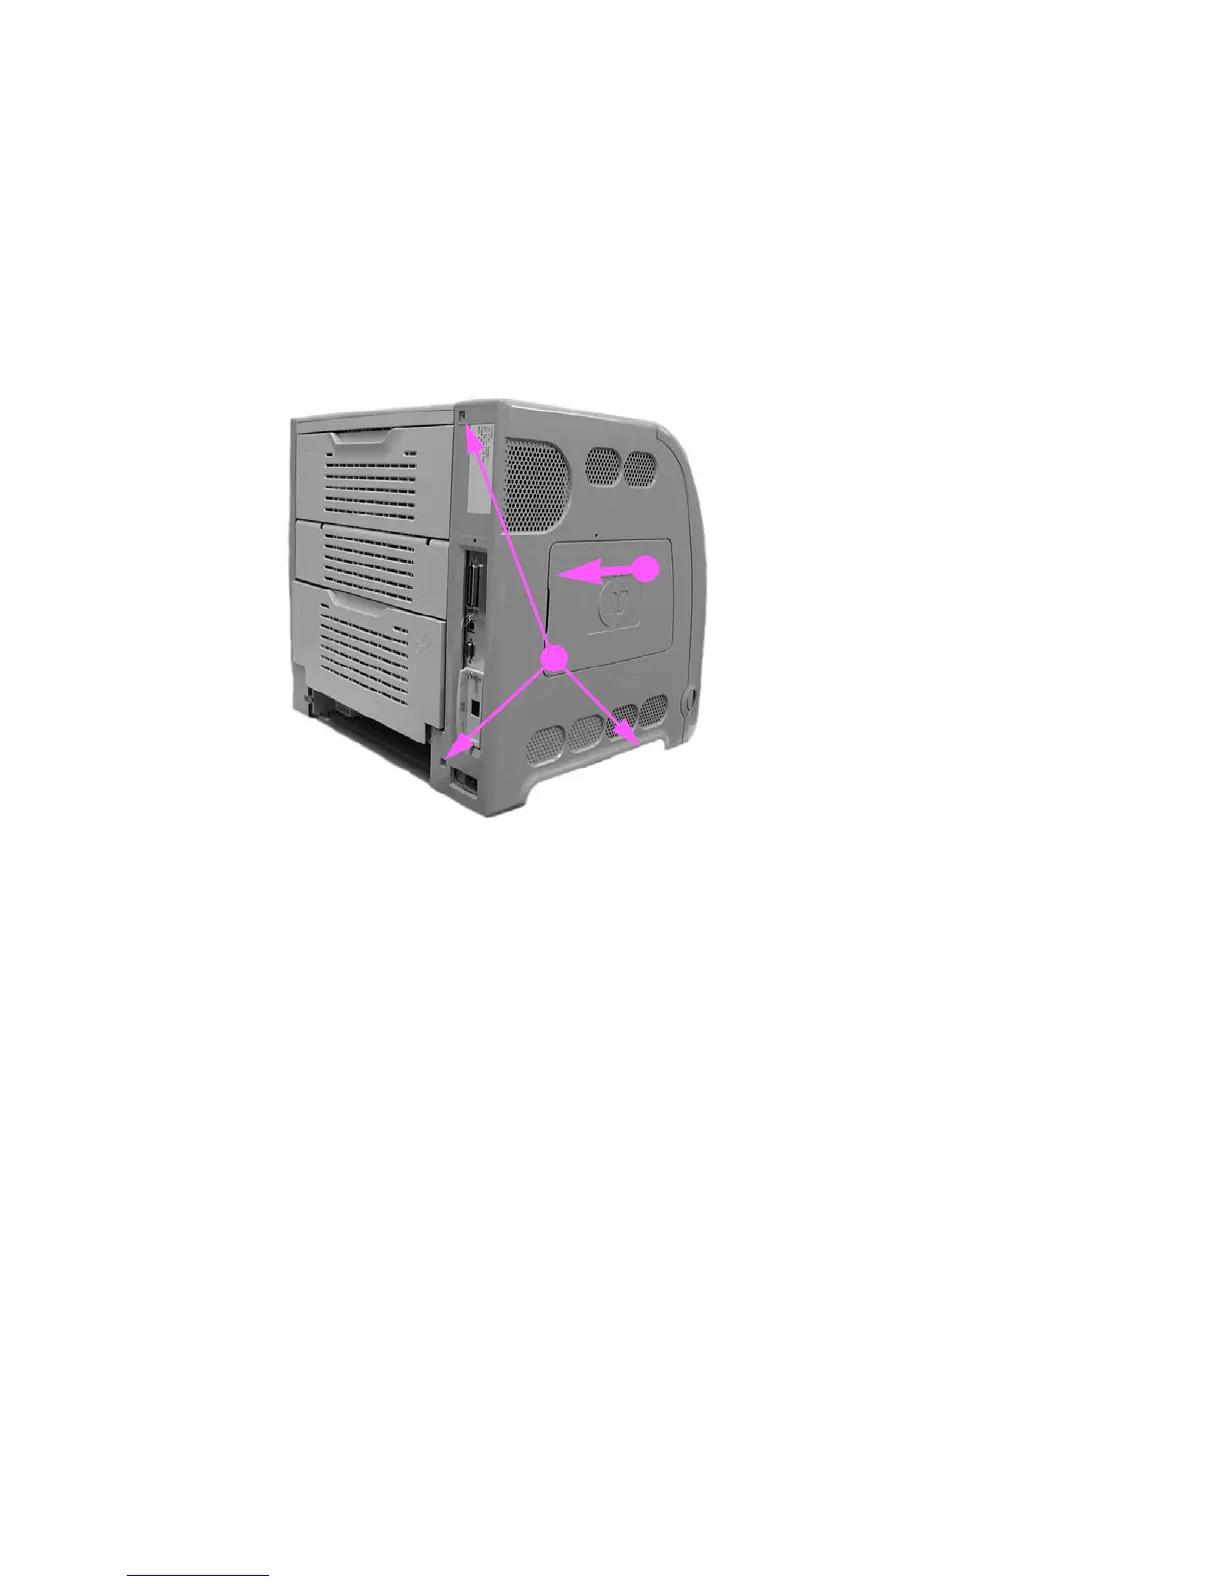
Left cover removal
1 Remove three screws (1).
2 Slide the cover back in the direction of the arrow (2) about one inch, and then pull it out away
from the printer to remove it.
Figure 6-5 Left cover removal
1
2
 Loading...