260 Removal and replacement ENWW
Registration clutch (CL1) removal
1 Remove the right cover. See Right cover removal.
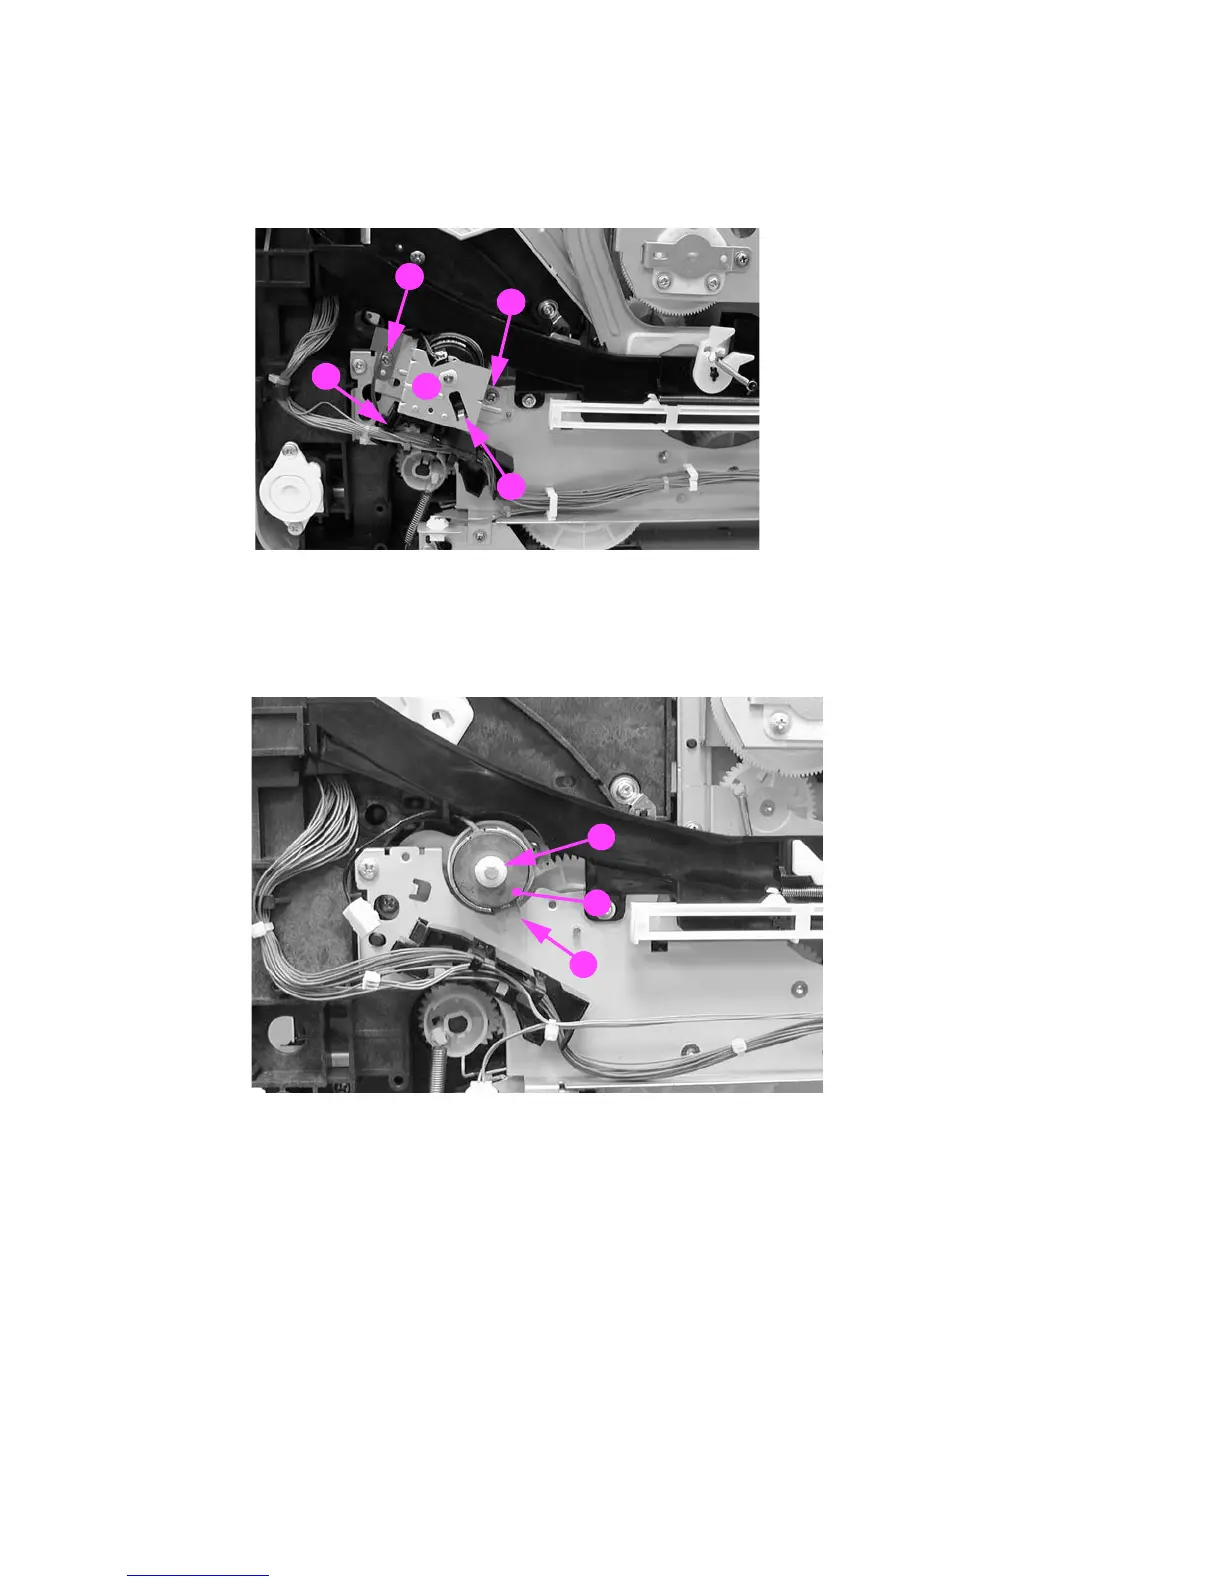
2 Disconnect one connector (1), remove two screws (2), and remove the plate (3).
Figure 6-95 Registration clutch removal (1 of 2)
3 Remove the bushing (1) and remove the registration clutch (2). The bushing needs to be used
for the replacement clutch.
Figure 6-96 Registration clutch removal (2 of 2)
Reassembly note: Do not forget to reinstall the bushing (1) removed from the previous
clutch. The bushing is keyed and fits into the clutch plate one way. Also, the slotted metal
tab on the clutch (3) (in the figure above) fits on clutch plate’s metal tab (4) (see the
previous figure).
1
2
2
3
4
1
2
3
 Loading...