268 Removal and replacement ENWW
Primary transfer roller engaging motor (M5) removal
1 Remove the image drive assembly. See Image drive assembly removal.
CAUTION It is important to refer to the image driver assembly removal procedure’s "Reinstallation notes" to
ensure correct installation of this assembly. If reassembly is not performed correctly, it can result in
damage to the print cartridge drive pins, the image drive assembly drive pins, and the swing guide
mechanism.
2 Remove the right swing guide. See Swing guide removal, right.
3 Refer to the pick-up/feed guide assembly removal procedure, steps 1 through 12, and remove
the right side gear plate. See Pick-up/feed assembly removal.
CAUTION It is important to refer to the pick-up/feed assembly removal procedure’s "Reinstallation notes" to
ensure correct installation of this assembly. If reassembly is not performed correctly, it can result in
damage to the print cartridge drive pins, the image drive assembly drive pins, and the swing guide
mechanism.
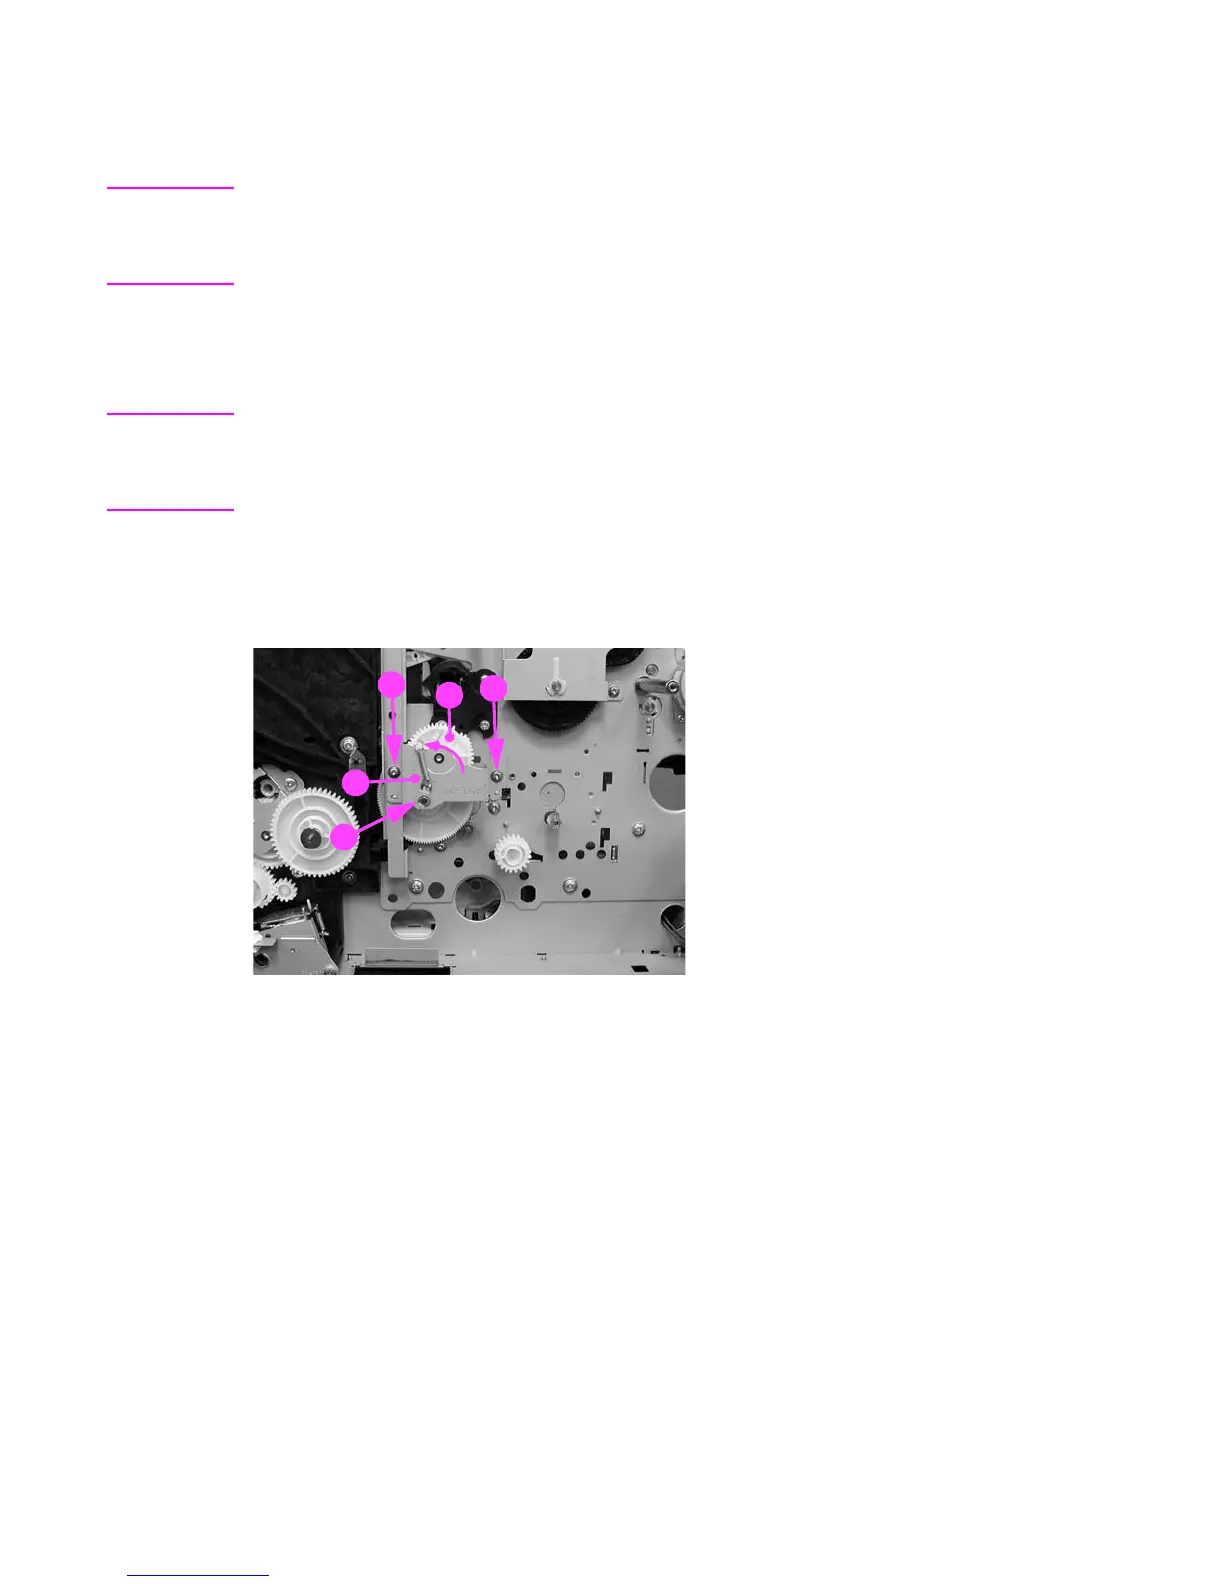
4 Remove the e-clip (1), remove two screws (2), and then remove the gear plate (3).
Reassembly note: When reinstalling the gear plate, ensure that the gear (4) is turned all
the way counterclockwise as shown above. Refer to the above caution for reinstallation
information.
Figure 6-110 Primary transfer roller engaging motor removal (1 of 4)
2
3
1
2
4
 Loading...

