Clean the printer
Print a cleaning page
During the printing process paper and dust particles can accumulate inside the printer and can cause print-
quality issues such as smears, streaks, lines, or repeating marks.
Follow these steps to clean the printer's paper path.
1. From the Home screen on the printer control panel, select Device Maintenance
2. Open the following menus:
●
Calibration/Cleaning
●
Cleaning Page
A Cleaning message displays on the printer control panel. The cleaning process takes a few minutes to
complete. Do not turn the printer o until the cleaning process has nished. When it is nished, discard
the printed page.
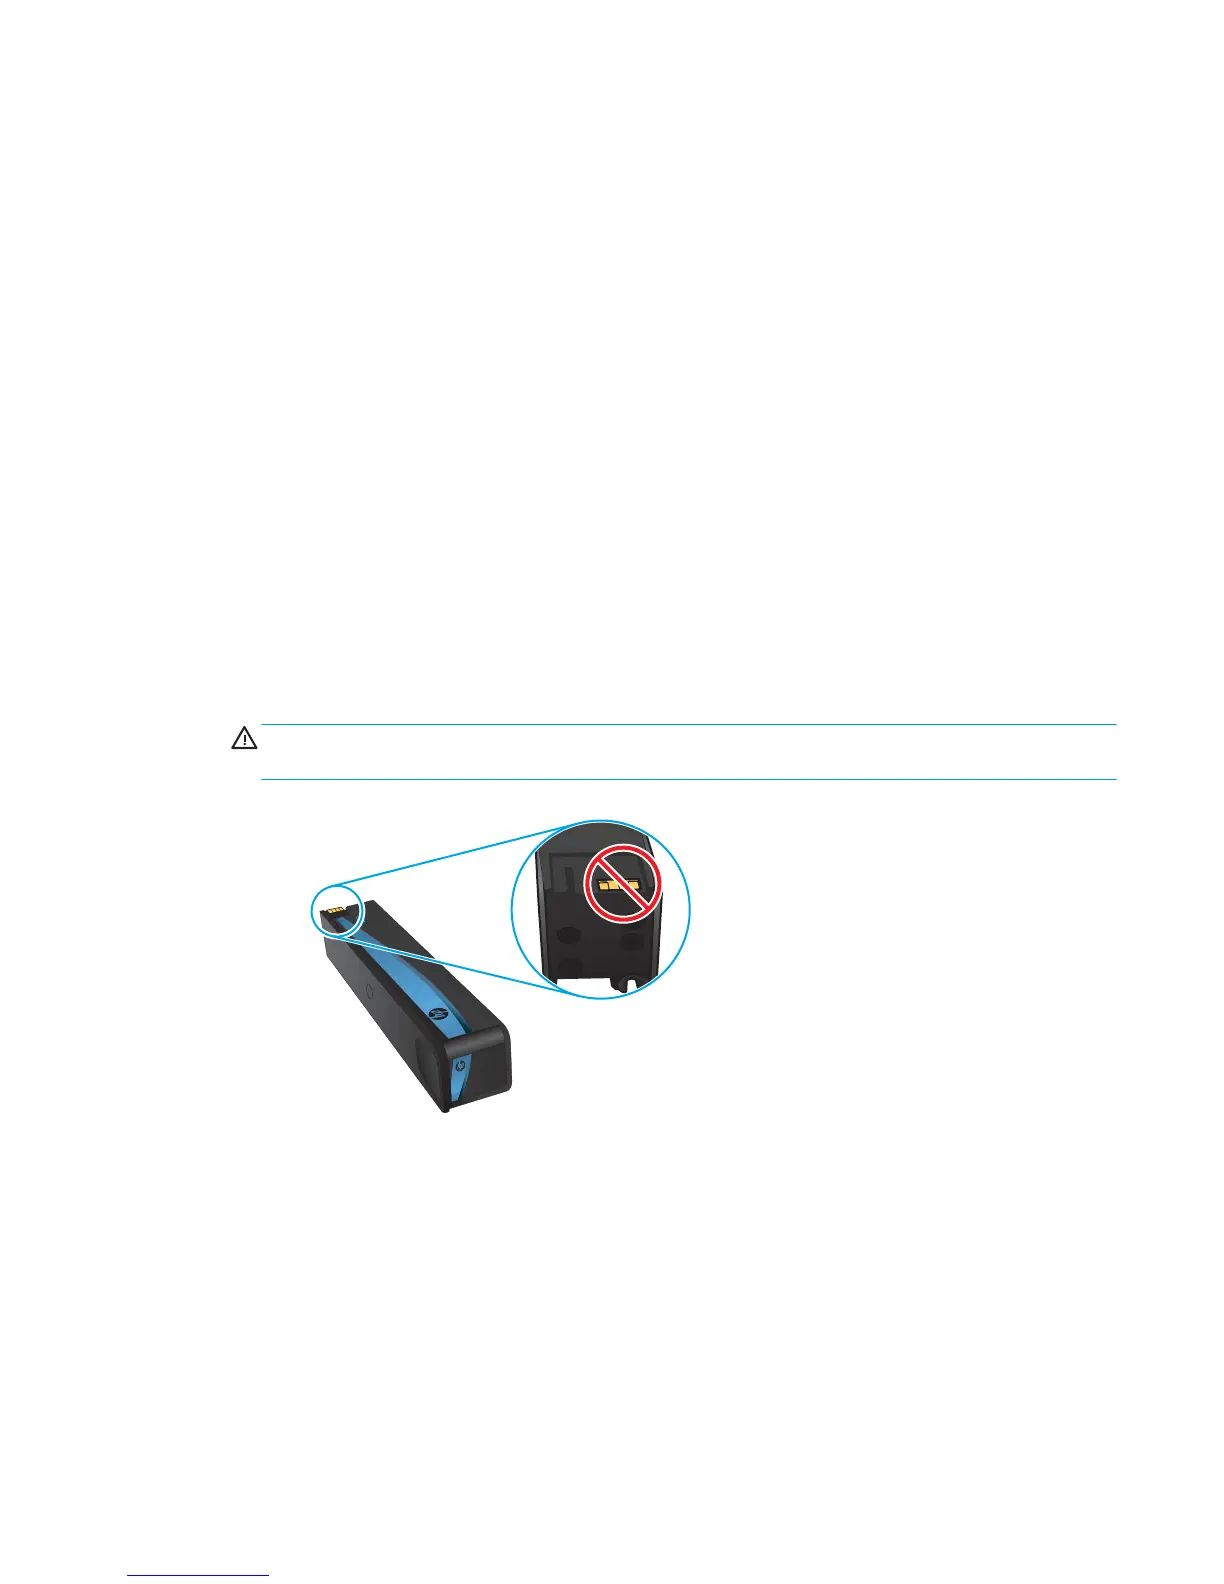
Visually inspect the cartridge
1. Remove the cartridge from the product, and verify that there is no debris in the cartridge path.
2. Examine the metal connector of the cartridge.
CAUTION: Do not touch the metal connector on the edge of the cartridge. Fingerprints on the metal
connector can cause print-quality problems.
3. If you see any scratches, or other damage on the metal connector, replace the cartridge.
4. If the metal connector does not appear to be damaged, push the cartridge gently back into its slot until
it locks in place. Print a few pages to see if the problem has resolved.
Follow these steps to inspect each cartridge.
Check paper and the printing environment
Step one: Use paper that meets HP specications
Some print-quality problems arise from using paper that does not meet HP specications.
ENWW Improve print quality 127