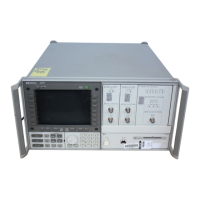
Making
a
Measurement
Instrument
Preset
Execute
the
instrument-preset
function
at
the
beginning of measurements to place the analyzer
into
a
known
state
.
Pressing
the instrument-preset key,
4
INSTR PRESET
5
,
congures
a
spectrum
analyzer
and
lightwave
signal
analyzer
dierently
.
A
spectrum
analyzer
is
preset
to
measure the full frequency range with trace A, using
normal
peak
detection, 10 dB of input attenuation, and the widest resolution bandwidth
available
.
A
lightwave signal analyzer is also preset to measure the full frequency range with trace A,
using
normal peak detection, and the widest resolution bandwidth available. In addition,
an
optical signal path is selected, 5 dB of optical attenuation is set, and the power meter is
activated.
Refer to the index for a complete listing of the spectrum analyzer and lightwave signal analyzer
preset settings.
On some analyzer models, the instrument-preset key is called
4
I-P
5
instead of
4
INSTR PRESET
5
.
The operation of the two keys is identical.
Measurement Procedure
Measurements involve tuning the instrument to place a signal on the screen, then measuring
the frequency and amplitude of the signal. Measurements can be made with either trace A, B,
or C.
An
input
signal
can
be
measured
using
the
following
four
steps:
1.
Set
the
span.
2.
Set
the
center
frequency
.
3. Set the amplitude.
4.
A
ctivate
the marker.
On
all
systems
, measurements can be made using the softkeys located on the left and right side
of
the
display. On models having an HP 70004A color display, the instrument keypad can be
used
interchangeably
with the softkeys.
Example 1-1.
Measure the calibrator signal.
1. Turn on the spectrum analyzer, then connect the CALIBRATOR output to the RF INPUT.
Note
To connect the calibrator signal on a lightwave signal analyzer:
Turn on the analyzer, then connect the CALIBRATOR output to the RF
INPUT on the HP 70810B lightwave section.
Press
NNNNNNNNNNNNNNNNNNNNNNNNNNNNNNNNNNNNNN
select input
and select the RF signal bypass path (lightwave section
RF INPUT) by pressing the
NNNNNNNNNNNNNNNNNNNNNNNNNNNNNNNNNNNNNNNNNNNN
IN 2
W 70810B
softkey.
Continue at step 2.
2. Set the frequency span.
Press
NNNNNNNNNNNNNN
Freq
, then press either the
NNNNNNNNNNNNNN
SPAN
softkey or
4
SPAN
5
on the instrument keypad.
Note that the
NNNNNNNNNNNNNN
SPAN
softkey is highlighted, and also that
SPAN
is now displayed in the
Overview 1-11

 Loading...