Do you have a question about the HP G2 Series and is the answer not in the manual?
Essential safety precautions for installation and handling of rack equipment.
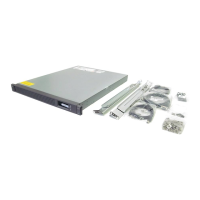
Lists and describes available rack option kits, including part numbers.
Guide to selecting the correct baying kit based on rack models and configurations.
Explains the purpose of the Airflow Optimization kit for improving rack airflow.
Lists the tools needed for installing the airflow optimization kit.
Step-by-step instructions for installing foam rail gaskets to separate hot and cold aisles.
Procedure for cutting and attaching the floor gasket to the rack for airflow management.
Describes the Ballast kit's function in providing rack stability and support.
Lists the necessary tools for installing the Ballast kit.
Step-by-step guide for installing ballast assemblies to the rack for stability.
Instructions for connecting multiple racks of the same series, height, and depth.
Lists the tools required for installing the baying kit.
Procedure for physically connecting racks together using baying brackets.
Introduces the Cable Management Combo kit for organizing cables within racks.
Lists the tools needed for installing cable management components.
Step-by-step guide for attaching a 1U cable management bracket to the rack.
Step-by-step guide for attaching a 2U cable management bracket to the rack.
Procedure for mounting D-ring brackets on the rack for cable routing.
Instructions for mounting D-ring brackets on the front of the rack for cable routing.
Instructions for mounting D-ring brackets on the side of the rack for cable routing.
Procedure for installing cross-over brackets for cable management at the rear of the rack.
How to attach and use hook-and-loop straps for securing cables.
Describes the Rack Roof Mount Fan kit for enhancing rack cooling.
Lists the tools needed for installing the fan kit.
Step-by-step instructions for mounting the fan assembly onto the rack.
Explains the Filler Panel kit's role in controlling rack airflow by covering open U-spaces.
Procedure for positioning and snapping filler panels into empty rack U-spaces.
Describes depth-adjustable rails for mounting equipment in third-party racks.
Lists the tools required for installing the fixed rail kit.
Step-by-step guide for installing depth-adjustable rails into the rack.
Explains how the Ground Bonding kit reduces electromagnetic emissions by grounding rack components.
Lists the tools needed for installing the ground bonding kit.
General procedure outline for attaching grounding straps to various parts of the rack.
Detailed steps for grounding the chassis to the front rack door.
Instructions for using a grounding lug to connect straps to the front door.
Procedure for connecting grounding straps from the chassis rail to the rear doors.
Steps for grounding the chassis rail to the rack's top panel.
Guidance on connecting the rack to a building's ground facility.
How to install grounding straps on the rack's side panels.
Procedure for grounding the top side panel of the rack.
How to ground components associated with fan kits.
Explains the Hook-and-Loop Cabling Strap Clip kit for managing cables.
Lists no tools required for this procedure.
Procedure for attaching and using hook-and-loop clips to secure cables.
Introduces the 1/4 Turn Hook and Loop Cabling Strap kit for cable management.
Lists no tools required for this procedure.
Step-by-step guide for installing and securing 1/4 turn hook-and-loop cabling straps.
Describes the LED light kit for adding lighting to the rack.
Lists the T-25 Torx driver as the required tool for installation.
Comprehensive guide for installing the LED lighting system within the rack.
Explains the purpose of the locking drawer for storing items securely within the rack.
Lists the tools needed for installing the locking drawer kit.
Step-by-step instructions for mounting the 2U locking drawer into the rack.
Describes the Server/Utility Shelf kit for installing a convenient shelf in the rack.
Lists the tools needed for installing the shelf kit.
Procedure for installing the server or utility shelf into the rack.
Introduces the 100 Kilo Sliding Shelf kit for easy access to components.
Lists the Phillips screwdrivers needed for installation.
Steps to construct the sliding shelf rail assemblies before rack installation.
Instructions for mounting the prepared sliding shelf rail assemblies into the rack.
Procedure for inserting and securing the sliding shelf into the installed rails.
Guidance on operating and using the sliding shelf once installed.
Explains the purpose of the Side Panel kit for attaching side panels to racks.
Lists no tools required for this procedure.
Step-by-step instructions for attaching side panels to the rack frame.
Describes the Stabilizer kit's function in preventing rack tipping.
Lists ratchet, sockets, and adjustable wrench as required tools.
Procedure for attaching stabilizer mounts and feet to the rack for stability.
Explains the Heavy Duty Stabilizer kit for racks with heavy components or specific configurations.
Lists ratchet, sockets, and adjustable wrench as required tools.
Steps for installing heavy-duty stabilizer mounts and feet onto the rack.
Describes the Universal Rack Tie-down kit for securing racks to the floor.
Lists ratchet, sockets, and adjustable wrench as required tools.
Procedure for attaching tie-down brackets to the rack and floor.
Guidance on drilling and bolting the rack to the floor for maximum stability.
Information on how to contact HPE support for assistance and documentation.
Instructions on how to find and download software updates for HPE products.
Information about HPE's customer self-repair program for product maintenance.
A list of useful HPE websites for support and information.
Links to warranty information for various HPE product lines.
Information regarding chemical substances, REACH, RoHS, and environmental compliance.
Details about EAC marking and local representative information for specific regions.
Explanation of the manufacturing date format derived from the serial number.
Declaration regarding compliance with Turkish RoHS regulations.
Declaration regarding compliance with Ukrainian RoHS regulations.
| Category | Measuring Instruments |
|---|---|
| Series | G2 |
| Measurement Range | Varies by model |
| Accuracy | Varies by model |
| Resolution | Varies by model |
| Display | Varies by model |
| Input Impedance | Varies by model |
| Operating Temperature | Varies by model |
| Power Supply | Varies by model |
| Dimensions | Varies by model |
| Weight | Varies by model |