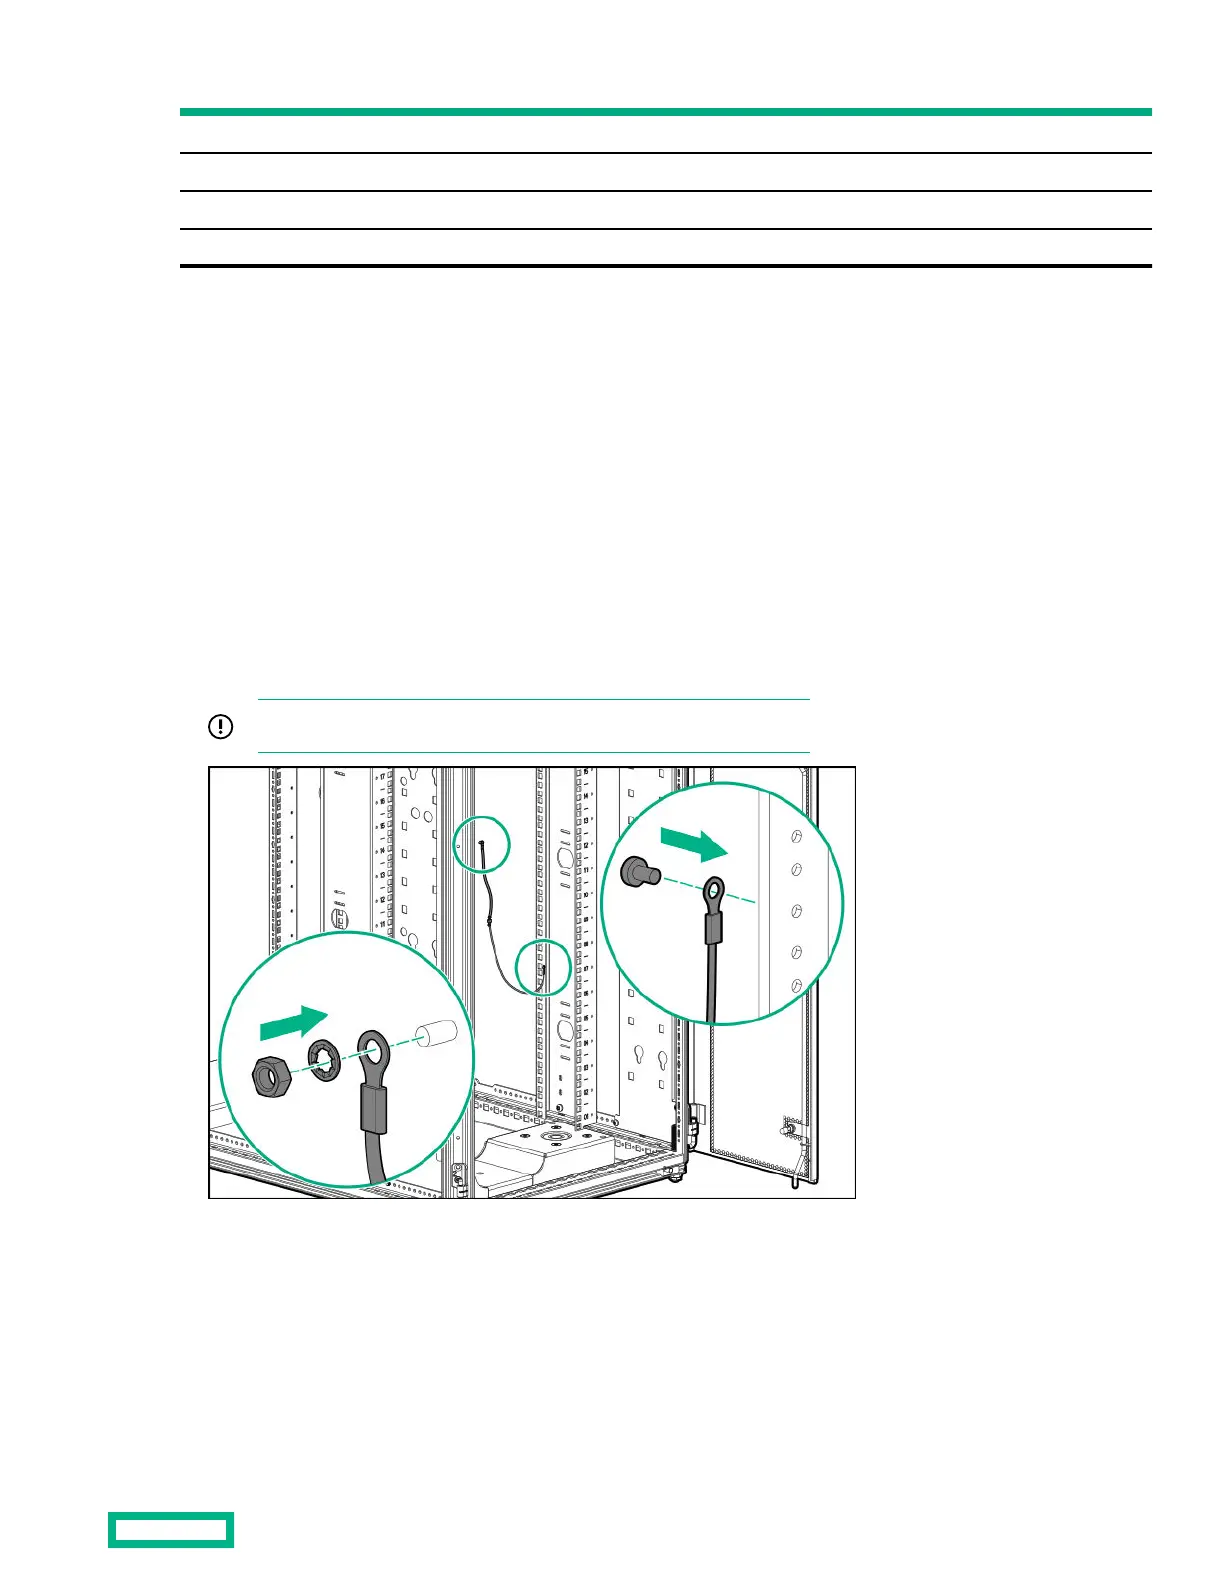
Reference Item
1 Rack grounding lug
2 M8 Belleville toothed washer
3 M8 flat washer
4 M8 hex nut
The rack grounding lug can be moved to any position on the top or bottom of the rack.
Installing the ground bonding kit on side panels
Procedure
1. Connect a 3683-cm (145-inch) and a 1524-cm (6-inch) grounding strap with connectors together.
2. Insert a T-25 Torx screw through the end of the 3683-cm (145-inch) grounding strap and secure the screw to the middle
system chassis rail.
3. Place the end of the 1524-cm (6-inch) grounding strap over the grounding lug on the bottom side panel.
4.
Place an M8 internal serrated lock washer and an M8 hex nut over the grounding lug on the bottom side panel and tighten
the washer.
5.
Repeat steps 1 through 4 for the other bottom side panel.
IMPORTANT: The location of the welding stud on your model may vary.
Installing the ground bonding kit to the top side panel
Procedure
1. Connect a 3683-cm (145-inch) and a 1524-cm (6-inch) grounding strap with connectors together.
2. Insert a T-25 Torx screw through the end of a 3683-cm (145-inch) grounding strap, and then secure the screw to the
middle system chassis rail.
Ground Bonding kit
39

 Loading...